Advertisement
Quick Links
415002
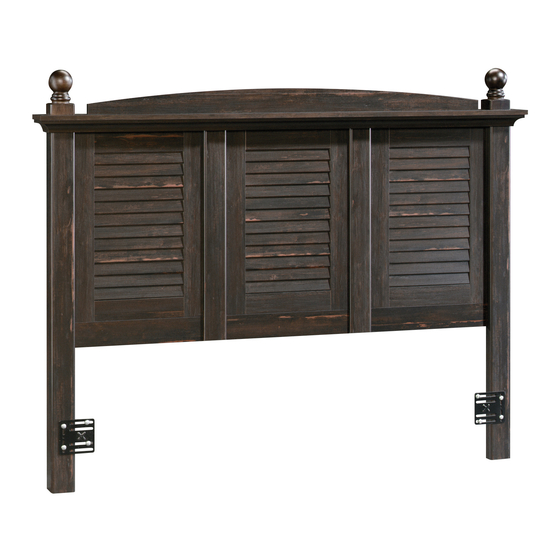
Full/Queen Headboard
Harbor View Collection
PLEASE CONTACT US
BEFORE RETURNING
YOUR UNIT TO THE STORE
1-800-523-3987
www.sauder.com
NOTE: THIS INSTRUCTION BOOKLET CONTAINS
IMPORTANT SAFETY INFORMATION.
PLEASE READ AND KEEP FOR FUTURE REFERENCE.
English .................... Page 1-12
Français ...............Pages 13-15
Made in the USA
Espanol .............Páginas 16-18
Archbold, OH
Lot #: 355369
Date Purchased: ____________________
08 / 21 / 13
Advertisement

Subscribe to Our Youtube Channel
Related Manuals for Sauder Harbor View 415002


Summary of Contents for Sauder Harbor View 415002
- Page 1 PLEASE READ AND KEEP FOR FUTURE REFERENCE. BEFORE RETURNING English ....Page 1-12 YOUR UNIT TO THE STORE Français ....Pages 13-15 Made in the USA 1-800-523-3987 Espanol .....Páginas 16-18 Archbold, OH www.sauder.com Lot #: 355369 08 / 21 / 13 Date Purchased: ____________________...
- Page 2 TABLE OF CONTENTS ADULT ASSEMBLY REQUIRED Part Identifi cation .......3 Hardware Identifi cation .....4 ASSEMBLY TOOLS REQUIRED Assembly Steps ....5-12 No. 2 Phillips Screwdriver Français ......13-15 Tip Shown Actual Size Espanol ....... 16-18 Warranty ........19 Hammer Page 2 www.sauder.com/services 415002...
- Page 3 While not all parts are labeled, some of the parts will have a label or an inked letter on the edge to help distinguish similar parts from each other. Use this PART IDENTIFICATION to help identify similar parts. VALANCE RIGHT LEG MOLDING LEFT LEG PANEL HORIZONTAL MOLDING POST BACK VERTICAL MOLDING 415002 www.sauder.com/services Page 3...
- Page 4 BROWN 1" FLAT HEAD SCREW - 28 SILVER 1-1/4" BOLT - 4 BLACK 2" PAN HEAD SCREW - 6 SILVER 2" BOLT - 4 Screws are shown actual size. You may receive extra hardware with your unit. Page 4 www.sauder.com/services 415002...
- Page 5 Look for this icon. It means a video assembly tip is available at: www.sauder.com/services/tips Curved edge Finished surface BLACK 1-7/8" FLAT HEAD SCREW (5 used for the VALANCE) Finished edge BLACK 1-1/4" FLAT HEAD SCREW (4 used for the POSTS) Assemble your unit on a carpeted fl...
- Page 6 VERTICAL MOLDING. Fasten three PANELS (C) and two VERTICAL MOLDINGS (H) to the BACK (D). Use sixteen BROWN 1" FLAT HEAD SCREWS (12S). NOTE: The locator hole on the VERTICAL MOLDING must be located toward the bottom. Page 6 www.sauder.com/services 415002...
- Page 7 F i n Fasten three HORIZONTAL MOLDINGS (G) to the BACK (D). Use six BROWN 1" FLAT HEAD SCREWS (12S). NOTE: The HORIZONTAL MOLDINGS (G) must be against the PANELS (C). 415002 www.sauder.com/services Page 7...
- Page 8 Fasten the ENDS (A) to the LEGS (I and J). Use eight BLACK 9/16" LARGE HEAD SCREWS (1S) through the ANGLE BRACKETS (5G) on the ENDS (A) Fasten the BACK (D) to the LEGS (I and J). Use six BROWN 1" FLAT HEAD SCREWS (12S).. Page 8 www.sauder.com/services 415002...
- Page 9 NOTE: Be sure the METAL PINS (1R) in the LEGS (I and J) insert into the holes in the MOLDING (F). Fasten the TOP (B) to the MOLDING (F). Use five BLACK 1-1/4" FLAT HEAD SCREWS (7S). 415002 www.sauder.com/services Page 9...
- Page 10 Then, attach your bedframe to the HEADBOARD BRACKETS (42G). Use four SILVER 1-1/4" BOLTS (48S), four WASHERS (13M), and four NUTS (24M). NOTE: Your bedframe must be attached to the headboard as indicated in this step. This completes assembly. Clean with your favorite furniture polish or a damp cloth. Wipe dry. Page 10 www.sauder.com/services 415002...
- Page 11 94S BOULON ARGENTÉ 51 mm ....4 Canada Noter la date d’achat de cet élément et conserver le livret pour future référence. Pour contacter Sauder en ce qui concerne cet élément, faire référence au numéro de lot et numéro de modèle en appelant notre numéro...
- Page 12 ÉTAPE 1 ÉTAPE 5 Assembler l'élément sur un sol à moquette ou sur le REMARQUE : On peut avoir besoin de l’aide d’une carton vide pour éviter d'endommager l'élément ou autre personne pour retourner l’unité. le sol. Insérer deux GOUPILLES EN MÉTAL (1R) dans Fixer le LAMBREQUIN (E) au DESSUS (B).
- Page 13 REDONDA de 51 mm ......6 94S PERNO PLATEADO de 51 mm ..4 Si necesita ponerse en contacto con Sauder en cuanto a esta unidad, refi érase al número de lote y al número de modelo cuando llame a nuestro número gratis.
- Page 14 PASO 1 PASO 5 Ensamble la unidad sobre un piso alfombrado o sobre el NOTA: Es posible que necesite la ayuda de alguien para cartón vacío para evitar rayar la unidad o el piso. girar la unidad. Fije la CORNISA (E) al PANEL SUPERIOR (B). Utilice Inserte dos ESPIGAS DE METAL (1R) en cinco TORNILLOS NEGROS DE CABEZA PERDIDA las PATAS (I y J).
- Page 15 4. La présente garantie ne s’applique qu’aux défauts garantis qui se produisent des composantes de mobilier Sauder. Le mot « défaut », tel qu’il est utilisé sous pour la première fois et qui sont signalés à Sauder dans les limites de ouverture les termes de la présente garantie, comprend les imperfections des pièces qui...
- Page 16 Archbold, Ohio, where it all began. Certifi cate of Conformity The Sauder name on the box ensures that 1. This certifi cate applies to the Sauder Woodworking Product identifi ed by this Instruction Book. the item you have purchased is made with 2.
Need help?
Do you have a question about the Harbor View 415002 and is the answer not in the manual?
Questions and answers