Advertisement
Quick Links
sauder.com
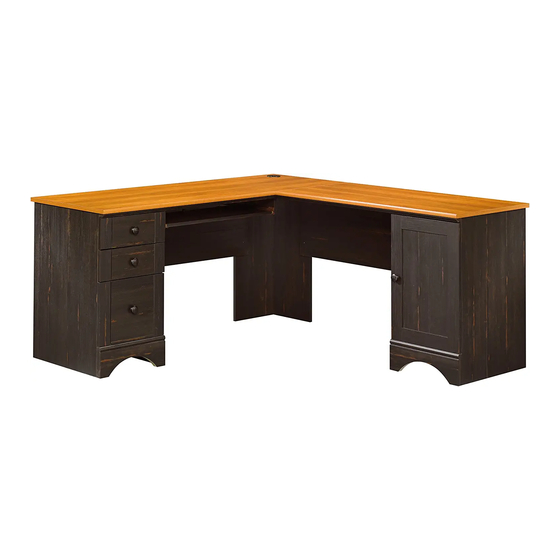
Corner Desk
Harbor View Collection | Model 403794
Need help? Visit Sauder.com to view video assembly tips or chat with a live rep.
Prefer the phone? Call 1-800-523-3987.
Share your journey!
For all your
newfangled gadgetry.
NOTE: THIS INSTRUCTION
BOOKLET CONTAINS IMPORTANT
SAFETY INFORMATION.
PLEASE READ AND KEEP FOR
FUTURE REFERENCE.
English pg 1-36
Français pg 37-40
Español pg 41-44
Lot # 390206
04/13/16
Purchased: __________________
Be sure to give us a ring before
making any returns. 1-800-523-3987
Advertisement

Related Manuals for Sauder Harbor View 403794


Summary of Contents for Sauder Harbor View 403794
- Page 1 Harbor View Collection | Model 403794 NOTE: THIS INSTRUCTION BOOKLET CONTAINS IMPORTANT SAFETY INFORMATION. Need help? Visit Sauder.com to view video assembly tips or chat with a live rep. PLEASE READ AND KEEP FOR FUTURE REFERENCE. Prefer the phone? Call 1-800-523-3987.
- Page 2 KEYBOARD UPRIGHT (2) D109 SMALL DRAWER BACK (2) KEYBOARD SHELF (1) D707 DRAWER BOTTOM (1) SMALL DRAWER FRONT (2) D716 SMALL DRAWER BOTTOM (2) BASE (2) RIGHT UPRIGHT (1) RIGHT MOLDING (1) LEFT UPRIGHT (1) LEFT MOLDING (1) Page 2 403794 www.sauder.com/services...
- Page 3 Part Identifi cation D109 D716 D109 D707 D716 www.sauder.com/services 403794 Page 3...
- Page 4 40AY DRAWER RIGHT - 1 40AZ DRAWER LEFT - 1 FILE GLIDE - 2 HIDDEN CAM - 18 CAM DOWEL - 18 HIDDEN CONNECTOR - 4 PLATE - 2 UU HINGE - 2 FILE ROD - 2 KNOB - 4 Page 4 403794 www.sauder.com/services...
- Page 5 BLACK 9/16" LARGE HEAD SCREW - 36 LLL GOLD 5/16" FLAT HEAD SCREW - 28 BLACK 1/2" FLAT HEAD SCREW - 4 CONNECTOR SCREW - 4 NAIL - 30 30S BLACK 1-9/16" FLAT HEAD SCREW - 12 www.sauder.com/services 403794 Page 5...
- Page 6 IMPORTANT: Follow the video to the right for this option. å Scan this QR code or go to this address: http://qr.sauder.com/?ID=1476 to watch a video on how to assemble your unit. DOOR ON LEFT AND DRAWERS ON RIGHT IMPORTANT: Follow the video to the right for this option.
- Page 7 Look for this icon. It means a Step 1 video assembly tip is available at www.sauder.com/services/tips Insert a CONNECTOR SCREW (NNN) into each å HIDDEN CONNECTOR (OO). Step 2 Assemble your unit on a carpeted fl oor or on the empty å...
- Page 8 Then, insert the metal end of a CAM DOWEL (QQ2) into each HIDDEN CAM. Do not tighten the HIDDEN CAMS in this step. Arrow (18 used) Arrow Arrow Insert the metal end of the CAM DOWEL into the HIDDEN CAM. Page 8 403794 www.sauder.com/services...
- Page 9 HEAD SCREWS (LLL) through holes #1 and #3. NOTE: The LONG CABINET RAILS (GG and HH) are å marked "CABINET RIGHT" and "CABINET LEFT" for easy identifi cation. Roller end Roller end GOLD 5/16" FLAT HEAD SCREW (12 used in this step) www.sauder.com/services 403794 Page 9...
- Page 10 NOTE: Be sure the edges of the METAL BRACKETS are even with the edges of å the KEYBOARD UPRIGHTS. GOLD 5/16" FLAT HEAD SCREW (4 used for the CABINET RAILS) Roller end Roller end BLACK 9/16" LARGE HEAD SCREW (4 used for the METAL BRACKETS) Page 10 403794 www.sauder.com/services...
- Page 11 Do not stand the unit upright without the BACK fastened. The unit may collapse. BLACK 1-7/8" FLAT HEAD SCREW (2 used in this step) Edge with CAM DOWEL S u r f a c H I D D E N i t h www.sauder.com/services 403794 Page 11...
- Page 12 Tighten Risk of damage or Arrow injury. HIDDEN CAMS must be completely Arrow Maximum tightened. HIDDEN 210 degrees CAMS that are not completely tightened may loosen, and parts may separate. To Minimum completely tighten: 190 degrees Page 12 403794 www.sauder.com/services...
- Page 13 ENDS and BRACE. Fasten the BASE (X) to the DRAWER ENDS (C and D) å and BRACE (L). Use four BLACK 9/16" LARGE HEAD SCREWS (JJJ). (4 used) BLACK 9/16" LARGE HEAD SCREW (8 used in this step) www.sauder.com/services 403794 Page 13...
- Page 14 D E N H I D S u r f a c H I D D E N i t h i t h o f a c S u r D E N H I D Page 14 403794 www.sauder.com/services...
- Page 15 ENDS and BOTTOM. Fasten the BASE (X) to the DOOR ENDS (A and B) å and BOTTOM (J). Use four BLACK 9/16" LARGE HEAD SCREWS (JJJ). (4 used) BLACK 9/16" LARGE HEAD SCREW (8 used in this step) www.sauder.com/services 403794 Page 15...
- Page 16 NOTE: Perforations have been provided for access å through the BACK. Carefully cut out the rectangle in the BACK for proper ventilation of your CPU. Edge without holes NAIL (30 used in this step) Edge without holes Page 16 403794 www.sauder.com/services...
- Page 17 NOTE: The following steps in this book show the fi rst option å with the DOOR on the left and drawers on the right. DOOR ON LEFT AND DRAWERS ON RIGHT DOOR ON RIGHT AND DRAWERS ON LEFT www.sauder.com/services 403794 Page 17...
- Page 18 Step 13 Fasten the DOOR ENDS (A and B) to the TOP (G3). å Tighten four HIDDEN CAMS. Maximum Arrow 210 degrees Minimum 190 degrees The large hole must be here. Rounded edge Page 18 403794 www.sauder.com/services...
- Page 19 H I D f a c D E N S u r i t h BLACK 1-1/8" PAN HEAD SCREW D E N H I D (3 used in this step) www.sauder.com/services 403794 Page 19...
- Page 20 Use two BLACK 1-7/8" FLAT HEAD SCREWS (GGG). Cut-out BLACK 1-1/8" PAN HEAD SCREW (2 used for the LEFT UPRIGHT) Use a 1/8" drill bit in the RIGHT END (A). BLACK 1-7/8" FLAT HEAD SCREW (2 used for the MODESTY PANEL) Page 20 403794 www.sauder.com/services...
- Page 21 HEAD SCREWS (JJJ). Turn three CORD CLIPS (AAA) into the TOP (G3). å NOTE: The CORD CLIPS are used to hold your keyboard å cord against the TOP. BLACK 9/16" LARGE HEAD SCREW (6 used in this step) www.sauder.com/services 403794 Page 21...
- Page 22 Step 17 Fasten the DRAWER ENDS (C and D) to the SMALL å TOP (H2). Tighten four HIDDEN CAMS. Maximum Arrow 210 degrees Minimum 190 degrees Rounded edge Page 22 403794 www.sauder.com/services...
- Page 23 MODESTY PANEL (I). Use two BLACK 9/16" LARGE HEAD SCREWS (JJJ). Use a 1/8" drill bit in the LEFT END (D). BLACK 1-7/8" FLAT HEAD SCREW (2 used for the MODESTY PANEL) BLACK 9/16" LARGE HEAD SCREW (2 used for the ANGLE BRACKET) www.sauder.com/services 403794 Page 23...
- Page 24 å Turn a CORD CLIP (AAA) into the TOP (H2). å NOTE: The CORD CLIP is used to hold your keyboard cord å against the TOP. BLACK 1-1/8" PAN HEAD SCREW (3 used in this step) Page 24 403794 www.sauder.com/services...
- Page 25 BLACK 9/16" LARGE HEAD SCREWS (JJJ) through the PLATES on the TOP and into the SMALL TOP. BLACK 9/16" LARGE HEAD SCREW (4 used for the SMALL TOP) BLACK 1-1/8" PAN HEAD SCREW (2 used for the RIGHT UPRIGHT) www.sauder.com/services 403794 Page 25...
- Page 26 Step 21 Fasten two HINGES (UU) to the DOOR (M). Use four å BLACK 1/2" FLAT HEAD SCREWS (MMM). BLACK 1/2" FLAT HEAD SCREW (4 used in this step) Page 26 403794 www.sauder.com/services...
- Page 27 å Stick a FELT DISC on the DOOR where it comes in contact with the RIGHT END (A). See the next step for DOOR adjustments. å BLACK 1-1/8" PAN HEAD SCREW (1 used for the KNOB) www.sauder.com/services 403794 Page 27...
- Page 28 To adjust the DOORS in or out (depth), loosen the mounting å screw one turn and move the DOORS in or out, as needed. Tighten the mounting screw after making adjustments. Mounting screw (depth) Adjusting screw (horizontal) (vertical adjustment) Page 28 403794 www.sauder.com/services...
- Page 29 Turn a CORD CLIP (AAA) into the KEYBOARD SHELF (T). å NOTE: The CORD CLIP is used to hold your keyboard å cord against the TOP. Roller end Roller end Finished edge BROWN 1" FLAT HEAD SCREW (4 used in this step) www.sauder.com/services 403794 Page 29...
- Page 30 HIDDEN CONNECTOR. While pushing the screw into the hole of the adjoining part, turn the screwdriver clockwise to tighten. BLACK 9/16" LARGE HEAD SCREW (4 used for the METAL BRACKETS) Page 30 403794 www.sauder.com/services...
- Page 31 D29). Use four BLACK 1-9/16" FLAT HEAD SCREWS (30S). NOTE: Be sure the DRAWER BOTTOM (D707) inserts into the å groove of the DRAWER BACK (D78). Repeat this step for the small drawers using parts U, D24, D25, å D109, and D716. www.sauder.com/services 403794 Page 31...
- Page 32 RIGHTS (35DC) and DRAWER LEFTS (35DD). Roller end Screw head - turn CAM to line up holes in the SLIDES with holes in DRAWER SIDES Roller end GOLD 5/16" FLAT HEAD SCREW (12 used in this step) Page 32 403794 www.sauder.com/services...
- Page 33 Slide another FILE GLIDE (RR) onto the other end of the å FILE RODS (SS), then press this FILE GLIDE over the LEFT DRAWER SIDE (D29). Insert the FILE RODS into the holes of your choice in the FILE GLIDES, depending on your fi le sizes. www.sauder.com/services 403794 Page 33...
- Page 34 Fasten a KNOB (WW) to the DRAWER FRONT (N). Use a å BLACK 1-1/8" PAN HEAD SCREW (HHH). Almost time to Repeat this step for the small drawers. celebrate! With a nap. å BLACK 1-1/8" PAN HEAD SCREW (3 used in this step) Page 34 403794 www.sauder.com/services...
- Page 35 Lift the front of the drawer up and slide it into the unit. Repeat this step to insert the KEYBOARD SHELF. 60 lbs. 40 lbs. 25 lbs. 10 lbs. 50 lbs. 30 lbs. www.sauder.com/services 403794 Page 35...
- Page 36 #3. The higher the screw in the oblong hole, the higher your drawer front will be. The lower the screw, the lower the drawer front. Page 36 403794 www.sauder.com/services...
- Page 37 EXTRÉMITÉ DROITE DE PORTE ......1 35DA ÉLÉMENT DROITE............2 pour future référence. 35DB ÉLÉMENT GAUCHE ..........2 EXTRÉMITÉ GAUCHE DE PORTE ....1 Pour contacter Sauder 35DC TIROIR DROIT ..............2 EXTRÉMITÉ DROITE DE TIROIR .......1 en ce qui concerne cet 35DD TIROIR GAUCHE ............2 EXTRÉMITÉ...
- Page 38 Fixer les EXTRÉMITÉS (C et D) aux ENTRETOISES (L). Serrer quatre EXCENTRIQUES ESCAMOTABLES. REMARQUE : Les étapes suivantes de ce manuel montrent la première option avec la PORTE sur la gauche et les tiroirs sur la droite. Page 38 403794 www.sauder.com/services...
- Page 39 REMARQUE : Ne pas trop serrer les VIS dans le DESSUS. Serrer un CLIP DE CORDONS (AAA) dans le DESSUS (H2). REMARQUE : Le CLIP DE CORDON est utilisé pour maintenir le cordon de clavier contre le DESSUS. www.sauder.com/services 403794 Page 39...
- Page 40 REMARQUE : La tête de vis dans l'EXCENTRIQUE doit être visible à travers le trou fendu dans la COULISSE. Répéter cette étape pour les petits tiroirs en utilisant les TIROIRS DROITS (35DC) et les TIROIRS GAUCHES (35DD). Page 40 403794 www.sauder.com/services...
- Page 41 40AX GABINETE IZQUIERDO ............1 pour future référence. EXTREMO DERECHO DE CAJÓN .......... 1 40AY CAJÓN DERECHO ..............1 Pour contacter Sauder EXTREMO IZQUIERDO DE CAJÓN ........1 40AZ CAJÓN IZQUIERDO .............. 1 en ce qui concerne cet LADO DERECHO DE CAJÓN PEQUEÑO ......2 CONECTOR INVISIBLE .............
- Page 42 Fije los EXTREMOS (C y D) a las RIOSTRAS (L). Apriete cuatro como se muestra en el diagrama inferior. EXCÉNTRICOS ESCONDIDOS. NOTA: Los pasos siguientes en este libro mostrarán la primera opción con la PUERTA fi jado al lado izquierdo y los cajones al lado derecho. Page 42 403794 www.sauder.com/services...
- Page 43 NOTA: No apriete en exceso los TORNILLOS en el PANEL SUPERIOR. Atornille una GRAPA DE CABLE (AAA) en el PANEL SUPERIOR (H2). NOTA: Se utiliza la GRAPA DE CABLE para mantener los cordones de teclado contra el PANEL SUPERIOR. www.sauder.com/services 403794 Page 43...
- Page 44 RIGHT" (derecha) y una inscripción "DRAWER LEFT" (izquierda) para identifi carlas fácilmente. NOTA: La cabeza de tornillo del EXCÉNTRICO debe ser visible a través del agujero alargado de la CORREDERA. Repita este paso para los cajones pequeños utilizando los CAJONES Page 44 403794 www.sauder.com/services...
- Page 45 à Les téléviseurs peuvent être particulièrement un téléviseur. cet eff et. lourds. De plus, le poids et l’emplacement du tube image ont tendance à rendre les téléviseurs instables et enclins à tomber vers l’ a vant. www.sauder.com/services 403794 Page 45...
- Page 46 Además, el peso y la ubicación del tubo de imagen tienden a causar la inestabilidad de televisores y propensa a volcarse hacia adelante. Page 46 403794 www.sauder.com/services...
- Page 47 à compter de la date d'achat la première fois et qui sont signalés à Sauder dans les limites de couverture de la contre tout défaut de matériaux ou de fabrication des composantes de mobilier Sauder.
- Page 48 Dear Valued Customer: So, how did it go? Thanks so much for choosing Sauder® furniture. I hope the Set a world record for speed? purchase and assembly process was a positive experience Feeling good about yourself? and you feel good about the furniture you just built. If you Nice.
Need help?
Do you have a question about the Harbor View 403794 and is the answer not in the manual?
Questions and answers