Advertisement
Table of Contents
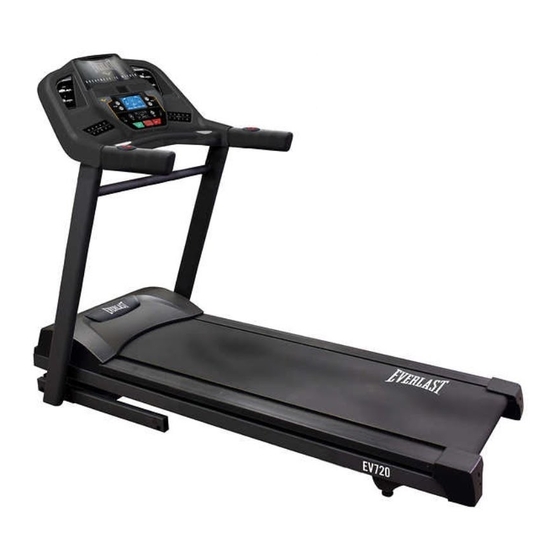
Owner's Manual
EV720 Treadmill
Model No.
16005107200
- Assembly
- Operation
- Adjustments
- Parts
- Warranty
CAUTION:
You must read and
understand this
owner's manual
before operating
unit.
Keep this manual for
future reference.
Serial number
Write the serial
number in the space
above for reference.
Serial number can be
found at the front
bottom section of the
Treadmill.
PLEASE CAREFULLY READ THIS ENTIRE MANUAL BEFORE
OPERATING YOUR NEW TREADMILL!
Advertisement
Table of Contents

Subscribe to Our Youtube Channel
Related Manuals for Everlast EV720


Summary of Contents for Everlast EV720
- Page 1 Owner’s Manual EV720 Treadmill Model No. 16005107200 - Assembly - Operation - Adjustments - Parts - Warranty CAUTION: You must read and understand this owner’s manual before operating unit. Keep this manual for future reference. Serial number Write the serial number in the space above for reference.
-
Page 2: Table Of Contents
TABLE OF CONTENTS Important Safety Instructions ................. 3 Important Electrical Instructions ..............5 Assembly Instructions ................... 6 Operation of Your Treadmill ................. 12 Parts Diagram and List ................23 General Maintenance ................. 27 Service Checklist - Diagnosis Guide …………………………………………...31 Troubleshooting ..................32 Training Guidelines .................. - Page 3 BEFORE YOU BEGIN Thank you for choosing the Everlast EV720 Treadmill. We take great pride in producing this quality product and hope it will provide many hours of quality exercise to make you feel better, look better, and enjoy life to its fullest. It is a proven fact that a regular exercise program can improve your physical and mental health.
-
Page 4: Important Safety Instructions
IMPORTANT SAFETY INSTRUCTIONS THIS UNIT IS INTENDED FOR HOUSEHOLD USE ONLY READ ALL INSTRUCTIONS BEFORE USING THIS TREADMILL CAUTION: Before starting any exercise program, it is recommended that you consult your physician. WARNING:Connect this unit to a properly grounded outlet only. DANGER: To reduce the risk of electric shock, always unplug the treadmill from the electrical outlet immediately after using and before cleaning. - Page 5 Keep the treadmill indoors, away from moisture and dust. Do not put the treadmill in a garage, covered patio or near water. Do not operate the treadmill where aerosol products are used or where oxygen is being administered. 10. Read, understand, and test the emergency stop procedure before using the treadmill. Do not insert any objects into any openings.
-
Page 6: Important Electrical Instructions
IMPORTANT ELECTRICAL INSTRUCTIONS WARNING! ●NEVER use a ground fault circuit interrupt (GFCI) wall outlet with this treadmill. Route the power cord away from any moving part of the treadmill, including the elevation mechanism and transport wheels. ●NEVER remove any cover without first disconnecting AC power. ●If voltage varies by ten percent (10%) or more, the performance of your treadmill may be affected. -
Page 7: Assembly Instructions
ASSEMBLY INSTRUCTIONS !!ATTENTION: IMPORTANT UNPACKING INSTRUCTIONS. PLEASE READ BEFORE UNPACKING YOUR FOLDING TREADMILL!! Serious injury could occur if this folding treadmill is not unpacked properly. There is a Velcro strap installed around the treadmill base that prevents the treadmill from unfolding accidentally during shipping. - Page 8 HARDWARE PACKING #80. #100. #99. Ø8 × 1.5m/m Ø8 × Ø18 × 1.5m/m 5/16" × UNC18 × 1/2" (4pcs) (8pcs) (8pcs) Split Washer Flat Washer Hex Head Bolt #125. 5/16" × UNC18 × 3/4" Button Head Socket Bolt (8pcs) #44. Safety Key (1pc) #104.
- Page 9 ASSEMBLY INSTRUCTIONS Step 1. Remove the treadmill from the carton and lay it on a smooth level surface. Step2. Connect Computer Cable (Middle) (54) with Computer Cable (Lower) (55) then insert Right and Left Uprights (4) and (5) into the Frame Base (2) and use 13m/m Wrench (90) to tighten 8 pcs of 5/16"...
- Page 10 Step 3 Connect the Computer Cable (Middle) (54) to the Computer Cable (Upper) (53). Connect the Speed Adjustment Switch W/Cable (Upper) (114) to the Speed/Hand Pulse Complex (28). Connect the Incline Adjustment Switch W/Cable (Upper) (115) to the Incline/Hand Pulse Complex (29).
- Page 11 FOLDING INSTRUCTIONS Do not attempt to move the unit unless it is in the folded and locked position. Be sure the power cord is secured to avoid possible damage. Use both handrails to maneuver the unit to the desired position. ■...
- Page 12 TREADMILL OPERATION Your treadmill features a walking belt coated with a lubricant. IMPORTANT: Never apply silicone spray or other substances to the walking belt or walking board. Such substances will deteriorate the walking belt and cause excessive wear. How to plug in the power cord GROUNDING INSTRUCTIONS.
-
Page 13: Operation Of Your Treadmill
OPERATION OF YOUR TREADMILL GETTING STARTED: CAUTION: Before operating the console, read the following precautions: 1. Do not stand on the walking belt when turning on the treadmill. 2. Always wear the safety key. Pulling the safety key will stop treadbelt movement. 3. - Page 14 TO OPERATE TREADMILL CAUTION: To avoid injury, hold onto the handrails while mounting and dismounting the treadmill. Hold onto the handrails and place feet on side rails before starting. Step onto the walking belt only at the slowest speed. Always hold on to a handrail or hand bar while making control changes (incline, speed, etc.).
- Page 15 Incline shortcut key 1-10: Press one of the buttons to set the incline rapidly. BLUETOOTH The EV720 Treadmill is equipped with Bluetooth technology that will allow the user to pair 3 party exercise apps with your machine. Open desired app, then search for your treadmill to successfully pair and begin workout.
- Page 16 TREADMILL OPERATION QUICKSTART: After the treadmill is powered on and the safety key is in place, simply press the START key. The treadmill will start at the minimum speed of 0.5 mph, the time will count up from zero, and all data will begin to accrue.
- Page 17 When the heart rate is lower than the target, incline or speed will increase to increase the level of workout raising the heart rate. When heart rate reaches the target, no changes will be made. When the heart rate is higher than the target, incline or speed will decrease to lower heart rate. Customer Service 1-888-707- 1880 Dyaco Canada Inc.
- Page 18 PRESET PROGRAMS The treadmill has 24 different programs that have been designed for a variety of workouts. These 24 programs have factory preset work level profiles for achieving different goals. Customer Service 1-888-707- 1880 Dyaco Canada Inc. 2021 Email: customerservice@dyaco.ca...
- Page 19 Customer Service 1-888-707- 1880 Dyaco Canada Inc. 2021 Email: customerservice@dyaco.ca...
- Page 20 Customer Service 1-888-707- 1880 Dyaco Canada Inc. 2021 Email: customerservice@dyaco.ca...
- Page 21 Customer Service 1-888-707- 1880 Dyaco Canada Inc. 2021 Email: customerservice@dyaco.ca...
- Page 22 Customer Service 1-888-707- 1880 Dyaco Canada Inc. 2021 Email: customerservice@dyaco.ca...
- Page 23 HEART RATE PROGRAMS Before we begin, a few words about heart rate: The old motto, "no pain, no gain," is a myth that has been overpowered by the benefits of exercising comfortably. A great deal of this success has been promoted using heart rate monitors. With the proper use of a heart rate monitor, many people find that their usual choice of exercise intensity was either too high or too low, and exercise is much more enjoyable by maintaining their heart rate in the desired benefit range.
- Page 24 RATE OF PERCEIVED EXERTION Heart rate is important but listening to your body also has a lot of advantages. There are more variables involved in how hard you should workout than just heart rate. Your stress level, physical health, emotional health, temperature, humidity, the time of day, the last time you ate and what you ate all contribute to the intensity at which you should workout.
- Page 25 PARTS DIAGRAM Customer Service 1-888-707- 1880 Dyaco Canada Inc. 2021 Email: customerservice@dyaco.ca...
- Page 26 PARTS LIST KEY NO. PART NO. DESCRIPTION Q'TY AA010188-Q2 Main Frame AA020067-Q2 Frame Base AA030046-Q2 Incline Bracket CRAA040250-Q2 Right Upright CRAA040251-Q2 Left Upright AA050136-Q2 Console Support CRAA060099-Q2 Outer & Inner Slide AA060098-Q2 Handrail Support G150001 Incline Motor N010001 Drive Belt B134029-Y3 Motor Bracket CRG080606B...
- Page 27 KEY NO. PART NO. DESCRIPTION Q'TY E010755 300m/m_Connecting Wire (Black) E010747 100m/m_Connecting Wire (Black) D090060-02 Motor Controller E020746-01 1000m/m_Computer Cable (Upper) E020725-02 1250m/m_Computer Cable (Middle) E020729-01 1200m/m_Computer Cable (Lower) F030185 1000m/m_Sensor W/Cable J011503-Y3 1/2" × 12UNC × 1"_Hex Head Bolt J011013R-ZN 3/8"...
- Page 28 KEY NO. PART NO. DESCRIPTION Q'TY J330001-Y3 M5_Allen Wrench Head Screw Wrench J330002-Y3 M6_L Allen Wrench N020007A Lubricant P060018-A1 Adjustment Foot Pad J536805-Y3 3.5 × 16m/m_Tapping Screw P060281 Wire Tie Mount CRP010105-A1-02 Top Motor Cover Plate E050205 1050m /m_Speed Cable (Upper) E050254 1050m/m_Incline Cable (Upper) J547003-Z1...
-
Page 29: General Maintenance
GENERAL MAINTENANCE BELT ADJUSTMENTS: Treadbelt Tension Adjustment - Belt tension is not critical for most users. It is very important for joggers and runners to provide a smooth, steady running surface. Adjustment must be made from the right side of the rear roller to adjust the tension with the 6 mm Allen wrench provided in the parts package. - Page 30 to center the tread belt. Adjustments will become less of a maintenance concern as the belt is used. Proper belt tracking is an owner responsibility common with all treadmills. ATTENTION: DAMAGE TO THE RUNNING BELT RESULTING FROM IMPROPER TRACKING / TENSION ADJUSTMENTS IS NOT COVERED UNDER THE WARRANTY.
- Page 31 GENERAL MAINTENANCE WARNING! ALWAYS UNPLUG YOUR TREADMILL PRIOR TO CLEANING TO AVOID ELECTRICAL HAZARD OR SHOCK. Belt and Deck - Your treadmill uses a very high-efficient low-friction deck. Performance is maximized when the deck is kept as clean as possible. Use a soft, damp cloth or paper towel to wipe the edge of the belt and the area between the belt edge and frame.
- Page 32 RESET SWITCH RESETTING • If your treadmill loses power or will not start, check the reset switch located on the front of the frame. • If the white tab of the reset switch is not showing, then the reset switch has not been tripped.
-
Page 33: Service Checklist - Diagnosis Guide
SERVICE CHECKLIST – DIAGNOSIS GUIDE Before contacting your dealer for aid, please review the following information. It may save you both time and expense. This list includes common problems that may not be covered under the treadmill's warranty. PROBLEM SOLUTION/CAUSE 1. -
Page 34: Troubleshooting
TROUBLESHOOTING How to enter factory settings to change from miles to kilometers Remove the safety key. Press and hold the PROGRAM button and reinsert the safety key. Release the PROGRAM button after reinserting the safety key. Press the ENTER button once to select Press the speed ▲... -
Page 35: Training Guidelines
will begin to calibrate itself and will leave the factory settings mode once the operation is completed. Do not modify any values other than English vs. Metric (Miles vs. Kilometers). TRAINING GUIDELINES Exercise Exercise is one of the most important factors in the overall health of an individual. Listed among its benefits are: ... - Page 36 As your become fitter, a higher intensity of exercise is required to create an overload and therefore provide continued improvement. Customer Service 1-888-707- 1880 Dyaco Canada Inc. 2021 Email: customerservice@dyaco.ca...
- Page 37 Overload This is where you exercise at a level above that which can be carried out comfortably. The intensity, duration, and frequency of exercise should be above the training threshold and should be gradually increased as the body adapts to the increasing demands. As your fitness level improves, so the training threshold should be raised.
- Page 38 The following table is a guide to those who are "starting fitness". Target heart Rate 10 Second Count Beats per Minute Pulse Count The pulse count (on your wrist or carotid artery in the neck, taken with two index fingers) is done for ten seconds, taken a few seconds after you stop exercising.
- Page 39 periods of lighter exercise to allow the body to recuperate and restore its reserves. You will enjoy your program more and feel better for it. Muscle Soreness For the first week or so, this may be the only indication you have that you are on an exercise program.
- Page 40 STRETCHING Stretching should be included in both your warmup and cool down and should be performed after 3-5 minutes of low intensity aerobic activity or callisthenic type exercise. Movements should be performed slowly and smoothly, with no bouncing or jerking. Move into the stretch until slight tension, not pain, is felt in the muscle and hold for 20-30 seconds.
- Page 41 INNER THIGH STRETCH TOUCHES Sit with the soles of your feet together with your Slowly bend forward from your waist, letting knees pointing outward. Pull your feet as close your back and shoulders relax as you stretch Into your groin as possible. Gently push your toward your toes.
-
Page 42: Manufacturer's Limited Warranty
MANUFACTURER'S LIMITED WARRANTY Dyaco Canada Inc. warrants all its treadmill parts for a period of time listed below from the date of retail sale, as determined by sale receipt. Dyaco Canada Inc.'s responsibilities include providing new or remanufactured parts at Dyaco Canada Inc.'s option and technical support to our independent dealers and servicing organizations. - Page 43 Please visit us online for information about our other brands and products manufactured and distributed by Dyaco Canada Inc. spiritfitness.ca solefitness.ca xterrafitness.ca dyaco.ca/products/everlast.html dyaco.ca/UFC/UFC-home.html spiritfitness.ca/johnnyg.html trainorsports.ca For more information, please contact Dyaco Canada Inc. T: 1-888-707-1880 ⏐ 5955 Don Murie St., Niagara Falls, Ontario L2G 0A9 ⏐ sales@dyaco.ca...
Need help?
Do you have a question about the EV720 and is the answer not in the manual?
Questions and answers