Table of Contents
Advertisement
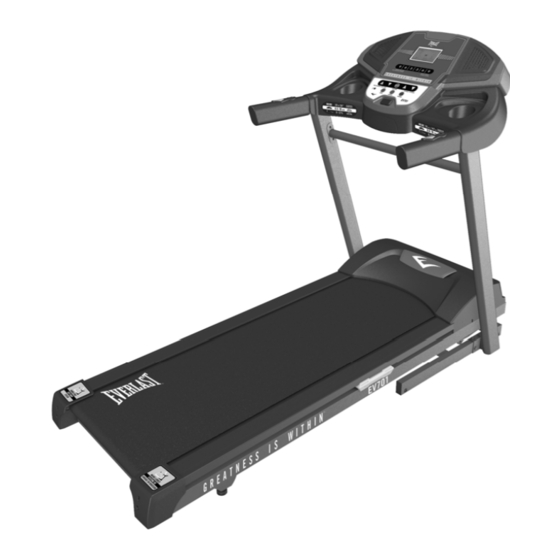
Owner's Manual
Model No.
1654701
- Assembly
- Operation
- Adjustments
- Parts
- Warranty
CAUTION:
You must read and
understand this
owner's manual
before operating
unit.
Keep this manual for
future reference.
Serial number
Write the serial
number in the space
above for reference.
Serial number can be
found at the front
bottom section of the
Treadmill.
Advertisement
Table of Contents

Related Manuals for Everlast 1654701


Summary of Contents for Everlast 1654701
- Page 1 Owner’s Manual Model No. 1654701 - Assembly - Operation - Adjustments - Parts - Warranty CAUTION: You must read and understand this owner’s manual before operating unit. Keep this manual for future reference. Serial number Write the serial number in the space above for reference.
-
Page 2: Table Of Contents
Repair Parts and Service All of the parts for the Everlast treadmill, shown in figure can be ordered from: Dyaco Canada Inc. 6050 Don Murie Street, Niagara Falls, Ontario, L2G 0B3. When ordering parts, the parts will be sent and billed at the current prices. -
Page 3: Grounding Instructions
IMPORTANT SAFETY INFORMATION THIS UNIT IS INTENDED FOR HOUSEHOLD USE ONLY READ ALL INSTRUCTIONS BEFORE USING THIS TREADMILL CAUTION: Before starting any exercise program, it is recommended that you consult your physician. WARNING: Connect this unit to a properly grounded outlet only. DANGER: To reduce the risk of electric shock, always unplug the treadmill from the electrical outlet immediately after using and before cleaning. - Page 4 when others are using it. 15. Never turn on treadmill while standing on treadbelt. Always hold the handrails while using the treadmill. Always return the treadmill to the slowest speed to provide for safe dismount and low speed restart. 16. To disconnect, turn all controls to the off position, then remove plug from outlet. 17.
-
Page 5: Important Electrical Information
Important Electrical Information WARNING! NEVER use a ground fault circuit interrupt (GFCI) wall outlet with this treadmill. Route the power cord ● away from any moving part of the treadmill including the elevation mechanism and transport wheels. NEVER remove any cover without first disconnecting AC power. ●... -
Page 6: Assembly Instructions
Assembly Instructions !!ATTENTION: IMPORTANT UNPACKING INSTRUCTIONS. PLEASE READ BEFORE UNPACKING YOUR FOLDING TREADMILL!! Serious injury could occur if this folding treadmill is not unpacked properly. There is a Velcro strap installed around the treadmill base that prevents the treadmill from unfolding accidentally during shipping. -
Page 7: Before You Begin
Before you begin. Thank you for purchasing our product. Even though we go to great efforts to ensure the quality of each product we produce, occasional errors and /or omissions do occur. In any event should you find this product to have either a defective or a missing part please contact us for a replacement. - Page 8 Hardware Packing #80. #100. #99. Ø8 × 1.5T Ø8 × Ø18 ×1.5T 5/16" × UNC18 × 1/2" (4pcs) (8pcs) (8pcs) Split Washer Flat Washer Hex Head Bolt #125. 5/16" × UNC18 × 3/4" Button Head Socket Bolt (8pcs) #104. Lubricant #44.
- Page 9 Assembly Instructions Step 1. Remove the treadmill from the carton and lay it on a smooth level surface. Step2. Connect Computer Cable (Middle) (54) with Computer Cable (Lower) (55) then insert Right and Left Uprights (4) and (5) into the Frame Base (2) and use 13m/m Wrench (90) to tighten 8 pcs of 5/16"...
- Page 10 Step 3 Connect the Computer Cable (Middle) (54) to the Computer Cable (Upper) (53). Connect the Speed Adjustment Switch W/Cable(Upper) (114) to the Speed/Hand Pulse Complex (28). Connect the Incline Adjustment Switch W/Cable(Upper) (115) to the Incline/Hand Pulse Complex (29). Insert the Console Assembly (21) into the right and left Uprights (4) and (5) and secure with 4 pcs of 5/16"...
-
Page 11: Folding Instructions
Folding Instructions Do not attempt to move the unit unless it is in the folded and locked position. Be sure the power cord is secured to avoid possible damage. Use both handrails to maneuver the unit to the desired position. ■... -
Page 12: Treadmill Operation
Treadmill Operation Your treadmill features a walking belt coated with a lubricant. IMPORTANT: Never apply silicone spray or other substances to the walking belt or walking board. Such substances will deteriorate the walking belt and cause excessive wear. How to plug in the power cord. GROUNDING INSTRUCTIONS. -
Page 13: Operation Of Your Treadmill
Operation of your treadmill GETTING STARTED: CAUTION: Before operating the console, read the following precautions: Do not stand on the walking belt when turning on the treadmill Always wear the safety key. Pulling the safety key will stop tread-belt movement. Adjust the speed in small increments to avoid sudden jumps in speed To reduce the possibility of electric shock, keep the console dry. - Page 14 TO OPERATE TREADMILL CAUTION: To avoid injury, hold onto the handrails while mounting and dismounting the treadmill. Hold onto the handrails and place feet on siderails before starting. Step onto the walking belt only a slowest speed. Always hold on to a handrail or hand bar while making control changes (incline, speed, etc.).
- Page 15 Button Function: A > SPEED ▲(FAST): Pressing this button increases the speed by 0.1(mph/km). Press and hold this button for 3 seconds to increase speed rapidly. Press this button during setting the program to adjust the value (to increase). B > SPEED ▼(SLOW):Pressing this button decreases the speed by 0.1(mph/km). Press and hold this button for 3 seconds to decrease speed rapidly.
- Page 16 Preset PROGRAM: There are 24 built in programs (P-1~P-24). Press PROGRAM button to choose program P-1~P-24or press START button to start. The preset time is (30:00) or press ENTER button to enter time parameter setting. 30:00(5:00~99:00) with increment of 1:00 HRC:This program controls Heart Rate.
- Page 17 Metric Table Customer Service 1-888-707-1880 Dyaco Canada Inc. 2014 Email: customerservice@dyaco.ca...
- Page 18 English Table Customer Service 1-888-707-1880 Dyaco Canada Inc. 2014 Email: customerservice@dyaco.ca...
-
Page 19: Heart Rate Programs
HEART RATE PROGRAMS The old motto, “no pain, no gain”, is a myth that has been overpowered by the benefits of exercising comfortably. A great deal of this success has been promoted by the use of heart rate monitors. With the proper use of a heart rate monitor, many people find that their usual choice of exercise intensity was either too high or too low and exercise is much more enjoyable by maintaining their heart rate in the desired benefit range. -
Page 20: Rate Of Perceived Exertion
RATE OF PERCEIVED EXERTION Heart rate is important but listening to your body also has a lot of advantages. There are more variables involved in how hard you should workout than just heart rate. Your stress level, physical health, emotional health, temperature, humidity, the time of day, the last time you ate and what you ate, all contribute to the intensity at which you should workout. - Page 21 Parts List and Diagram KEY NO. PART NO. DESCRIPTION Q'TY 470101 Main Frame 470102 Frame Base 470103 Incline Bracket 470104 Right Upright 470105 Left Upright 470106 Console Support 470107 Outer Slide 470108 Inner Slide 470109 Handrail Support 470110 Incline Motor 470111 Drive Belt 470112...
- Page 22 470148 Power Cord 470149 300m/m_Connecting Wire (White) 470150 300m/m_Connecting Wire (Black) 470151 100m/m_Connecting Wire (Black) 470152 Motor Controller 470153 1200m/m_Computer Cable (Upper) 470154 1250m/m_Computer Cable (Middle) 470155 1200m/m_Computer Cable (Lower) 470156 Sensor W/Cable 470158 1/2" × UNC12 × 1"_Hex Head Bolt 470159 3/8"...
- Page 23 4701117 400m/m_Console Ground Wire 4701125 5/16" × UNC18 × 3/4"_Button Head Socket Bolt 4701128 M5 × P0.8 × 10L_Phillips Head Screw 4701135 Ø3 × 75L_Sheet Metal Screw 4701140 Ø4 × 19L_Sheet Metal Screw 4701151 400m/m_Audio Cable 4701154 1000m/m_Ground Wire 4701161 Rubber Foot 4701162 Controller Back Plate...
-
Page 24: Parts Diagram
Parts Diagram Customer Service 1-888-707-1880 Dyaco Canada Inc. 2014 Email: customerservice@dyaco.ca... -
Page 25: General Maintenance
General Maintenance BELT ADJUSTMENTS: Treadbelt Tension Adjustment - Belt tension is not critical for most users. It is very important for joggers and runners in order to provide a smooth, steady running surface. Adjustment must be made from the right side of the rear roller in order to adjust tension with the 6 mm Allen wrench provided in the parts package. - Page 26 TENSION ADJUSTMENTS IS NOT COVERED UNDER THE WARRANTY. BELT / DECK LUBRICATION: Do not lubricate with other than Everlast approved lubricant. Your treadmill comes with one tube of lubricant and extra tubes can be ordered directly from Everlast. There are commercially available lube kits, but the only one currently approved by Everlast is Lube-N-Walk.
-
Page 27: Treadmill Lubrication
General Maintenance WARNING: Always unplug your treadmill prior to cleaning in order to avoid electrical hazard or shock. Belt and Bed - Your treadmill uses a very high-efficient low-friction bed. Performance is maximized when the bed is kept as clean as possible. Use a soft, damp cloth or paper towel to wipe the edge of the belt and the area between the belt edge and frame. -
Page 28: Reset Switch Resetting
RESET SWITCH RESETTING If your treadmill looses power or will not start, check the reset switch located on the front of the motor cover. If the white tab of the reset switch is not showing then the reset switch has not been tripped. -
Page 29: Service Checklist – Diagnosis Guide
Service Checklist – Diagnosis Guide Before contacting your dealer for aid, please review the following information. It may save you both time and expense. This list includes common problems that may not be covered under the treadmill’s warranty. PROBLEM SOLUTION/CAUSE 1. -
Page 30: Troubleshooting
Troubleshooting I. Engineering Mode Remove the safety key and reinsert it after pressing the ENTER and STOP buttons together to enter the engineer mode. Press the ENTER button once to select roller diameter (60), km or miles, speed (0.5mph to 10mph) and incline (12). Press FAST button and SLOW button to change the value. -
Page 31: Training Guidelines
Training guidelines Exercise Exercise is one of the most important factors in the overall health of an individual. Listed among its benefits are: Increased capacity for physical work (strength endurance) Increased cardiovascular (heart and arteries/veins) and respiratory efficiency Decreased risk of coronary heart disease Changes in body metabolism, e.g. - Page 32 Warm Up Every exercise program should start with a warm up where the body is prepared for the effort to come. It should be gentle and preferably use the muscles to be involved later. Stretching should be included in both your warm up and cool down, and should be performed after 3-5 minutes of low intensity aerobic activity or callisthenic type exercise.
- Page 33 Endurance Circuit Training Cardiovascular endurance, muscle, strength, flexibility and coordination are all necessary for maximum fitness. The principle behind circuit training is to give a person all the essentials at one time by going through your exercise program moving as fast as possible between each exercise. This increases the heart rate and sustains it, which improves the fitness level.
- Page 34 STRETCHING Stretching should be included in both your warm up and cool down, and should be performed after 3-5 minutes of low intensity aerobic activity or callisthenic type exercise. Movements should be performed slowly and smoothly, with no bouncing or jerking. Move into the stretch until slight tension, not pain, is felt in the muscle and hold for 20-30 seconds.
- Page 35 INNER THIGH STRETCH TOUCHES Sit with the soles of your feet together with your Slowly bend forward from your waist, letting knees pointing outward. Pull your feet as close your back and shoulders relax as you stretch Into your groin as possible. Gently push your toward your toes.
Need help?
Do you have a question about the 1654701 and is the answer not in the manual?
Questions and answers