
Related Manuals for Wunderkind Custom 106503-F15


Summary of Contents for Wunderkind Custom 106503-F15
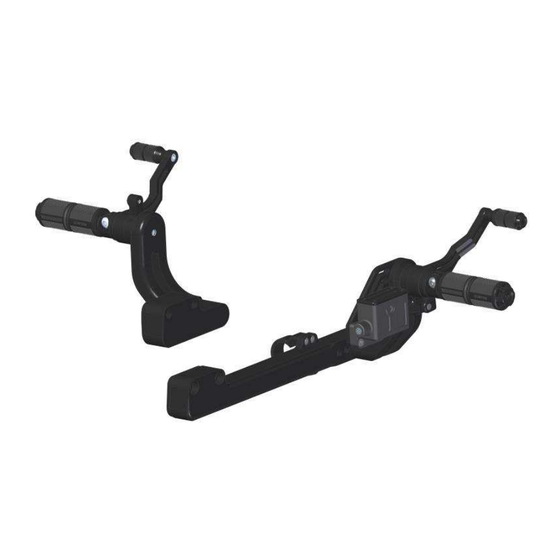
- Page 1 Installation and Safety information Extended forward control kit Triumph Bonneville Bobber From model year 2017 • www.wunderkind-custom.com ••• info@wunderkind-custom.com •...
- Page 2 Installation manual for Triumph Bonneville Bobber Caution Important safety advice: • Working on motorcycles poses a safety risk. Some work may only be carried out by appropriately qualified personnel. Faulty work can have serious consequences and may pose a threat to life and health.
- Page 3 Installation manual for Triumph Bonneville Bobber Installation time Registration Additional products Drawing (approx.) required Handlebar 120 minutes (30 mm higher) Riser 40 minutes (elevation 25 mm) Handlebar extension for handlebar 5 minutes modification with original mirror Handlebar with riser 150 minutes (55 mm higher) Extended forward 240 minutes...
- Page 4 Installation manual for Triumph Bonneville Bobber 25 minutes Chainguard cover Brake line kit 200 minutes 15 minutes Fork covers Horn bracket 15 minutes (displaced) Sprocket cover 25 minutes Brake caliper cover 20 minutes Handles 25 minutes • Revision: 00 • 03/12/2017 • ©...
- Page 5 Installation manual for Triumph Bonneville Bobber Frontfender 25 minutes Axle cover 20/25 minutes (front/rear) Fender with lights 150 minutes Lever 15 minutes Mirror 15 minutes Top yoke/triple clamp 10 minutes Reflector covers 10 minutes • Revision: 00 • 03/12/2017 • ©...
- Page 6 Installation manual for Triumph Bonneville Bobber Content and recommended accessories: Torque wrench, Modification Special tool required? approx. 240 min Connection tongs for time: flat plug, • Revision: 00 • 03/12/2017 • © ABM Fahrzeugtechnik GmbH Page 6 of 16...
- Page 7 Installation manual for Triumph Bonneville Bobber Installation: Extended forward control kit Slightly raise the vehicle with a scissor jack. Caution: Make sure that the motorbike is positioned securely. Completely remove the sprocket cover. Unscrew the brake fluid reservoir. Cover the exhaust and frame on both sides with a cloth or towel.
- Page 8 Installation manual for Triumph Bonneville Bobber Loosen both fixing screws of the original footrest and remove it completely. Screw the rubber buffer (provided) into the baseplate using thread-locking fluid and hand tighten. Attach the support bracket with the two screws (provided) to the baseplate.
- Page 9 Installation manual for Triumph Bonneville Bobber Insert the adhesive rubber into the rounding of the front holder and slide onto the frame at the mounting position at the baseplate. Tip: Spray some silicone onto the frame beforehand for easier mounting. Attach the holder onto the baseplate using the two M6 and M8 screws with locking washers.
- Page 10 Installation manual for Triumph Bonneville Bobber Insert the new brake light switch (provided) with a seal through the fitting of the original brake line. Screw on the new brake line with a seal onto the brake light switch. Torque 15 Nm Dismount the screw of the bracket (coolant reservoir) and attach the brake line with the provided bracket, …...
- Page 11 Installation manual for Triumph Bonneville Bobber …it can be screwed onto the brake cylinder using the banjo bolt and seals provided. Caution: Lay the brake line so that there is sufficient distance to the downpipe. Torque 22 Nm Bleed the brake system according to the workshop manual.
- Page 12 Installation manual for Triumph Bonneville Bobber Relay Brown/ ground • Revision: 00 • 03/12/2017 • © ABM Fahrzeugtechnik GmbH Page 12 of 16...
- Page 13 Installation manual for Triumph Bonneville Bobber Reassemble the cover and all removed parts on the right side. By changing the position of the push rod, the height of the foot brake lever can be finely adjusted. Afterwards lock the push rod with the nut. If, however, the desired result cannot be achieved in this manner, the height of the pedal can be adjusted on the lever itself.
- Page 14 Installation manual for Triumph Bonneville Bobber Remove the complete footrest system on the left-hand side as shown in the illustration. Unscrew both nuts from the original shift linkage and screw onto the provided. Attach the new system to the frame using the original screws.
- Page 15 Installation manual for Triumph Bonneville Bobber Attach the support bracket onto the baseplate, as on the right side. Torque 25 Nm Tip: Mount the bracket in the front position. Screw on the shift linkage on both hinges, adjust the height of the gear lever and lock with nuts. If, however, the desired result cannot be achieved in this manner, the height of the pedal can be adjusted on the lever itself.
-
Page 16: Final Check
Installation manual for Triumph Bonneville Bobber Final check • All electric wires must be laid in a manner which prevents them from bending or getting pulled during spring deflection movements and which adequately protects them against rubbing. After all the work has been completed, make sure you check the complete electrical system. •...
Need help?
Do you have a question about the 106503-F15 and is the answer not in the manual?
Questions and answers