
Related Manuals for Arrowquip 1040


Summary of Contents for Arrowquip 1040
- Page 1 PRODUCT MANUAL Q-POWER CATTLE CHUTES 1040 | 1070 LEFT | RIGHT JUNE 2021 1-877-275-6075 | cs@arrowquip.com arrowquip.com...
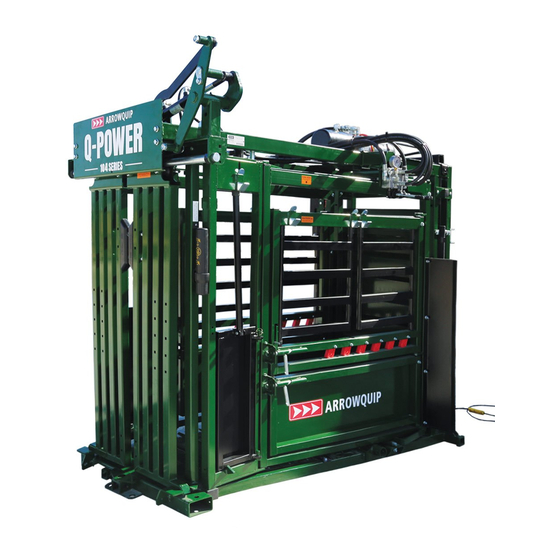
- Page 2 THIS PRODUCT MANUAL IS FOR THE FOLLOWING PRODUCTS*: Q-Power 107 Series Deluxe Vet Q-Power 104 Series Deluxe Vet Q-Power 104 Series Standard *Products may not be exactly as shown...
- Page 3 WARNING DO NOT REPAIR THE CHUTE OR GO INTO THE CHUTE WHEN HYDRAULICS ARE IN OPERATION. This can result in injury to the worker. Unplug the motor before performing any necessary repairs or inspection. DO NOT ATTEMPT TO CONNECT THE ELECTRIC POWER PACK IF YOU ARE NOT A CERTIFIED ELECTRICIAN.
-
Page 5: Table Of Contents
CONTENTS Safety Precautions Risk Assessment Q-Power Hydraulic Squeeze Chute Assembly Gas Power Pack Electric Power Pack Operating the Q-Power Cattle Chute Cold Start Power Failure Recommended Maintenance Maintenance Safety Regular Maintenance Hydraulic Maintenance Power Pack Maintenance Troubleshooting Guide Squeeze Chute 107 Series Power Pack Troubleshooting Gas Power Pack start cord is difficult to pull Pump is not building pressure... -
Page 6: Safety Precautions
OF SAFETY PRECAUTIONS ARE THE SOLE RESPONSIBILITY OF THE OPERATOR. All farm machinery and equipment are potentially dangerous. Careless use of any Arrowquip livestock equipment may cause injury or damage to persons, cattle, or property. Arrowquip has taken precautions in the design and manufacturing of this product to ensure that it is safe and user-friendly. -
Page 7: Risk Assessment
RISK ASSESSMENT Conduct a risk assessment on procedures regarding the operation of an Arrowquip hydraulic squeeze chute, establishing a safe work procedure. 1. Ensure all users of the equipment have been inducted and comply with safe working procedures. -
Page 8: Q-Power Hydraulic Squeeze Chute Assembly
Q-POWER HYDRAULIC SQUEEZE CHUTE ASSEMBLY Your chute will come fully assembled with the options you have ordered already fitted to the chute. However, it will be necessary to connect the hydraulics to a tractor or power pack. The following guide will assist you in properly setting up your chute for use. DO NOT ATTEMPT TO CONNECT THE ELECTRIC POWER PACKS IF YOU ARE NOT A CERTIFIED ELECTRICIAN. -
Page 9: Gas Power Pack
SETTING UP THE Q-POWER 107 SERIES 1. Hydraulics are plug and play. Please ensure that the color code of the hoses matches to the quick connects. Rule of thumb: red is pressure, yellow is tank. 2. When hooking up the hoses, ensure the couplers are engaged and the female sleeve is snapped into place. -
Page 10: Electric Power Pack
ELECTRIC POWER PACKS DO NOT ATTEMPT TO CONNECT THE ELECTRIC POWER PACK IF YOU ARE NOT A CERTIFIED ELECTRICIAN. FOR YOUR SAFETY, ELECTRIC POWER PACKS MUST BE CONNECTED AND WIRED BY A FULLY CERTIFIED ELECTRICIAN. 1. RECIRCULATION VALVE 2. OIL FILTER 3. -
Page 11: Operating The Q-Power Cattle Chute
If you have any questions, contact Arrowquip Client Care at 1-877-275-6075. OPERATING THE Q-POWER CATTLE CHUTE ENSURE ALL CHUTE FUNCTIONS AND ADD-ONS ARE WORKING PROPERLY BEFORE OPERATING. 1. Ensure the head gate, tail gate, and all access points are closed before the animal enters the chute. -
Page 12: Cold Start
5. Review the cause for power failure and troubleshoot to restore power. 6. See start-up procedure once power is restored. RECOMMENDED MAINTENANCE All Arrowquip Products are made with precision parts to require minimal maintenance. However, regular maintenance will keep your equipment running smoothly and safely. MAINTENANCE SAFETY 1. -
Page 13: Regular Maintenance
8. TAIL GATE CYLINDER ROD END 4. SQUEEZE CYLINDER ROD END 9. TAIL GATE CYLINDER CAP END 5. SQUEEZE CYLINDER CAP END 1040 MODEL 1. HEAD GATE TOWER BUSHING 4. SQUEEZE CYLINDER ROD END 2. HEAD GATE CYLINDER ROD END 5. - Page 14 Lubricate slam latches and door hinges with WD-40 Dry Lube. ✓ Check gate latches and striker plates for wear. Ensure gates are locking securely. ✓ Clean bottom head gate door track to prevent dirt-build-up. ✓ Clean the chute floor. Excess build-up of manure or dirt inside chute can cause the ✓ squeeze and head gate to malfunction. Check mechanism pivot bolts for wear.
-
Page 15: Hydraulic Maintenance
HYDRAULIC MAINTENANCE If you have any issues with your hydraulic chute, contact Arrowquip Client Care at 1-877- 275-6075. 1. Replace oil annually, or more frequently as necessary. a. Dirty oil or oil that has 0.05% of water in it can be catastrophic for hydraulic systems. -
Page 16: 107 Series Power Pack Troubleshooting
107 SERIES POWER PACK TROUBLESHOOTING GAS POWER PACK ISSUES Possible Cause Dirt in Dirty Faulty Improper Incorrect Engine Dirty Air Problem No Fuel Fuel Debris Spark Fuel Oil Level Overloaded Cleaner Line Screen Plug • • • • • • •... -
Page 17: Pump Is Not Building Pressure
Q-Power 107: 15 Years or 50,000 Total Head of Cattle.* Your product must be registered to claim warranty, and to ensure that Arrowquip has the required information to contact you in the event of a product or part recall. Any owner who fails to register their product warranty with Arrowquip through their Authorized Arrowquip Dealer voluntarily voids their warranty. -
Page 18: Add-Ons Maintenance & Safety Precautions
Warranty valid for the number of years or the number of head outlined above, whichever limit is met first. Follow the recommended use instructions to maximize the lifespan of your equipment. Arrowquip products that have only been used within acceptable tolerance following the stated recommended use will be eligible to claim warranty. -
Page 19: Sheeted Sternum Bar
Secure the head holder with 4 bolts. Safety Precautions: 1. Ensure that the head holder remains open until required to hold the animal’s head. 2. If not in use, use detent pin to hold the head holder in place. Maintenance: 1. Add grease through the grease nipples as needed. 2. Every 6 months: a. -
Page 20: Trimming Bar
Fasten bolts to front plate. SAFETY CHECK: Ensure that the sternum bar is installed correctly before running cattle ✓ through the chute. Safety Precautions: 1. Remove the sternum bar when working calves. TRIMMING BAR Installation: Place both brackets on the chute. 15 | ADD-ONS MAINTENANCE &... -
Page 21: Wheel Kit
Attach the trimming bar to the bottom bracket. Insert the trimming bar into the top bracket. Adjust trimming bar position to your preference. Tighten bolts to secure. Safety Precautions: 1. Ensure the trimming bar is installed and secured correctly before running cattle through the chute. - Page 22 Jack Reference: JACK UP JACK DOWN Installation: THE CHUTE MUST BE FLAT ON THE GROUND BEFORE PROCEEDING. Install both jacks on the mounts located near the vet cage. x2 (BOTH SIDES) 17 | ADD-ONS MAINTENANCE & SAFETY PRECAUTIONS...
- Page 23 Using both jacks simultaneously, raise the chute 12" above the ground. 12" x2 (BOTH SIDES) Install wheels and secure with transport pins. x2 (BOTH SIDES) ADD-ONS MAINTENANCE & SAFETY PRECAUTIONS | 18...
- Page 24 Remove both jacks. x2 (BOTH SIDES) Attach the removable jack mount to the front of the chute and secure with the pin. 19 | ADD-ONS MAINTENANCE & SAFETY PRECAUTIONS...
- Page 25 Mount the jack to the front of the chute. Using the front jack, raise the chute 3" above the ground. 3" Install the hitch and secure with the pin. ADD-ONS MAINTENANCE & SAFETY PRECAUTIONS | 20...
- Page 26 Attach the unit to the towing vehicle. Adjust the hitch to the proper position for the vehicle, if necessary. Retract the front jack completely. SAFETY CHECK: Jacks are retracted completely. ✓ All doors and gates are shut. ✓ Tires are in good condition. ✓...
- Page 27 Remove the hitch. Using the front jack, lower the chute to the ground. THE FRONT SECTION OF THE CHUTE MUST BE LYING FLAT ON THE GROUND BEFORE PROCEEDING. ADD-ONS MAINTENANCE & SAFETY PRECAUTIONS | 22 ADD-ONS MAINTENANCE & SAFETY PRECAUTIONS | 22...
- Page 28 Transfer the front jack to the rear mount. Attach the second jack to the opposite side. x2 (BOTH SIDES) Using both jacks simultaneously, raise the chute until the tires are 1" above the ground. Remove tires and set aside. B x2 (BOTH SIDES) 1"...
- Page 29 Using both jacks simultaneously, lower the chute until it is lying flat on the ground. (BOTH SIDES) Remove jacks and set aside. x2 (BOTH SIDES) SAFETY CHECK: Inspect for damages due to transport ✓ Head gate and squeeze mechanisms are functioning properly ✓ All latches on doors, gates, and panels are functioning properly ✓ When applicable, all add-ons are properly installed and functioning ✓...
-
Page 30: Wheel Maintenance
WHEEL MAINTENANCE It is extremely important to apply and maintain proper wheel mounting torque on your trailer wheel. Torque is a measure of the amount of tightening applied to a fastener (nut or bolt) and is expressed as length force. For example, a force of 90 pounds applied at the end of a wrench on foot long will yield 90 ft. - Page 32 If you have any questions regarding your product or require assistance, please contact Arrowquip’s Client Care Team at 1-877-275-6075 or by email at cs@arrowquip.com. Printed in Canada | October 2021...
Need help?
Do you have a question about the 1040 and is the answer not in the manual?
Questions and answers