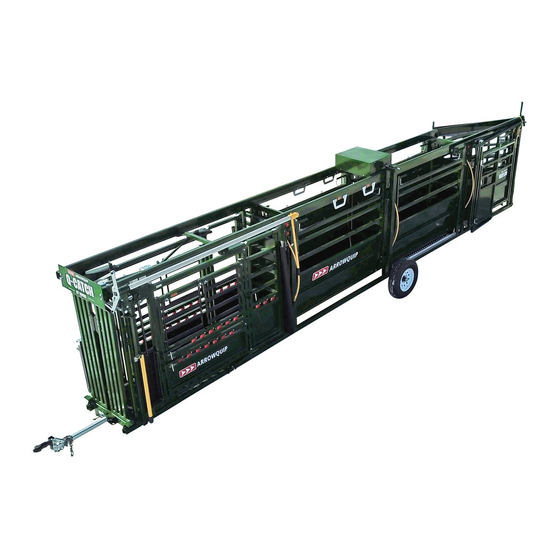
Arrowquip PORTABLE Q-CATCH 86 Series Product Manual
Chute & alley
Hide thumbs
Also See for PORTABLE Q-CATCH 86 Series:
- Product manual (12 pages) ,
- Product manual (16 pages)

Related Manuals for Arrowquip PORTABLE Q-CATCH 86 Series


Summary of Contents for Arrowquip PORTABLE Q-CATCH 86 Series
- Page 1 PORTABLE Q-CATCH 86 SERIES CHUTE & ALLEY PRODUCT MANUAL 1-877-275-6075 cs@arrowquip.com arrowquip.com...
-
Page 3: Table Of Contents
CONTENTS Safety Precautions Risk Assessment Transporting the Q-Catch 86 Series Portable Cattle Chute & Alley Operating the Cattle Chute Q-Catch 86 Series Head Gate Assembly Emergency Head Gate Release Recommended Maintenance Wheel Maintenance Portable Jack Conversion Manual Jack to Electric Jack Conversion Electric Jack to Manual Jack Conversion Troubleshooting Guide Warranty... -
Page 4: Safety Precautions
TO HOW THE PRODUCT IS OPERATED, OR RESULTING FROM A LACK OF SAFETY PRECAUTIONS ARE THE SOLE RESPONSIBILITY OF THE OPERATOR. All farm machinery and equipment is potentially dangerous. Careless use of any Arrowquip livestock equipment may cause injury or damage to persons, cattle, or property. Arrowquip has taken precautions in the design and manufacturing of this product to ensure that it is safe and user-friendly. -
Page 5: Risk Assessment
RISK ASSESSMENT Conduct a risk assessment on procedures for which the equipment is used and establish a safe work procedure. 1. Ensure all users of the equipment have been inducted and comply with safe working procedure. 2. Please ensure that there are NO large or hazardous objects inside the equipment that may cause injury to the animal or operator, or may cause the equipment to malfunction. - Page 6 TO LOWER THE UNIT: 1. Use the manual bulldog jack beside the hitch to raise the unit. Then unhook the unit from towing vehicle. 2. Remove the hitch from the unit. 3. Lower manual bulldog jack beside the hitch until the front of the chute rests on the ground.
- Page 7 4. Using the electric controller or manual winder, lift the unit until the tires are 1" from the ground. 5. Remove tires, and place in a safe place with connector pins. 6. Using the electric controller or manual winder, lower the unit until it rests on the ground.
- Page 8 READY FOR USE. TO RAISE THE UNIT: 1. Using the electric controller or manual winder, lift the unit until the front of the chute rests on the ground and tires can be installed.
- Page 9 2. Install tires and secure with pins. 3. Using the electric controller or manual winder, lower the unit. Continue retracting the jacks until they are in transport position. 4. Use the manual bulldog jack beside the hitch to raise the unit. Install the hitch to the unit.
- Page 10 5. Connect the unit to the towing vehicle, adjusting the hitch to the proper position for the vehicle, if necessary. 6. Retract the jack by the hitch and store in transport position. READY FOR TRANSPORT.
-
Page 11: Operating The Cattle Chute
OPERATING THE CATTLE CHUTE REMEMBER SAFETY WHEN OPERATING THE CATTLE CHUTE 1. Ensure all gates and the head gate are closed before the animal enters the chute. 2. Open tail gate for the animal to enter the squeeze chute enclosure. 3. -
Page 12: Q-Catch 86 Series Head Gate Assembly
Q-CATCH 86 SERIES HEAD GATE ASSEMBLY Your chute will come with the head gate fully assembled and ready for use. However, if you need to dissemble your head gate for any reason, the following guide will help you to properly reassemble your chute. -
Page 13: Emergency Head Gate Release
EMERGENCY HEAD GATE RELEASE Arrowquip squeeze chutes are designed to ensure the safety of both animal and operator. With proper maintenance and regular lubrication, the head gate will not lock. However, in the rare event that an animal becomes stuck in the head gate, the following guidelines will ensure... -
Page 14: Recommended Maintenance
RECOMMENDED MAINTENANCE All Arrowquip Products are made with precision parts to require minimal maintenance. However, regular maintenance will keep your equipment running smoothly and safely. THE BATTERIES ON THE NEW PORTABLE HANDLING... -
Page 15: Wheel Maintenance
8. Charge the battery as required with an AGM battery charger or smart charger with an AGM setting. Battery status should be monitored on the Battery Level Indicator regularly. • Connect charger to external Battery Lugs. Red: plus, black: minus. Kill switch must be in ‘on’ position for battery level to show. -
Page 16: Portable Jack Conversion
PORTABLE JACK CONVERSION INSTRUCTIONS TOOLS REQUIRED - 2x 1/2" Wrench - 2x 9/16" Wrench - Hammer - 5/16 Punch - Cordless Drill - 5/16 Drill Bit - Forklift - Straps MANUAL JACK TO ELECTRIC JACK CONVERSION 1. Remove the inside bolts from the top and bottom chain cover plates, and loosen the outer ones. - Page 17 3. Release the gear by removing the roll pin with a hammer and punch. 4. Remove the nuts, bolts, and washers from the top shaft. 5. Remove the nuts and bolts from the side jacks: two from the top plate and one from the bottom plate, leaving the bottom bolt in place.
- Page 18 6. a. Tilt both sides of the jack away from the main frame and remove the shaft. b. Using the forklift and straps, position the electric box. Secure the box with nuts and bolts. 7. Install the safety switch.
- Page 19 8. Place jacks back in upright position, inserting jack shaft into the electric box. Secure with nuts, bolts, and washers. Note: Do not overtighten the bolts, or this may cause the gears to grind when jacks are in use. 9. Secure side jack plates back in place on both sides of the jack with nuts and bolts.
-
Page 20: Electric Jack To Manual Jack Conversion
ELECTRIC JACK TO MANUAL JACK CONVERSION 1. Remove the nuts and bolts from the side jacks: two from the top plate and one from the bottom plate, leaving the bottom bolt in place. Note: A wrench with a long handle is recommended, as this step is a tight fit due to the location of the rolling door. - Page 21 4. Remove the bolts and nuts on the electric box, and remove with the forklift and straps. 5. a. Put one side jack back in the upright position, and secure the side jack plate loosely with nuts and bolts. b. Put the manual jack shaft in place. c.
- Page 22 6. Place nuts, bolts, and washers to secure the position of the shaft. Note: Do not overtighten the bolts, or this may cause the gears to grind when jacks are in use. 7. Install the gear and roll pin on the shaft, and secure with the hammer.
-
Page 23: Troubleshooting Guide
8. Keep the chain zip tied to the cover, and place it close to install position. Release the tie and continue holding the chain with your fingers. Install the chain over the gear, then place cover of the gear and secure. Make sure the chain is tight. WARNING: DO NOT DROP THE CHAIN INTO THE CHAIN COVER. 9. - Page 24 a. Lubricate Q-Catch track shaft by spraying directly with WD-40. Repeat with head gate doors closed and open to properly lubricate the entire shaft. b. Spray lubricant directly onto each of the four Q-Catch rollers on both head gate doors. c.
-
Page 25: Warranty
Check that bearings are not ceased. WARRANTY Your product must be registered to claim warranty, and to ensure that Arrowquip has the required information to contact you in the event of a product or part recall. If the owner of the equipment fails to register the product with Arrowquip, they are considered to have voluntary voided the warranty. -
Page 26: Options Maintenance & Safety Precautions
OPTIONS MAINTENANCE & SAFETY PRECAUTIONS Q-CATCH HEAD HOLDER Installation: 1. Rest head holder on the bottom 1.5" spacer on working side of head gate. 2. Install .5" x 3.5" bolts through face of head holder and install large washers on back of head gate doors, then tighten bolts. - Page 28 1-877-275-6075 | cs@arrowquip.com | arrowquip.com Printed in Canada | March 2019...
Need help?
Do you have a question about the PORTABLE Q-CATCH 86 Series and is the answer not in the manual?
Questions and answers