
Related Manuals for Arrowquip EASY FLOW CATTLE ALLEY


Summary of Contents for Arrowquip EASY FLOW CATTLE ALLEY
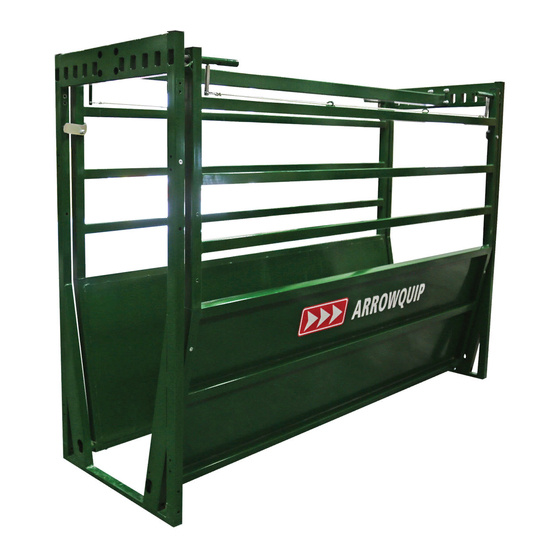
- Page 1 PRODUCT MANUAL EASY FLOW ® CATTLE ALLEY APRIL 2021 1-877-275-6075 | cs@arrowquip.com arrowquip.com...
-
Page 3: Table Of Contents
Between an Alley and a Kicker Panel Between an Alley and a Tub Between an Alley and a Vet Cage Between a Loading Ramp and Alley Other Products Adjusting the Easy Flow Cattle Alley Emergency Exit Using the Removable Side Panels Recommended Maintenance Bill of Materials... -
Page 4: Safety Precautions
OF SAFETY PRECAUTIONS ARE THE SOLE RESPONSIBILITY OF THE OPERATOR. All farm machinery and equipment is potentially dangerous. Careless use of any Arrowquip livestock equipment may cause injury or damage to persons, cattle, or property. Arrowquip has taken precautions in the design and manufacturing of this product to ensure that it is safe and user-friendly. -
Page 5: Risk Assessment
MACHINE. 5. Follow safe cattle handling procedures in other areas of the yard so that cattle are more docile. 6. Do not make any modifications to Arrowquip equipment. Non-factory modifications to the equipment can reduce the safety for the operator and livestock. RISK ASSESSMENT Conduct a risk assessment on procedures for which the equipment is used and establish a safe work procedure. -
Page 6: Assembly Instructions
ASSEMBLY INSTRUCTIONS ASSEMBLING A SINGLE EASY FLOW ALLEY REQUIRED TOOLS - 3/4" Wrench - 3/4" Socket - 9/16" Wrench - 9/16" Socket - Ratchet PACKING LIST: 8´ EASY FLOW ALLEY 7002337 7001812 7002062 2004618 WING HEAD BOLT 1/2" FLANGE NUT 1/2"... - Page 7 ASSEMBLY Lay two alley bows on the ground horizontally. Install the top post in the alley. Keep nuts loose. B x 8 C x 8 E x 1 G x 2 ASSEMBLING A SINGLE EASY FLOW ALLEY | 4...
- Page 8 Stand the alley frame up, and position one panel on each side. Insert the bottom pins on the panel into the frame on one side. 5 | ASSEMBLING A SINGLE EASY FLOW ALLEY...
- Page 9 Insert the bottom pins on the panel into the frame on the opposite side. Lift the panels up and latch into the frame. Tighten all fasteners to secure. Connect to chute, alley or other equipment using the provided panel pins. ASSEMBLING A SINGLE EASY FLOW ALLEY | 6...
-
Page 10: Kicker Panel Installation
CONNECTING TO ADDITIONAL PRODUCTS KICKER PANEL INSTALLATION REQUIRED TOOLS - 9/16" Wrench - Alignment bar PACKING LIST 2004382 7002294 7001811 2008775 3/8" x 2 3/4" CARRIAGE BOLT 3/8" FLANGE NUT ASSEMBLY Start with two assembled Easy Flow Alleys. 7 | KICKER PANEL INSTALLATION... - Page 11 Switch the standard Panel Clips on Easy Flow Alleys to the No-Gap Panel Clips included with your Kicker Panel. a. 4 panel clips on each alley bow, 8 total. Connect the two alleys together on the side that you want to form the inside of the curve using 2 panel pins.
- Page 12 Move the Panel Clips on the Kicker Panel into the correct position. Connect the Kicker Panel to the Easy Flow Cattle Alleys to form the outside of the curve. 9 | KICKER PANEL INSTALLATION...
-
Page 13: Anti-Backing Bar Installation
CONNECTING TO ADDITIONAL PRODUCTS ANTI-BACKING BAR INSTALLATION If you opted for an anti-backing bar, see the below instructions to install. The anti-backing bar should be placed at the entry side of the alley with the bar facing in the direction of cattle flow, and you will use the chain for adjustments based on cattle size. - Page 14 Install the chain latch. NOTE: The notch on the latch must face the direction of cattle flow. B x 3 C x 1 D x 3 Install the chain clip and secure to the centre bar on the Alley Stop. 11 | ANTI-BACKING BAR INSTALLATION...
-
Page 15: Rolling Alley Gate Installation
Install the chain into the chain latch and adjust to the proper height for livestock. CONNECTING TO ADDITIONAL PRODUCTS DOUBLE ALLEY MERGE SECTION INSTALLATION Reference the Double Cattle Alley Merge Section installation instructions, available at https://arrowquip.com/resources/manuals. CONNECTING TO ADDITIONAL PRODUCTS ROLLING ALLEY GATE INSTALLATION REQUIRED TOOLS - 9/16"... -
Page 16: Between An Alley And A Kicker Panel
ASSEMBLY 1. Remove panel clips from the Rolling Alley Gate frame. 2. Place the Alley Gate between two alleys. 3. Extend Rolling Alley Gate to the far side with Off-Side Operation Handle. 4. Connect Rolling Alley Gate Frame to the Alley Bow with bolts and secure. 2. - Page 17 ASSEMBLY 1. Remove panel clips from the Rolling Alley Gate frame. 2. Place the Rolling Alley Gate between the Alley and Kicker Panel. 3. Extend Rolling Alley Gate to the far side with Off-Side Operation Handle. 4. Connect the Rolling Alley Gate Frame to the Alley Bow and the Kicker Panel with bolts, and secure.
-
Page 18: Between An Alley And A Tub
C x 8 E x 8 3. BETWEEN AN ALLEY AND A TUB PACKING LIST 2000093 7002318 7001811 3/8" x 4 1/2" CARRIAGE BOLT 3/8" FLANGE NUT ASSEMBLY 1. Remove panel clips from the Rolling Alley Gate frame on the Alley Side only. 2. -
Page 19: Between An Alley And A Vet Cage
B x 8 C x 8 4. BETWEEN AN ALLEY AND A VET CAGE 1. Follow the same steps for connecting a Rolling Alley Gate between an Alley and a Tub. Replace ‘Tub’ with ‘Vet Cage’. 5. BETWEEN A LOADING RAMP AND ALLEY 1. Follow the same steps for connecting a Rolling Alley Gate between an Alley and a Loading Ramp. Replace ‘Tub’ with ‘Loading Ramp’. -
Page 20: Other Products
OTHER PRODUCTS To connect your Easy Flow Cattle Alley to other products in the Arrowquip line, use panel clips and pins to secure products. ADJUSTING THE EASY FLOW CATTLE ALLEY SAFETY LATCHES MUST BE IN PLACE WHEN ADJUSTING THE SIDES OF THE EASY FLOW CATTLE ALLEY. FAILURE TO USE THE SAFETY LATCHES MAY CAUSE THE PANELS TO DROP, RESULTING IN DAMAGE TO PERSONS OR PROPERTY. -
Page 21: Using The Removable Side Panels
RECOMMENDED MAINTENANCE All Arrowquip Products are made with precision parts to require minimal maintenance. However, regular maintenance will keep your equipment running smoothly and safely. 1. Lubricate latches, lube bolts, and hinges regularly with WD-40. Recommended every six months, minimum. -
Page 22: Bill Of Materials
8´ EASY FLOW ALLEY BILL OF MATERIALS 7002337 7001812 7002062 2004618 WING HEAD BOLT 1/2" FLANGE NUT 1/2" x 3" HEX BOLT 2004875 2004619 2004616 2003908 2004874 2007457 2004379 10´ EASY FLOW ALLEY BILL OF MATERIALS 7002337 7001812 7002062 2003891 WING HEAD BOLT 1/2"... -
Page 23: Warranty
WARRANTY Your product must be registered to claim warranty, and to ensure that Arrowquip has the required information to contact you in the event of a product or part recall. Any owner who fails to register their product warranty with Arrowquip through their Authorized Arrowquip Dealer voluntarily voids their warranty. - Page 24 If you have any questions regarding your product or require assistance, please contact Arrowquip’s Client Care Team at 1-877-275-6075 or by email at cs@arrowquip.com. Printed in Canada | April 2021...
Need help?
Do you have a question about the EASY FLOW CATTLE ALLEY and is the answer not in the manual?
Questions and answers