Table of Contents
Advertisement
Available languages
Available languages
Quick Links
F
Panneaux et ensembles de douche à fermeture automatique temporisée
GB
Shower panels and shower kits with automatic, time flow shut-off
DE
Duschelemente und Duschkombinationen mit automatischer Abschaltung
PL
Panele i zestawy natryskowe z zamknięciem automatycznym czasowym
NL
Douchepanelen en douchecombinaties met automatische zelfsluiting
F
Purgez soigneusement les canalisations avant la pose
et la mise en service du produit.
GB
Thoroughly flush the pipes to remove any impurities
before installing and commissioning the mixing valve.
Vor Montage und Inbetriebnahme des Produkts die
DE
Anschlussleitungen regelkonform spülen.
Dokładnie wypłukać instalację przed montażem
PL
i uruchomieniem produktu.
NL
Spoel zorgvuldig de leidingen vooraleer tot installatie
of ingebruikname van het kraanwerk over te gaan.
S P O R T I N G
NT 714
Indice B
Advertisement
Table of Contents

Related Manuals for Delabie SPORTING


Summary of Contents for Delabie SPORTING
- Page 1 NT 714 S P O R T I N G Indice B Panneaux et ensembles de douche à fermeture automatique temporisée Shower panels and shower kits with automatic, time flow shut-off Duschelemente und Duschkombinationen mit automatischer Abschaltung Panele i zestawy natryskowe z zamknięciem automatycznym czasowym Douchepanelen en douchecombinaties met automatische zelfsluiting Purgez soigneusement les canalisations avant la pose et la mise en service du produit.
- Page 2 20°±10 0-9mm...
-
Page 3: Installation
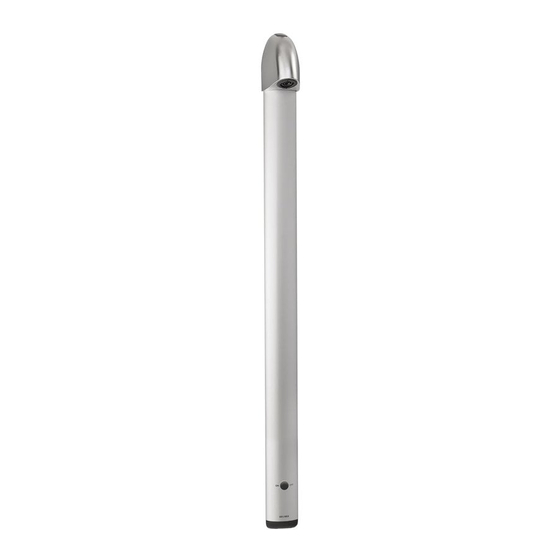
• Monter le joint filtre 8 fourni : il sert à protéger le clapet anti-retour 9. Raccorder au réseau d'eau mitigée à 37°C. SPORTING douche mural en applique (fig. B) • Fixer le diffuseur de douche 5 à 2,10 m du sol. S’il est nécessaire de compenser une épaisseur de carrelage, utiliser la cale en plastique blanc entre la pomme et le mur. -
Page 4: Mise En Service
• Respecter le diamètre des tuyauteries permet d'éviter les coups de bélier ou pertes de pression/débit. (Voir le tableau de calcul du catalogue et en ligne sur www.delabie.fr). • Protéger l'installation avec des filtres, antibéliers ou réducteurs de pression diminue la fréquence d'entretien. -
Page 5: Entretien Et Nettoyage
20 qui s’insère dans la gorge de l’amorceur. Ne pas bloquer la vis. - Replacer l’embout 2 et visser les vis 4 et alimenter en eau. Modèle SPORTING de douche mural en applique ou encastré (fig. H) : - Couper l’alimentation en eau et démonter l’amorceur à l’aide d’une clé BTR. -
Page 6: Operation
• Install the supplied filter 8 to protect the non-return valve 9 and connect to the mixed water supply at 37°C (recommended max. 41°C for the UK and Ireland). Exposed, wall-mounted SPORTING shower (fig. B) • Position the shower diffuser 2.10m from the floor. If necessary, insert the white plastic wedge between the shower head and the wall to equalise the tile thickness. - Page 7 • ENSURE THAT THE SEALS/JOINTS BETWEEN THE WALL PLATE AND THE BODY OF THE MIXER ARE CHECKED REGULARLY (AT LEAST ONCE A YEAR) AND REPLACE THE SEALS/WASHERS IF NECESSARY. Failure to comply with this advice may lead to leakage into the wall, for which Delabie cannot be held responsible.
-
Page 8: Cleaning And Servicing
Impurities in the filter 8 and/or non-return valve 9 (figs. A, B, C, E): shut-off the water supply and clean them. After Sales Care and Technical Support: For Douglas Delabie UK market only: Tel. 01491 824449 email: technical@douglasdelabie.co.uk For all other markets: Tel.03.22.60.22.74 email: sav@delabie.fr The most recent version of this installation guide is available on: www.delabie.com... -
Page 9: Funktionsweise
• Mitgelieferte Siebdichtung 8 montieren: Diese dient dem Schutz des Rückflussverhinderers 9. An Mischwasser 37°C anschließen. Abdichtungen an den Verbindungen überprüfen. SPORTING Dusche Unterputz (Abb. C) • Alle Anschlüsse und Rohre 13-14 so in der Wand montieren, dass sich die Düse 5 2,10 m über OKFFB befindet. - Page 10 Bei Nichtbeachtung dieser Hinweise besteht die Gefahr von Einsickern in die Wand. Hierfür kann DELABIE nicht haftbar gemacht werden. IM ZWEIFELSFALL: TECHNISCHE HOTLINE DELABIE UNTER 069 - 17 32 09 45 2 ANRUFEN. SPORTING Dusche für Deckenmontage (Abb. E) • Brausekopf 16 anschließen.
-
Page 11: Instandhaltung Und Reinigung
Betätigungsknopf fest eindrücken und Schraube 20 in der Rille unterhalb des Betätigungsknopfs anziehen. Schraube nicht festziehen. - Abdeckung 2 wieder aufsetzen, Schrauben 4 festziehen. Modell SPORTING Aufputz oder Unterputz (Abb. H): - Wasser abstellen und Betätigungsknopf mit einem Inbusschlüssel abnehmen. - O-Ringe 21 und 22 überprüfen / reinigen. - Page 12 • Umieścić dostarczoną uszczelkę-filtr 8 : służy do ochrony zaworu przeciwpowrotnego 9. Podłączyć do zasilania wody zmieszanej, ok. 37°C. SPORTING natrysk ścienny natynkowy (rys. B) • Umieścić panel na ścianie tak, aby dyfuzor był na wysokości 2,10 m od posadzki. Jeśli jest to konieczne, wyrównać...
- Page 13 PŁYTĄ Z INOXU, A KORPUSEM BATERII MUSZĄ BYĆ SPRAWDZANE PRZYNAJMNIEJ RAZ NA ROK LUB TYLE RAZY ILE POTRZEBA. W RAZIE POTRZEBY NALEŻY JE ZASTĄPIĆ. Nie przestrzeganie zaleceń może spowodować przeniknięcie wody do ściany, za co DELABIE nie ponosi odpowiedzialności. W PRZYPADKU WĄTPLIWOŚCI, KONTAKT Z SERWISEM TECHNICZNYM DELABIE +48 (022)7894052.
-
Page 14: Obsługa I Czyszczenie
śrubę 20, aby zagnieździła się w szyjce startera. Nie blokować śruby. - Przykręcić końcówkę 2, dwiema śrubami 4. Model SPORTING natrysk ścienny natynkowy lub podtynkowy (rys. H) : - Odciąć zasilanie i odkręcić starter za pomocą klucza nasadowego. - Sprawdzić/oczyścić uszczelki 21 i 22. - Page 15 • Plaats de meegeleverde filterdichting 8, deze dient ter bescherming van de terugslagklep 9. Aansluiten op gemengd water van 37°C. SPORTING muurdouche voor opbouwmontage (fig. B) • Bevestig de sproeikop 5 op een hoogte van 2,10 m t.o.v. de vloer. Indien het nodig is om de dikte van de betegeling te compenseren, de witte kunststof spie tussen de hoofddouche en de muur plaatsen.
- Page 16 VERVANGEN De niet-naleving van deze aanbevelingen kan het risico op insijpeling met zich meebrengen, waarvoor DELABIE niet aansprakelijk kan worden gesteld. IN GEVAL VAN TWIJFEL, CONTACT OPNEMEN MET DE TECHNISCHE DIENST: + 32 (2) 520 16 76. SPORTING douche plafondmodel (fig. E) •...
-
Page 17: Schoonmaken & Onderhoud
Er bevinden zich onzuiverheden op de filter 8 en/of op de terugslagklep 9: sluit de watertoevoer af om ze te reinigen. Dienst na verkoop en technische ondersteuning: Tel: + 32 (2) 520 16 76 e.mail: bsc@bsc.be De laatste bijgewerkte versie van deze folder is beschikbaar op www.delabie.fr...
Need help?
Do you have a question about the SPORTING and is the answer not in the manual?
Questions and answers