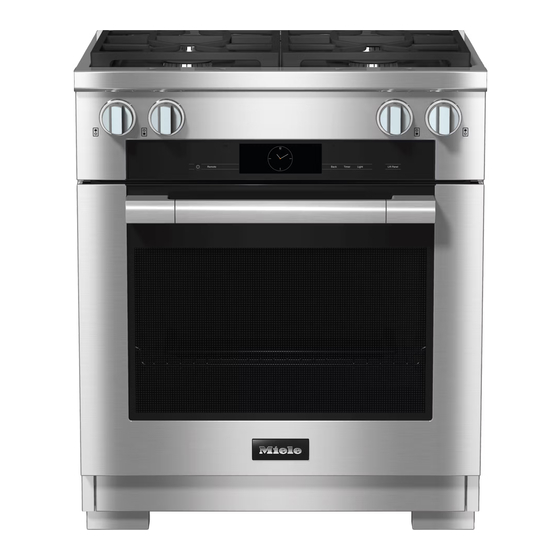
Miele HR 1924-3 DF Operating Instructions Manual
30 inch dual fuel range (electric oven and gas cooktop)
Hide thumbs
Also See for HR 1924-3 DF:
- Installation instructions manual (124 pages) ,
- Installation instructions manual (136 pages)
Table of Contents

Related Manuals for Miele HR 1924-3 DF


Summary of Contents for Miele HR 1924-3 DF
- Page 1 Operating Instructions 30 Inch Dual Fuel Range (electric oven and gas cooktop) To prevent accidents and damage to the range, you must read all instructions supplied before installing or using the appliance. en-US, CA M.-Nr. 11 919 010...
-
Page 2: Important Safety Instructions
IMPORTANT SAFETY INSTRUCTIONS WARNING Children and adults can tip over the range if has not been secured. This may lead to fatal injuries. This range must be secured and connected using the anti-tip device according to the installation instructions. If you have moved the range, slide the locking latch onto the anti- ... - Page 3 IMPORTANT SAFETY INSTRUCTIONS WARNING: If the information in this manual is not followed exactly, a fire or explosion may result causing property damage, personal injury, or death. - Do not use or store gasoline or other combustible liquids or vapors in the vicinity of this or any other appliance.
-
Page 4: Table Of Contents
PerfectClean treated surfaces..................36 Self-Clean-ready accessories..................36 Initial commissioning ....................37 Miele@home ........................37 Basic settings........................38 Cleaning the cooktop before heating it up for the first time ........39 Installing the side racks, heating up the oven for the first time and rinsing the... - Page 5 Recommended temperatures..................55 Self clean ......................... 56 Cooling fan run-on......................56 Proximity sensor (MotionReact) .................. 56 Safety ..........................57 Miele@home ........................57 Remote Control ......................58 Activating MobileStart ..................... 58 SuperVision ........................58 RemoteUpdate ....................... 59 Lift-up panel ........................59...
- Page 6 Contents Electrical version ......................59 Probe ..........................59 Calibrate temperature....................60 Software version......................60 Legal information ......................60 Showroom Program ....................... 60 Factory default ........................ 60 Operating hours (total) ....................60 Alarm + Timer......................... 61 Using the Alarm function....................61 Using the Timer function....................61 Main and submenus .....................
- Page 7 Contents Cleaning and care of the oven..................96 Unsuitable cleaning agents................... 96 Removing normal soiling ....................97 Removing stubborn soiling.................... 97 Cleaning the oven compartment with Self clean ............98 Removing the door ......................101 Installing the door......................102 Side rack removal ......................103 Frequently asked questions..................
-
Page 8: Important Safety Instructions
Both documents contain important information about installation, safety, use and maintenance. Miele cannot be held liable for damage occurring as a result of non- compliance with the instructions. Keep these installation instructions and operating instructions in a safe place and pass them on to any future owner. -
Page 9: Safety With Children
IMPORTANT SAFETY INSTRUCTIONS The oven compartment is equipped with special bulbs to cope with particular conditions (e.g., temperature, moisture, chemical resistance, abrasion resistance, and vibration). These special bulbs must only be used for the purpose for which they are intended. They are not suitable for room lighting. -
Page 10: Technical Safety
Unauthorized installation, maintenance, and repairs can cause considerable danger for the user. Installation, maintenance, and repairs should only be carried out by a Miele authorized technician. Do not carry or lift the range by the oven door handle or the control... - Page 11 Any repairs not performed by a Miele authorized service technician will void the warranty. Miele can only guarantee the safety of the appliance when original Miele parts are used. Faulty components must only be replaced with genuine Miele parts.
-
Page 12: Correct Use
- The appliance is properly installed (electric and water). - A damaged appliance is dangerous. Contact Miele to have it repaired immediately. - Turn off the water supply when the appliance is not in use for an extended period (e.g., vacation). - Page 13 IMPORTANT SAFETY INSTRUCTIONS Do not let food sit in the oven for an extended period of time before or after cooking. Doing so can result in food poisoning or sickness. Loose fitting or hanging garments present a fire hazard. Wear ...
- Page 14 IMPORTANT SAFETY INSTRUCTIONS This oven must only be used for cooking food. Corrosive chemicals and vapors as well as fumes, vapors or heat given off by glues, plastics or flammable liquids and materials could be hazardous. Do not use it as a dryer, kiln, dehumidifier, etc. ...
- Page 15 IMPORTANT SAFETY INSTRUCTIONS Some foods dry out very quickly and can be ignited by high broiling temperatures. Do not use broiling modes for crisping rolls or bread, or to dry flowers or herbs. Instead use the Convection Bake/Convection Roast or Surround modes. If using alcohol in your recipes, please be aware that high ...
- Page 16 IMPORTANT SAFETY INSTRUCTIONS Risk of injury caused by steam. During cooking processes with moisture injection and during the residual moisture evaporation process, steam is produced, which can lead to severe scalding. Never open the door when bursts of steam are being injected. ...
- Page 17 IMPORTANT SAFETY INSTRUCTIONS Wet sponges or cloths can cause burns due to hot steam if they are used to wipe spilled food off a hot cooktop. Some cleaning agents can emit hazardous vapors if they are applied to a hot surface. Be careful when cleaning the cooktop.
- Page 18 IMPORTANT SAFETY INSTRUCTIONS If the cooktop is used for very long periods of time, additional ventilation of the room may be necessary, e.g. by opening windows or doors, or running the ventilation on the highest setting. Do not use pots or pans that are large enough to cover several ...
- Page 19 IMPORTANT SAFETY INSTRUCTIONS Magnets can cause scratches. Do not use the stainless steel surface as a magnetic notice board. Cleaning and care Only clean parts listed in these operating and installation instructions. There is a delicate fiberglass seal around front of the oven ...
- Page 20 from other manufacturers will invalidate the warranty, and Miele cannot accept liability. Only use the Miele probe supplied with the appliance. If it is faulty, it must be replaced with a new original Miele probe. The plastic on the probe can melt at very high temperatures. Do ...
-
Page 21: Guide To The Range
Guide to the range Gas cooktop a Control knob e Extra large burner Rear left burner f Island trim b Control knob g Grates Front left burner h Power burner c Control knob Front right burner d Control knob Rear right burner... -
Page 22: Oven
Guide to the range Oven a Gas cooktop i Wireless precision probe b Controls j Side runners with 6 shelf levels c Door lock k Oven floor with bottom heat element underneath it d Steam inlet openings l Data plate e Air inlets for the blowers with ring The data plate is located behind the heating elements behind them toe-kick panel... -
Page 23: Controls For The Range
Controls for the range Controls for the gas cooktop a Control knob Rear left burner b Control knob Front left burner c Control knob Front right burner d Control knob Rear right burner... - Page 24 Controls for the range The knobs are illuminated with a light ring. The control knob for each burner is used to ignite the burner and regulate the strength of the flame. The burners can be variably adjusted between the lowest and highest flame settings.
-
Page 25: Oven Controls
Controls for the range Oven controls a Recessed On/Off button e Optical interface For turning the oven on and off (for Miele Service only) b Remote sensor button f Back sensor button For controlling the oven via your To go back a step mobile device g Timer sensor button... -
Page 26: On/Off Button
Controls for the range On/Off button The On/Off button is recessed and reacts to touch. Use this button to turn the oven on and off. Proximity sensor The proximity sensor detects when you approach the touch display, e.g., with your hand or body. If you have activated the corresponding settings, you can turn on the oven interior lighting, turn on the oven, or... -
Page 27: Sensor Buttons
MobileStart function is available. As long as this sensor button is illuminated, you can control the oven via your mobile device (see “Settings – Miele@home”). Back Depending on which menu you are in, this will take you back a level or back to the main menu. -
Page 28: Touch Display
Controls for the range Touch display The sensitive surface of the touch display can be scratched by pointed or sharp objects, e.g., pens. Only touch the display with your fingers. Make sure that water cannot get behind the touch display. The touch display is split into multiple areas. -
Page 29: Symbols
The system lock or sensor lock is on (see “Settings – Safety”). The controls are locked. Core temperature when using the probe Remote control (only appears if you are in the Miele@home system and have selected the | setting) -
Page 30: Using The Appliance
Using the appliance You operate the oven via the touch Entering numbers with the roller display by tapping the menu option you Swipe the roller up or down until the want. desired value is displayed in the Each time you tap a possible option, the center. -
Page 31: Entering Letters
The Remote sensor button lights up. Keep your finger on the highlighted You can operate your oven remotely field and drag it to the location you with the Miele app. want. Directly operating on the oven takes priority over operating it via the remote control function on the app. -
Page 32: Features
(voltage/frequency/maximum rated for Miele Ranges. load) for your Range. These can be ordered from the Miele Have this information available if you web store, Miele Customer Service, or need to contact Miele so that any from your Miele dealer. - Page 33 Features Universal tray and Wire Rack with FlexiClips with Wire Rack anti-tip safety notches HFCBBR 30-3 The wireless roast probe antenna on the top right of the oven interior is at risk of damage when sliding in accessories. When sliding in accessories, take care not to bang them against the wireless roast probe.
- Page 34 Features The round perforated baking and AirFry pan HBFP 27-1 can be used for the same purposes as the Gourmet baking and AirFry tray, perforated HBBL 71. The enameled surface of both bakeware pans has been treated with Insert the FlexiClips with Wire Rack PerfectClean.
- Page 35 HUB Gourmet Casserole Dishes Accessories for cleaning and care HBD Gourmet Casserole Dish lids - Opener Miele Gourmet Casserole Dishes can The opener is used for removing the be placed directly on the wire rack. The cover from the oven lighting.
-
Page 36: Gas Cooktop Safety Features
Features Gas cooktop safety features PerfectClean treated surfaces PerfectClean surfaces have very good Automatic re-ignition non-stick properties making them Your gas cooktop features automatic re- exceptionally easy to clean. ignition. If a gas flame is extinguished, Food can be easily removed from these e.g., by food boiling over or by a draft, surfaces. -
Page 37: Initial Commissioning
- a Wi-Fi network Therefore, the availability of featured - the Miele app functions cannot be guaranteed. - a Miele user account You can create a Miele@home availability user account via the Miele app. The ability to use the Miele app... -
Page 38: Basic Settings
Setting up Miele@home The appliance is now ready for use. will appear on the Set up Miele@home? display. To set up Miele@home immediately, select Continue To set it up at a later date, select Skip See “Settings – Miele@home” for information on setting up at a later date. -
Page 39: Cleaning The Cooktop Before Heating It Up For The First Time
Initial commissioning Remove any adhesive labels or Cleaning the cooktop before protective films from the oven and heating it up for the first time accessories. The metal components have a Before heating the oven up, wipe the protective coating. The cooktop may interior with a damp cloth to remove have a slight odor and give off vapor any dust or bits of packaging that may... - Page 40 Initial commissioning Insert the fully telescopic runners Cleaning the oven compartment after with wire rack into the side racks and heating it up for the first time place all trays and wire racks in the Risk of injury caused by hot oven.
-
Page 41: Using The Gas Cooktop
Using the gas cooktop - When purchasing pots and pans, keep Energy-saving tips in mind that the diameter indicated is - Cook in covered pots and pans if typically the top diameter, not the possible. Doing so will prevent bottom diameter. unnecessary heat loss. -
Page 42: Switching On The Burner
Using the gas cooktop Light the emerging gas/air mixture Switching on the burner with a match. Do not turn the control knob clockwise Adjusting the flame past the Off position. When a control knob is activated, a The burners can be variably adjusted spark is developed automatically on all between the lowest and highest flame burners. -
Page 43: Switching Off The Burner
Using the gas cooktop Appearance of the gas flames Yellow flames Contact Customer Service. Yellow tips on the outer cone Normal for LP gas Pale blue flames possibly with yellow tips on the inner cone Normal for natural Switching off the burner Do not turn the control knob clockwise past the Off position. -
Page 44: Using The Oven
Using the oven - Most food can be cooked using Energy-saving tips . Convection Bake Convection Roast Cooking programs Because the blower distributes the heat in the oven compartment straight - If possible, use the automatic away, it allows you to use a lower programs for cooking food. - Page 45 Using the oven Residual heat utilization Settings - The temperature in cooking programs - Select the | | Display QuickTouch using temperatures above 285°F setting for the control elements in (140°C) which take longer than order to reduce energy consumption. 30 minutes to cook can be turned - Select the |...
-
Page 46: Changing Values And Settings For A Cooking Program
Using the oven Turn the oven on. Changing values and settings for a cooking program The main menu will appear. Place the food in the oven Depending on the operating mode, as compartment. soon as a cooking program is in progress, you can change the values or ... -
Page 47: Setting Additional Durations
Using the oven Setting additional durations Changing set durations Select , the duration, or Timer Cooking results can be adversely affected if there is a long delay Select the time you want and change between the food being placed in the oven and the start of cooking. -
Page 48: Preheating The Oven
Using the oven Preheating the oven Auto Roast Moisture Plus function is used to quickly Booster preheat the oven compartment in some If you set a temperature above 210°F operating modes. (100°C) and the function is Booster function can be used with turned on, a rapid preheating phase Preheat any operating mode and has to be... -
Page 49: Preheat
Using the oven Preheat Crisp function The oven compartment only needs to be It is a good idea to use the Crisp preheated in a few cases. function (moisture reduction) function when cooking food which has a moist You can place most dishes in the cold topping, e.g., quiche, pizza, tray bakes oven compartment to make use of the with fresh fruit toppings, or muffins. -
Page 50: Settings
Settings Settings overview Menu option Available settings ... | | | ... Language deutsch english Location Time Display * | | Night dimming Clock type * | Analog Digital Clock format | 24 h 12 h (am/pm) Date Lighting “On” for 15 seconds Start screen Main menu Operating modes... - Page 51 Switch the appliance on | Acknowledge buzzer * | Safety System Lock | Sensor Lock | Miele@home Activate Deactivate Connection status Set up again Reset Set up Remote Control SuperVision SuperVision display | Display in standby * |...
- Page 52 Settings Menu option Available settings Lift-up panel Automatic Manual Electrical version 208V / 60Hz 220V / 60Hz 240V / 60Hz Probe Calibrate temperature Software version Legal information Open Source Licenses Showroom Program Demo Mode | Factory default...
-
Page 53: Opening The "Settings" Menu
If the oven has been connected to a WiFi network and signed into the The time is always visible on the Miele app, the time will be display. synchronized based on the location If you also select the |... -
Page 54: Date
Settings Date Display Set the date. Brightness When the oven is turned off, the date The display brightness is represented by will only appear on the display if the a segment bar. | | setting has Time Clock type Digital - ... -
Page 55: Volume
Settings Volume Booster function is used to quickly Booster Buzzer Tones preheat the oven. If audible signals are turned on, an audible signal will sound when the set function is automatically Booster temperature is reached and at the end turned on during the preheating phase of a set time. -
Page 56: Self Clean
Settings Switch the light on Self clean during cooking program You can set whether the As soon as you approach the touch recommendation for carrying out the display during a cooking process, the Self Clean function will appear ( With oven interior lighting turns on. -
Page 57: Safety
We recommend connecting your oven to your WiFi network with the help of the Miele app or via WPS. The system lock is now active. If you want to use the oven, touch for at Activate least 6 seconds. -
Page 58: Remote Control
Miele@home. function is also available SuperVision Remote Control when the oven is in standby. However, If you have installed the Miele app on the time-of-day display must be turned your mobile device, have access to the on ( | |... -
Page 59: Remoteupdate
If an update is available for your oven, it will - Some software updates can only be automatically download it. Updates will carried out by Miele Customer Service. not be installed automatically. They Lift-up panel must be initiated manually. -
Page 60: Calibrate Temperature
Settings If you have purchased a new Miele Showroom Program probe, you must enter a 12-digit code This function enables the oven to be for this setting. You can then start using demonstrated in dealer showrooms the probe. without heating up. Do not activate this ... -
Page 61: Alarm + Timer
Alarm + Timer Using the Timer sensor button, you can Changing an alarm set a timer (e.g., for boiling eggs) or an Select the alarm on the display or alarm for a specific time. select the Timer sensor button and the alarm you want. Two alarms, two timers, or an alarm and a timer can be set simultaneously. - Page 62 Alarm + Timer Setting the timer Changing the timer Select the timer on the display or If you have selected the | Display select the Timer sensor button and | setting, you will need QuickTouch then the timer duration you want. to turn the oven on before setting the timer.
-
Page 63: Main And Submenus
Main and submenus As different countries have different preferences when it comes to preparing food, the temperatures in °F and °C may not match. The temperatures are defined as they are specified in the table. Menu Recommended Range temp. Operating Modes ... - Page 64 Main and submenus Menu Recommended Range temp. Automatic Programs Special Modes Defrost 100°F (25°C) 75–125°F (25–50°C) Dehydrate 150°F (60°C) 85–175°F (30–70°C) Warm-up Cookware 175°F (80°C) 125–225°F (50–100°C) Proof – – Proof for 15 minutes – – Proof for 30 minutes –...
-
Page 65: Moisture Plus
Moisture Plus Your oven is equipped with a steam Suitable food injection system for cooking with One burst of steam takes about 5– moisture. When baking, roasting, and 8 minutes. The number of bursts of cooking with the Moisture steam and when they are injected will operating mode, optimized Plus depend on the type of food being... -
Page 66: Starting A Cooking Program With Moisture Plus
Moisture Plus Starting a cooking program with Manual You can release 1, 2, or 3 bursts of Moisture Plus steam manually using the touch display. It is normal for condensation to form on the inside of the door during steam With timer injection. - Page 67 Moisture Plus Manual Injecting bursts of steam You can release the bursts of steam as Risk of injury caused by steam. soon as appears and Burst of steam Start Steam can cause severe scalding. is shown in green. In addition, steam condensing on the Please wait until the preheating phase control panel will cause the sensor is completed to allow the steam to be...
-
Page 68: Automatic Programs
Automatic Programs With the wide range of automatic Usage notes programs, you can achieve excellent - After cooking, allow the oven results with ease. compartment to cool down to room temperature again before starting a Categories automatic program. The automatic programs are sorted - Some automatic programs require a into categories to provide a better preheating phase before food can be... -
Page 69: Search
Automatic Programs Search (Depending on language) Under , you can Automatic Programs search by the name of the categories and the automatic programs. This search is a full-text search and can also be used to search for parts of words. From the main menu: ... -
Page 70: Special Modes
Special Modes This section provides information on the Tips following applications: - Remove the packaging and place the - Defrost frozen food on the universal tray or in a suitable bowl or dish. - Dehydrate - Use the universal tray with the wire - Warm-up Cookware rack placed on top of it for defrosting - Proof... -
Page 71: Dehydrate
Special Modes Dehydrate Food for [°F/°C] [h] drying Dehydrating or drying is a traditional 140-160 method of preserving fruit, certain Fruit 2–8 (60–70) vegetables, and herbs. 130-150 Vegetables 4–12 It is important to check that fruit and (55–65) vegetables are fresh, ripe, and not 115-125... -
Page 72: Warm-Up Cookware
Special Modes Warm-up Cookware Proof By preheating the dishware, the food This mode is designed specifically for does not cool down as quickly. proofing dough. Select . Special Modes Use heat-resistant dishware. Select Proof Place the wire rack on shelf level 3 ... -
Page 73: Slow Roasting
Special Modes Serve on preheated plates with very Slow Roasting hot sauce or gravy to prevent it method is ideal for Slow Roasting cooling down too quickly. The meat is cooking beef, pork, veal, or lamb when at an ideal temperature to eat straight you want a tender result. - Page 74 Special Modes Using the Slow Roasting Special Place the wire rack with the universal Mode tray on shelf level 3. Select . Operating Modes Observe the information under “Roasting – Precision Probe”. Select the operating Surround mode and a temperature of 250°F ...
- Page 75 Special Modes Cooking durations/core temperatures Always observe USDA/CFIA food safety guidelines. Meat Cooking Core temperature duration Beef tenderloin, approx. 2.2 lbs (1 kg) - rare 60–80 min 113–119°F (45–48°C) 75–85 min 129–135°F (54–57°C) - medium 110–130 min 145–151°F (63–66°C) - well done Prime rib, approx. 2.2 lbs (1 kg) - rare 70–80 min 113–119°F (45–48°C)
-
Page 76: Sabbath Program
Special Modes Using Sabbath Program Sabbath Program This Special Mode is suitable for the Sabbath Program Yom-Tov weekly Sabbath (Shabbat). You can use Special Modes help to support religious it to keep food warm for up to 24 hours, observance. until after the first door opening. To comply with the Sabbath regulations, ... - Page 77 Special Modes Using Yom-Tov This Special Mode is suitable for days of observance spanning several days across the week. You can use it to keep food warm for up to 76 hours. You can open and close the door multiple times during this time.
-
Page 78: Canning
Special Modes Preparing fruit and vegetables Canning The instructions are for 6 jars with a Risk of infection from bacteria. capacity of 1 L each. The spores of the botulinum Only use jars that are specifically bacterium are not sufficiently killed designed for canning (preserving jars by canning legumes and meat only or jars with a screw cap). - Page 79 Special Modes Canning fruit and vegetables Removing the jars after canning Set the specified post-canning Risk of injury caused by hot warming temperature as soon as surfaces. bubbles are visible in the jars, then The jars will be very hot after canning. leave the jars in the warm oven for the Use oven mitts when removing the time specified.
-
Page 80: Frozen Food/Ready Meals
Special Modes Preparing frozen food/ready meals Frozen food/ready meals Handling and cooking food correctly Tips for cakes, pizza, and baguettes is essential for maintaining good - Bake cakes, pizza, and baguettes on health. parchment paper on the wire rack. Cakes, pizzas, and French fries - Use the lowest temperature should be cooked until golden, not recommended by the manufacturer. -
Page 81: Mymiele
MyMiele Under , you can save Deleting entries MyMiele frequently used applications. Select . MyMiele It is particularly useful with the Touch the entry you want to delete automatic programs as you do not need and keep your finger on it until the to work through every menu level in context menu appears. -
Page 82: Favorites
Favorites You can create and save up to 20 of If additional cooking stages are your own programs. required, select and proceed as for the first cooking stage. - You can combine up to 10 cooking When you have finished setting the stages to accurately program your cooking stages, select Set shelf level... - Page 83 Favorites Changing cooking stages Ready at You can set the time at which the Cooking stages in an automatic cooking program should end. The program that have been saved under a oven will turn off automatically at the different name cannot be changed. time you have set.
- Page 84 Favorites Renaming Favorites Moving Favorites Select . Select . Favorites Favorites Touch the program you want to Touch the program you want to move change and keep your finger on it until and keep your finger on it until the the context menu appears.
-
Page 85: Baking
Baking Using parchment paper Handling and cooking food correctly is essential for maintaining good Miele accessories, e.g., the universal health. tray, are treated with PerfectClean Cakes, pizzas, and French fries (see “Features”). Surfaces treated with should be cooked until golden, not PerfectClean generally do not need to dark brown. - Page 86 Baking Using Automatic Programs Using Moisture Plus Follow the instructions on the display. Use this operating mode with your preferred type of heating for cooking Using Convection Bake with moisture injection. Because the blower distributes the heat Place the food on shelf level 2. around the oven compartment straight Using Intensive ...
-
Page 87: Roasting
Roasting - At the end of the program, take the Always observe USDA/CFIA food food out of the oven, cover it, and safety guidelines. leave to stand for about 10 minutes. This helps retain the juices when the Tips for roasting meat is sliced. -
Page 88: Notes On The Operating Modes
Roasting Using Moisture Plus Notes on the operating modes Use this operating mode with your You can find an overview of all the preferred type of heating for cooking operating modes with their with moisture injection. recommended values in “Main and submenus”. -
Page 89: Probe
Roasting The core temperature can be set up to Probe 210°F (99°C). Information on food and Risk of injury. The metal tip of the respective core temperatures can be probe can cause injury. found in “Special Modes – Slow Roasting”. The cooking duration will be similar for cooking processes with or without the probe. - Page 90 Roasting When to use the probe Risk of breakage! Some automatic programs and Special Do not use the wireless probe to lift Modes will prompt you to use the or carry the food. probe. In addition please note: You can also use the probe with Favorites and with the following - The meat can be placed in a pot or on operating modes:...
- Page 91 Roasting Tip: If the food is not cooked sufficiently If the wireless probe is no longer when the core temperature is reached, recognized during cooking, a message insert the probe into another place or will appear in the display. Reposition increase the core temperature and the probe in the food.
-
Page 92: Broiling
Broiling - The tray under the insert will collect Risk of injury caused by hot the meat juices and stop them from surfaces. burning so that they can be used for If you broil with the door open, the making gravy and sauces. -
Page 93: Notes On The Operating Modes
Broiling Selecting the cooking duration Using Broil Broil thinner cuts of meat/slices of Use this operating mode to broil flat thin fish for approx. 6–8 minutes per side. cuts in smaller quantities and for It is best to broil food of a similar browning small baked dishes. -
Page 94: Gas Cooktop Cleaning And Care
Gas cooktop cleaning and care Unsuitable cleaning agents Danger of injury caused by hot burners. To avoid damaging the surfaces of your appliance, do not use: The burners will be hot after use. Turn off the cooktop. - cleaning agents containing soda, Allow the burners to cool down alkali, ammonia, acids, or chlorides before cleaning the cooktop. - Page 95 Gas cooktop cleaning and care Cleaning the grates Ignitor Remove the grates. Do not let the ignitor get wet. If it gets wet, it will not spark. Clean the grates in a dishwasher or with a solution of warm water and a ...
-
Page 96: Cleaning And Care Of The Oven
Cleaning and care of the oven - solvent-based cleaning agents Risk of injury caused by hot - stainless steel cleaners surfaces. The oven gets hot during operation. - dishwasher cleaning agents You could burn yourself on the - glass cleaners heating elements, oven - cleaning agents for glass-ceramic compartment, or accessories. -
Page 97: Removing Normal Soiling
Cleaning and care of the oven Removing normal soiling Removing stubborn soiling There is a fiberglass seal around the Do not line the oven (e.g., with oven compartment which seals the aluminum foil) and do not use inside of the glass oven door and can standard oven cleaners unless they be damaged by rubbing and scouring. -
Page 98: Cleaning The Oven Compartment With Self Clean
Cleaning and care of the oven The following accessories are suitable Cleaning the oven compartment for the Self Clean program and can be with Self clean left in the oven compartment during the Instead of cleaning the oven process: compartment by hand, you can run the –... - Page 99 Cleaning and care of the oven Starting Self Clean at a later time Danger of injury caused by hot To start the Self Clean program later, surfaces. select Start at The oven gets much hotter during the Self Clean program than during ...
- Page 100 Cleaning and care of the oven Spilled fruit juices may cause lasting Danger of injury caused by hot discoloration of enameled surfaces. surfaces. This discoloration is permanent but At the end of the Self Clean program, will not affect the properties of the the oven will still be very hot.
-
Page 101: Removing The Door
Cleaning and care of the oven Raise the door up till it rests partially Removing the door open. The door weighs approx. 39.7 lbs (19 kg). The oven door is connected to the hinges by retainers. Before removing the door from the retainers, the locking clamps on both hinges have to be released. -
Page 102: Installing The Door
Cleaning and care of the oven Installing the door To relock the locking clamps, turn them back up to the horizontal position as far as they will go. Hold the door securely on both sides and carefully install it back into the hinge retainers. -
Page 103: Side Rack Removal
Cleaning and care of the oven Side rack removal Danger of injury caused by hot surfaces. The oven gets hot during operation. You could burn yourself on the heater elements, oven compartment, or accessories. Allow the heating elements, oven compartment, and accessories to cool before removing the side racks. -
Page 104: Frequently Asked Questions
You can save time and money in many cases, as you do not need to contact Miele Customer Service. Information to help you rectify faults yourself can be found at www.miele.com/ service. The following tables are designed to help you to find the cause of a malfunction or a fault and to resolve it. - Page 105 The ignitor does not The breaker in the building’s wiring system has function properly. tripped. Contact a qualified electrician or Miele Customer Service if necessary. There is food residue stuck between the ignitor and the burner cap. Remove any soiling (See “Gas cooktop cleaning and care”).
- Page 106 Check if the breaker has tripped. If it has, contact a qualified electrician or Miele Customer Service. If the display does not respond, there is a fault with the controls.
- Page 107 Turn off the microwave when you are using the wireless probe. If the probe is still not being recognized, it is faulty. You can purchase a new probe from your Miele dealer or from Miele Customer Service. The steam injection system is faulty.
- Page 108 Frequently asked questions Problem Possible cause and solution The cake/cookies are A different temperature than that given in the recipe not baked properly. was used. Select the temperature required for the recipe. The ingredient quantities are different from those given in the recipe.
- Page 109 | Lighting “On” for 15 setting. seconds The oven interior lighting is faulty. Contact Miele Customer Service. The oven interior lighting The halogen lamp is faulty. does not turn on. Danger of injury caused by hot surfaces. The oven gets hot during operation. You could burn yourself on the heater elements, oven compartment, or accessories.
-
Page 110: Customer Service
In the event of a fault which you cannot remedy yourself, please contact your Miele dealer or Miele Customer Service. You can book a Miele Service Call online at www.miele.com/service. Contact information for Miele Customer Service can be found at the end of this document. -
Page 111: Caring For The Environment
Consult with local authorities, dealers or Miele in order to dispose of and recycle electrical and electronic appliances. Miele assumes no responsibility for deleting any personal data left on the appliance being disposed. -
Page 112: Declaration Of Conformity
Declaration of conformity Compliance Statement Radio Modules This device complies with Part 15 of the This device contains the following food FCC Rules and contains licence-exempt probe radio module: transmitter(s)/receiver(s) that comply with Innovation, Science and Economic FCC ID SSVNAEPI02 Development Canada’s licence-exempt IC ID 5669B-NAEPI02... -
Page 113: Copyrights And Licenses
Copyrights and licenses Miele uses their own and third party software which is not subject to any so-called open source license for the operation and control of the device/appliance. This software/these software components are protected by copyright. The copyright powers of Miele and third parties have to be respected. -
Page 114: Copyrights And Licenses For The Communication Module
This software/ these software components are protected by copyright. The copyrights held by Miele and third parties must be respected. This communication module contains software components which are distributed under open source license conditions. - Page 115 Customer Service. U.S.A. Canada Miele, Inc. Importer Miele Limited National Headquarters Headquarters and Miele Centre 9 Independence Way 161 Four Valley Drive Princeton, NJ 08540 www.mieleusa.com Vaughan, ON L4K 4V8 www.miele.ca Customer Support Phone: 888-99-MIELE (64353) Customer Care Centre info@mieleusa.com...
- Page 116 HR 1924-3 DF en-US, CA M.-Nr. 11 919 010 / 12...
Need help?
Do you have a question about the HR 1924-3 DF and is the answer not in the manual?
Questions and answers