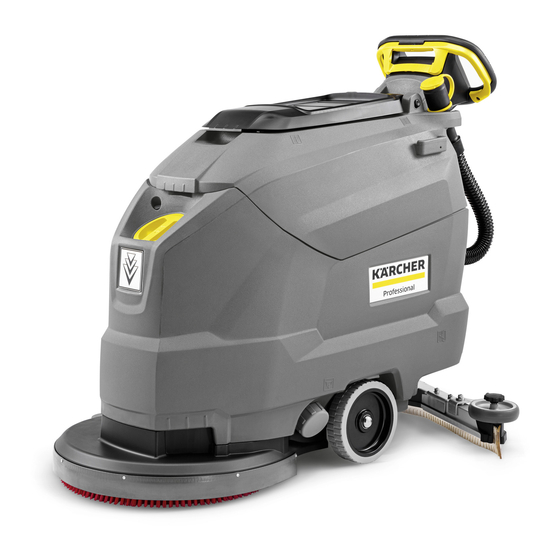
Kärcher BD 43/25 C Bp Manual
Hide thumbs
Also See for BD 43/25 C Bp:
- Manual (240 pages) ,
- Original instructions manual (18 pages) ,
- Service manual (229 pages)
Table of Contents
Advertisement
Available languages
Available languages
Quick Links
Advertisement
Table of Contents

Subscribe to Our Youtube Channel
Related Manuals for Kärcher BD 43/25 C Bp


Summary of Contents for Kärcher BD 43/25 C Bp
- Page 1 English BD 43/25 C Bp Русский 59657050 02/18...
-
Page 2: Table Of Contents
Please read and comply with Function Environmental protection these original instructions prior The scrubbing vacuum cleaner is used for to the initial operation of your appliance and The packaging material can be the wet cleaning of level floors. store them for later use or subsequent own- recycled. -
Page 3: Operating And Functional Elements
Operating and Functional Elements 1 Fluff filter 20 Suction hose Colour coding 2 Safety button 21 Water quantity regulator – The operating elements for the cleaning 3 Battery * 22 Battery socket process are yellow. 4 Drain hose for wastewater with dosing 23 Vacuum bar lowering lever –... -
Page 4: Before Startup
Push down the device holding the push Note: Please read the operating instruc- Operator console handle and push it forwards up to the tions of the charger manufacturer, espe- edge of the pallet. cially the chapters on safety instructions! ... -
Page 5: Shutting Down The Appliance . En
Detergent Inclination WARNING If the vacuum result is unsatisfactory the in- Risk of damage. Only use the recommended clination of the straight vacuum bar can be detergents. With other detergents, the opera- modified. tor bears the increased risk regarding the op- ... -
Page 6: Care And Maintenance
The vacuum lips must be replaced or reversed Care and maintenance Keep children away from acid and if they are worn down to the wear indicator. batteries DANGER Remove the vacuum bar. Risk of injury! Set the programme selector ... -
Page 7: Frost Protection
Insert the battery into the device as Pay attention to correct poles. CAUTION shown above. Place the waste water tank on the appli- When the batteries are installed and re- Insert the spacer between the battery ance. moved, the stability of the appliance can be and the device on the side indicated in Note:... -
Page 8: Accessories
Pull out the float casing towards the top. Cleaning the floater Detach locking hooks. Open the cover of the waste water tank. Clean float and bottom part. Assemble the float casing and insert it into the device. 1 Swimmer casing 2 Lock hook 3 Float... -
Page 9: Technical Specifications
Technical specifications EU Declaration of Conformity We hereby declare that the machine de- Power scribed below complies with the relevant Nominal voltage basic safety and health requirements of the Battery capacity 80/76 EU Directives, both in its basic design and (5h) construction as well as in the version put Average power consump-... - Page 10 Описание элементов управления и рабочих узлов 1 Сетчатый фильтр 18 Барашковые гайки для крепления Цветная маркировка 2 Предохранительный выключатель всасывающей планки – Органы управления для процесса 3 Аккумулятор * 19 Всасывающая планка * очистки желтого цвета. 4 Сливной шланг для грязной воды с 20 Всасывающий...
- Page 11 Снять колодки спереди и рядом с ко- Отсоединить разъем аккумулятора Пульт управления лесами. со стороны устройства. Прижать вниз буксирную скобу ВНИМАНИЕ устройства и сдвинуть вперед до Опасность повреждения! края поддона. – Не соединять зарядное устройст- Поднять устройство с поддона и во...
- Page 12 Удаления слоя со всех ще- RM 752 Мойка лочностойких поверхно- ВНИМАНИЕ стей (например, PVC) Опасность повреждения напольного Удаление слоя с линоле- RM 754 покрытия. Устройство не эксплуати- умных полов ровать на одном месте. Добавить моющее средство в резер- Опустить педаль шасси для тран- вуар...
- Page 13 Извлечь штекер аккумулятора из ма- Слить чистую воду Работы по техническому шины. обслуживанию Слить из прибора грязную воду и Заменить или перевернуть оставшуюся чистую воду и утилизо- всасывающие кромки вать. План технического обслуживания После каждой эксплуатации ВНИМАНИЕ Опасность повреждения. Не опрыски- вать...
- Page 14 Установить резервуар грязной воды Снятие резервуара для грязной воды Рекомендуемые аккумуляторы на прибор. Слить грязную воду. Указание: Перед началом работы прибора заря- дить аккумуляторы. См. раздел „Зарядка аккумуляторов“. Вынуть аккумуляторы Установить переключатель выбора программы в положение „OFF“. ...
- Page 15 Неполадки ОПАСНОСТЬ вытянуть вилку зарядного устройст- Слить из прибора грязную воду и Опасность получения травм! Перед ва из розетки. оставшуюся чистую воду и утилизо- проведением любых работ на устрой- Извлечь штекер аккумулятора из ма- вать. стве установить переключатель вы- шины.
- Page 16 Принадлежности Обозначение № детали Описание Дисковая щетка, белая (очень мягкая) 4.905-024.0 Для щадящей очистки чувствительных поверхностей. Дисковая щетка, натуральная (мягкая) 4.905-023.0 Из натуральных волокон для чистки и полировки. Дисковая щетка, красная (средний, 4.905-022.0 Для использования при всех стандартных задачах мойки. стандарт) Дисковая...
Need help?
Do you have a question about the BD 43/25 C Bp and is the answer not in the manual?
Questions and answers