Table of Contents
Advertisement
Quick Links
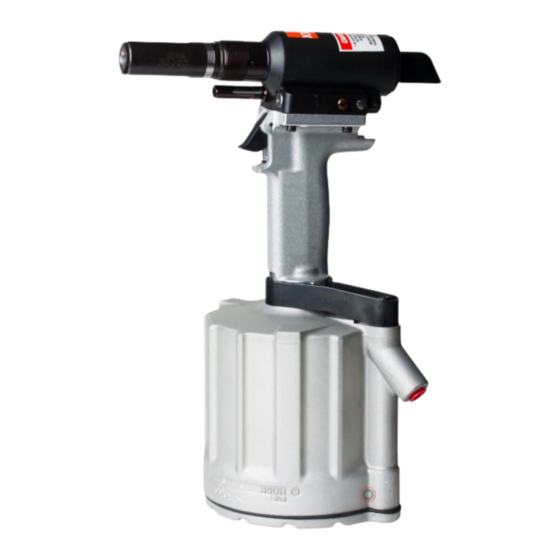
HUCK GUN – 10256
The powerful Huck 10256 air gun designed for Ø 7.9 & 9.5mm (5/16" & 3/8") diameter Huck® fasteners.
Made in the USA, the 10256 Huck gun is the best in its class lock bolt & structural rivet gun. When it's Huck,
you know it's proven technology that works. It features a high-quality aluminium alloy body, ergonomically
designed handle and soft-setting installation to reduce operator impact. This tool has been built tough for
the high-speed installation of Huck fasteners diameter sizes 7.9 mm (5/16") and 9.5 mm (3/8"). The 10256
provides optimum stroke for one-cycle installations, concentric (in-line) pull piston and a new front gland
design, allowing for easy piston removal.
Huck Gun HG-10256 Specifications
Weight
5.0Kg
Air Pressure
6.2 – 7.59 bar (90-100psi)
Stroke
22.35mm
Pulling Force
44.42kN @ 6.2bar (90psi)
Huck bolts & Huck rivets 7.9mm (5/16")
Fastener Capacity
& 9.5mm (3/8") with different noses
* Nose assemblies sold separately.
* Additional hose connection required: min. 3/8" Air hose with fittings
Tool includes: Operating manual, pintail deflector, small
Hose w/ 1/4" NPT & BSP (British Standard Pipe) fittings,
bleed tool, fill bottle, adaptor tube, stall nut.
Page 1 of 12
Advertisement
Table of Contents

Related Manuals for Huck AEROBOLT 10256


Summary of Contents for Huck AEROBOLT 10256
- Page 1 The powerful Huck 10256 air gun designed for Ø 7.9 & 9.5mm (5/16” & 3/8”) diameter Huck® fasteners. Made in the USA, the 10256 Huck gun is the best in its class lock bolt & structural rivet gun. When it’s Huck, you know it’s proven technology that works.
-
Page 2: Safety Instructions
Huck equipment. 18. Tools with ejector rods should never be cycled with 2. Huck equipment must be maintained in a safe working out nose assembly installed. condition at all times. Tools and hoses should be inspected 19. -
Page 3: Workplace Hazards
IV. REPETITIVE MOTION HAZARDS: VIII. VIBRATION HAZARDS: 1. When using assembly power tool, the operator can 1. Exposure to vibration can cause disabling damage to experience discomfort in the hands, arms, shoulders, neck the nerves and blood supply to the hands and arms. or other parts of the body. -
Page 4: Specifications
POWER SOURCE: 110 psi (6.2 bar) 110 psi MAX shop air MIN STROKE: HOSE KITS: .875 inches (2.22 cm) Use only genuine HUCK Hose Kits .750 inches (1.91 cm) when used rated @ 10,000 psi working with pressure. Stroke Limiter 118362-1... -
Page 5: Preparation For Use
Air Inlet Connector, then attach optional Air Hose supplied with tool. Maintenance NOTE: WARNING Sticker and HUCK Trademark Sticker DAILY must be always in place and readable. 1. If a Filter-Regulator-Lubricator unit is not being used,... -
Page 6: Disassembly Procedure
Operating Instructions Failure to understand WARNINGS may cause serious personal injury. Failure to understand CAUTIONS may cause damage to structure and Tool. LOCKBOLT® FASTENER INSTALLATION: BLIND FASTENER INSTALLATION: Place pin in work hole and place collar over pin. See WARNING. (If Collar has only one tapered end, that end must be facing toward tool, not next to workpiece.) Remove excess gap from between the sheets to permit Hold pin and push nose assembly onto pin protruding... - Page 7 9. If Check Valve Seat (Figure 10) is damaged, contact 22. Turn cylinder and handle upside down and secure in a your HUCK representative. If Relief Valve Seat is vise. damaged, it can be removed as described in step 10.
- Page 8 Assembly Clean components with mineral spirits or similar solvent. Inspect for wear/damage and replace as necessary. Replace all seals of disassembled components using Service Parts Kit, P/N 256KIT. Smear LUBRIPLATE 130AA or PARKER-O-LUBE on rings and mating parts to ease assembly.
- Page 9 Fill and Bleed Equipment Required: STEP 4: Attach the tool air source momentarily to seat Air - Shop airline 90-100 psi Piston at bottom of Air Cylinder, then disconnect tool. max. With Reservoir Fill port facing up, lay tool on its side. - Air regulator STEP 5: Install Fill Bottle in - Fill Bottle (Fig.
- Page 10 Head/Handle Components Page 10 of 12...
- Page 11 Air Cylinder Components Page 11 of 12...
-
Page 12: Troubleshooting
Accessories Stroke Limiter - 118362-1 Reduces stroke to .750 inches (1.91 cm) Stall Nut - 120824 Pintail Collection Bag - 125655 Service Tool Kit - 126104 Includes: Piston Assembly Bullet (Fig. 2) - 123111-1 Spacer (Fig. 2) - 123112-1 Troubleshooting Always check out the simplest possible cause of a malfunction first.
Need help?
Do you have a question about the AEROBOLT 10256 and is the answer not in the manual?
Questions and answers