Table of Contents
Advertisement
Advertisement
Table of Contents

Related Manuals for Turbosol MINI AVANT


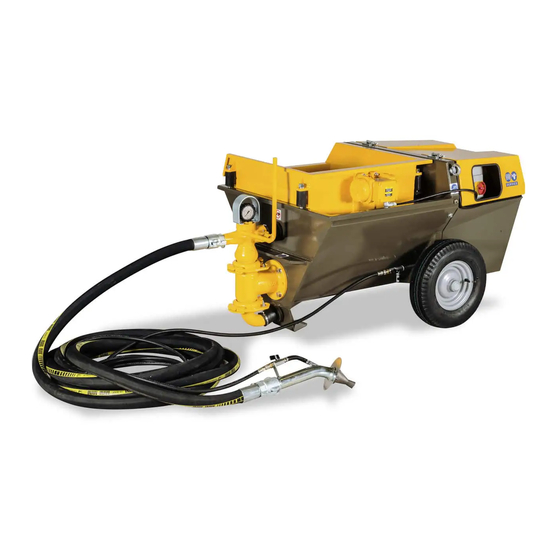
Summary of Contents for Turbosol MINI AVANT
- Page 1 ORIGINALI USE AND MAINTENANCE MANUAL MINI AVANT IS11/12 - 561185 Serial number READ THIS MANUAL CAREFULLY BEFORE USING THE MACHINE. THIS MANUAL IS AN INTEGRAL PART OF THE MACHINE AND MUST BE KEPT FOR FUTURE REFERENCE UNTIL THE MACHINE IS DISPOSED OF...
- Page 2 IL PRESENTE MANUALE E' PROPRIETA' DELLA OGNI RIPRODUZIONE ANCHE PARZIALE E' VIETATA...
-
Page 3: Table Of Contents
5.2.1 Piping anchorage ............................2 5.3 FITTINGS ................................. 3 5.4 CONNECTIONS............................... 4 5.4.1 Electric connection ............................4 5.4.1.1 MINI AVANT THREE-PHASE ........................4 5.4.1.2 MINI AVANT SINGLE-PHASE ........................6 5.4.1.3 MINI AVANT VARIO........................... 6 5.4.2 Piping line connection ........................... 7 5.4.3 Air pipe connection............................ - Page 4 7.3 CHECKS BEFORE START-UP........................4 7.4 CONTROLS ..............................4 7.5 EMERGENCY STOP............................7 7.6 STARTING THE MACHINE..........................7 7.6.1 MINI AVANT SINGLE/THREE PHASE......................7 7.6.2 MINI AVANT VARIO............................7 7.6.3 Start-up ................................. 8 7.7 CLEANING AND THE END OF A WORK SESSION ..................8 MAINTENANCE...............................
-
Page 5: Ce Declaration
MINI AVANT 1 - CE DECLARATION IS11/11 - 561185 CE DECLARATION OF CONFORMITY An original copy of the CE Declaration of Conformity is supplied separately from the manual. Cap. - Pag. THIS MANUAL IS PROPERTY OF ANY TOTAL OR PARTIAL REPRODUCTION IS STRICTLY FORBIDDEN... -
Page 6: General Information
MINI AVANT 2 - GENERAL INFORMATION IS11/11 - 561185 IMPORTANCE OF THE MANUAL This "Use and Maintenance Manual" has been drawn up following the guidelines envisioned in the relevant European Directives in order to guarantee simple and full understanding of the subjects by the operators authorised to operate and perform maintenance on the machine in question. -
Page 7: Machine Off
MINI AVANT 2 - GENERAL INFORMATION IS11/11 - 561185 DANGER: this symbol indicates the presence of electrical energy. IMPORTANT NOTE: this symbol supplies useful information. MACHINE OFF Before performing any type of maintenance and/or regulation on the machine, it is mandatory to isolate the electric power supply. -
Page 8: General And Contact Information
GENERAL AND CONTACT INFORMATION The MINI AVANT electric plastering machine and conveyor of common and special mortars can be supplied in different set-ups and with different accessories, therefore it is not said that all components described in this manual are mounted on your machine. -
Page 9: Technical Description
MINI AVANT 3 - TECHNICAL DESCRIPTION IS11/11 - 561185 NAME OF MACHINE CE mark plate FIG.01 The CE mark appears on a 159x95 mm plate (FIG. 01) that is partially screen-printed and partially engraved. The machine's series (1), model (2) and serial number (3) are engraved on the nameplate, as well as its power rating. The meaning of the symbols used are as follows. -
Page 10: Dimensions Of Machine
MINI AVANT 3 - TECHNICAL DESCRIPTION IS11/11 - 561185 FIG.03 DIMENSIONS OF MACHINE The following are the machine's overall dimensions and gross weight (in working conditions). VERSION LENGTH WIDTH HEIGHT WEIGHT Single-phase 1590 mm 860 mm 750 mm 240 kg... -
Page 11: Technical Data
MINI AVANT 3 - TECHNICAL DESCRIPTION IS11/11 - 561185 TECHNICAL DATA E (three-phase) Power supply voltage E (single-phase) 200÷230 VARIO Command circuit power supply 24 AC Input power Short circuit current pumping stop pneumatic control Calibration pressure pumping re-start pneumatic control 1450 ÷1800... -
Page 12: Intended Uses
FIELD OF USE: construction sector. DECLARED USE: conveying and spraying plasters. PRODUCTS USED FOR WORKING MINI AVANT elaborates ready-mixed products such as: • Cement mortars - Ready-mixed with cement base (WITH DEDICATED KIT ONLY). NAME OF THE COMPONENTS FIG.04 and FIG. 05 show and names the main components that make up the machine. - Page 13 FIG. 04-REF. 11 - Reducer FIG. 04-REF. 12 - Tensioner FIG.04-REF.13 - Connection for pneumatic controls FIG.04-REF.14 - Electric control board with inverter (MINI AVANT VARIO ONLY) FIG.04-REF.15 - Electric Remote control board (MINI AVANT VARIO ONLY) FIG.05-REF.1 - Intake collector FIG.05-REF.2 - Quick connection...
-
Page 14: Transport And Handling
MINI AVANT cannot be towed on roads. MINI AVANT can also be carried on motor vehicles; loading, securing and transporting the machine on a motor vehicle should always be done in compliance with the rules of the road. See paragraph 4.2, LIFTING, for information on using lifting apparatus to load MINI AVANT on a vehicle. -
Page 15: Installation
MINI AVANT 5 - INSTALLATION IS11/11 - 561185 POSITIONING THE MACHINE Place the machine in a horizontal position; the maximum gradient allowed is 5° both lengthwise and crosswise (FIG.06). 5° 5° 5° FIG.07 The machine must be positioned in the point of the worksite that allows the pipes and hoses to their full extension. -
Page 16: Piping Anchorage
5 - INSTALLATION IS11/11 - 561185 Use only original pipes and fittings. The pipes must be fitted by TURBOSOL PRODUZIONE S.p.A. or by companies expressly authorised by TURBOSOL. In no case is TURBOSOL PRODUZIONE S.p.A. responsible for damage/injury to objects/persons caused by using non-original piping or fittings. -
Page 17: Fittings
MINI AVANT 5 - INSTALLATION IS11/11 - 561185 FITTINGS Make sure the fittings are clean and in good order at all times. Cam fittings - Connect the pipe segments, checking that the rubber gasket is present (FIG.10-REF.1). - Tighten the levers completely (FIG.10-REF.2). -
Page 18: Connections
- high sensitivity differential switch. - Connect MINI AVANT to the site electric control board using an electric cable covered with neoprene, marked H07RN-F. - Insert the electric vibrator plug into the corresponding socket positioned on the electric control board: (FIG.11-REF.1) for MINI AVANT AND THREE-PHASE or SINGLE-PHASE... - Page 19 MINI AVANT 5 - INSTALLATION IS11/11 - 561185 FIG. 13 -Check the correct rotation of the engine: It must be anti-clockwise, as indicated by the label positioned on the engine (FIG.14). If this is not the case, switch the engine off and invert the polarity, using a screwdriver on the power supply socket positioned in the lower part of the electric control board (FIG.15).
-
Page 20: Mini Avant Single-Phase
• of 10 mm[squared] for a distance up to 50 m. - Connect the electric power supply cable to the electric control board socket (FIG.16-REF.1). - Connect the supplied electric cable (FIG.16-REF.2) to the electric control board socket inside MINI AVANT VARIO (FIG.16- REF.3). -
Page 21: Piping Line Connection
MINI AVANT 5 - INSTALLATION IS11/11 - 561185 FIG.16 5.4.2 Piping line connection - Connect the piping to the flow valve body fitting (FIG.17). - Connect the gun to the piping, eliminating the gasket: in this way the gun can turn with respect to the piping (FIG.18). -
Page 22: Air Pipe Connection
MINI AVANT 5 - INSTALLATION IS11/11 - 561185 FIG.18 5.4.3 Air pipe connection - Connect the air piping to the pneumatic control connection (FIG.19). - Connect the air piping to the gun connection (FIG.19). It is preferable to couple the mortar pipe and the air pipe along their entire length. -
Page 23: Safety
MINI AVANT 6 - SAFETY IS11/11 - 561185 SAFETY DEVICES VIBRATING FRAME The vibrating frame prevents contact with the moving parts inside the hopper. Its removal causes the machine to stop. BODYWORK The bodywork protects from contact with internal hot and moving parts. The machine stops when it is opened. -
Page 24: Safety Signs
MINI AVANT 6 - SAFETY IS11/11 - 561185 SAFETY SIGNS The safety signs are adhesive labels affixed outside the machine (FIG.20). The safety signs must be kept clean and clearly visible at all times. Damaged signs must be replaced immediately with new ones obtained from the manufacturer. - Page 25 MINI AVANT 6 - SAFETY IS11/11 - 561185 REF. LABEL DESCRIPTION Danger Electric shocks It is mandatory to read the instruction manual before starting to operate. It is mandatory to lift the machine using the hooks indicated TAB.04 Cap. - Pag.
- Page 26 MINI AVANT 6 - SAFETY IS11/11 - 561185 Wearing individual protective devices is mandatory, in compliance with the Standards regarding health and safety in the workplace in force in the country of use. The employers, staff in charge and operators must be aware of and apply these Standards.
-
Page 27: Residual Risks
MINI AVANT 6 - SAFETY IS11/11 - 561185 RESIDUAL RISKS Following the instructions and recommendations contained in this manual will allow you to use the machine correctly and reduce any residual risks. In particular: Read the use and maintenance manual before starting the machine. -
Page 28: Use And Operation
It is possible to make the mixture circulate partially or completely in the hopper by acting on the by-pass lever. If MINI AVANT is to be used only as a conveyor, the gun does not have to be mounted and the air cock described above is just a pumping start/end remote control. - Page 29 MINI AVANT 7 - USE AND OPERATION IS11/11 - 561185 To use the ready-mixed product kit the vibrating sieve must be replaced with the protection grill (FIG.21). FIG.21 - Replace the intake valve body (optional): • Release the two joints (FIG.22-REF.1).
- Page 30 The ready-mixed materials valve body cannot be used with traditional mixtures and with materials that have aggregates with particle size exceeding 3 mm. To increase the performance of MINI AVANT, with ready-mixed products it is a good idea to pump at second speed. To do this: - Put the machine in "machine off" mode.
-
Page 31: Checks Before Start-Up
MINI AVANT 7 - USE AND OPERATION IS11/11 - 561185 CHECKS BEFORE START-UP Before starting the machine, make sure that no-one, apart from staff in charge, are in the vicinity. - Check that the air flow cock (FIG.27-REF.6) is open, that the bleed cock is closed (FIG.27-REF.7) and that the air cock to the gun (FIG.28-REF.8) is open. - Page 32 MINI AVANT 7 - USE AND OPERATION IS11/11 - 561185 FIG.28 FIG.29 MINI AVANT single-phase and three-phase FIG. REF. DESCRIPTION Master switch Vibrator switch By-pass lever Line manometer Pneumatic control cock (to the machine) Bleed cock Pneumatic control cock (to the gun)
- Page 33 Note: Switches (FIG.27-REF.1A) and (FIG.27-REF.3A) are not present in the electric control board present inside the MINI AVANT VARIO version bodywork. A green indicator, normally on, and a red indicator, normally off, are present in the electric control board on the stand of the VARIO versions.
-
Page 34: Emergency Stop
- Open and close the cock quickly two or three times (FIG.27.REF.6) to check the correct functioning of the pneumatic control: MINI AVANT must stop and re-start. For MINI AVANT THREE-PHASE only - Make sure that the engine turns in the right direction (see par.5.4.1.1 ). -
Page 35: Start-Up
- The slurry starts to escape from the gun and when it has finished, the mixture will start to escape. MINI AVANT is now operational and can be stopped by acting on the air cock positioned on the gun (for all versions) or on the button (FIG.29-REF.18) (for VARIO version only). - Page 36 MINI AVANT 7 - USE AND OPERATION IS11/11 - 561185 - Disconnect the mortar pump flow pipes (FIG.05-REF.4) and insert one or two sponges into the mouth of the mortar pipe (FIG.30). All of the material present in the piping can be used (projected or recovered in a bucket).
- Page 37 MINI AVANT 7 - USE AND OPERATION IS11/11 - 561185 FIG.32 FIG.33 - Use a jet of water to wash the hopper, mixing device and pump intake. - Re-mount the vibrating frame. - Re-mount the intake collector and the flow valve body, checking that the sealing ring (FIG.33-REF.1) adheres perfectly to the profile (FIG.33-REF.2).
-
Page 38: Maintenance
Check the compressor oil level at the start of the shift, before starting work: the compressor oil level must always correspond to the maximum level indicated on the stick (FIG.34) and the measurement must be taken with MINI AVANT level (FIG.07). It is unlikely that the compressor works in a perfectly horizontal position on site, as recommended by the manufacturer. -
Page 39: Operations To Be Performed Every Week
MINI AVANT 8 - MAINTENANCE IS11/11 - 561185 FIG.35 FIG.36 Preventive care AT the end of the work session it is good practice to spray the machine with liquid that prevents the formation of deposits of material during the successive work session. -
Page 40: Membrane Control
MINI AVANT 8 - MAINTENANCE IS11/11 - 561185 Membrane control Check that the membrane (FIG.38-REF.1) is integral: the rubber must not be split. FIG.38 8.1.3 Operations to perform every 500 hours Compressor oil replacement Eliminate the oil by loosening the cap positioned at the base of the compressor (TAB.6, NP 5) and replace it with 0.485 litres of SAE 15W40 multigrade oil. -
Page 41: To Be Carried By Qualified Staff
MINI AVANT 8 - MAINTENANCE IS11/11 - 561185 TO BE CARRIED BY QUALIFIED STAFF 8.2.1 Operations to be performed every 6 months or every 500 hours - Check the flexible air pipe. - Inspect the electric system. - Check and replace the transmission belts if necessary (FIG.39-REF.1) and (FIG.39-REF.2). -
Page 42: Scrapping
MINI AVANT 9 - SCRAPPING IS11/11 - 561185 GENERAL RECOMMENDATIONS Follow the local regulations in the country of use when scrapping the machine. Separate the machine parts according to the type of material (plastic, rubber, iron, etc.). The oil and the storage cell must be handed over to authorised firms specialising in the disposal of polluting products. -
Page 43: Troubleshooting
MINI AVANT 10 - TROUBLESHOOTING IS11/11 - 561185 10.1 THE MIXTURE DOES NOT ESCAPE FROM THE GUN 10.1.1 Gun blockage. EFFECT High pressure (over 12 bar) indicated by the line manometer, as well as the non-escape of material from the gun. -
Page 44: Pipe Bent
MINI AVANT 10 - TROUBLESHOOTING IS11/11 - 561185 - Close the air cock to the gun: the machine stops. - Stop the machine using the master switch. - Discharge the pressure in the flow pipes by turning the by-pass lever to a vertical position (FIG.40-REF.1). - Page 45 MINI AVANT 10 - TROUBLESHOOTING IS11/11 - 561185 SOLUTION - Stop the machine using the master switch. - Discharge the pressure in the line pipes by taking the by-pass lever to a vertical position (FIG.40-REF.1). - Wait for the pressure indicated by the manometer (FIG.40-REF.2) to fall to zero.
-
Page 46: Operator Intervention
See par. 11.1.4 Material pipe bent Pressure below 10 bar, the belt slips. Belt loose Tension the belt. • Use original Turbosol piping only, suitable for MINI AVANT. Unsuitable piping • Check piping length (minimum 30 metres). Mixture too greasy •... - Page 47 MINI AVANT 10 - TROUBLESHOOTING IS11/11 - 561185 PROBLEMS CAUSES SOLUTIONS • Rearm the motor-protector: in the SINGLE-PHASE and THREE- PHASE versions turn the master switch (FIG.27-REF.1A) to position 0 and then to position 1 again; the inverter intervenes in the VARIO version and the red indicator lights-up.
-
Page 48: Operator'sresponsibility
11 - OPERATOR’S MINI AVANT IS11/11 - 561185 RESPONSIBILITY 11.1 RESPONSIBILITY The person in charge of the machine must make sure that the operator is fully acquainted with the instructions contained in this use and maintenance manual and has been specifically trained for carrying out the operations described herein. -
Page 49: Warranty
WARRANTY The machines manufactured by Turbosol Produzione S.p.A. are guaranteed for a period of 12 (twelve) months or 1000 working hours - whichever comes first - starting from the date of delivery of the machine to the final-user, and in any case no longer than 18 (eighteen) months after the date of shipment.
Need help?
Do you have a question about the MINI AVANT and is the answer not in the manual?
Questions and answers