Table of Contents
Advertisement
Available languages
Available languages
Quick Links
Advertisement
Chapters
Table of Contents

Related Manuals for SHX SHX55HP201WWS


Summary of Contents for SHX SHX55HP201WWS
- Page 1 WAND PANEL mit WIFI FUNKTION SHX55HP201WWS HERZLICHEN GLÜCKWUNSCH! VIELEN DANK, DASS SIE SICH FÜR EIN PRODUKT VON SHX ENTSCHIEDEN HABEN. Bitte beachten Sie, dass das SHX-Panel nicht für den Dauerbetrieb geeignet ist und nur in gut isolierten Räumen verwendet werden darf.
-
Page 2: Table Of Contents
Diese Bedienungsanleitung gibt es in folgenden Sprachen DEUTSCH Seite 3 – 17 ENGLISH Seite 18 – 32 INHALTSVERZEICHNIS Wichtige Informationen zur Sicherheit, Standort und zum 3 – 4 elektrischen Anschluss Recycling, Entsorgung, Konformitätserklärung Lieferumfang Beschreibung des Geräts 6 – 12 Inbetriebnahme Schutzeinrichtung Reinigungshinweise... -
Page 3: Deutsch
10. Weist das Gerät einen Defekt auf, so schalten Sie es aus und kontaktieren die Kundenhotline. 11. Wenden Sie sich für eventuelle Reparaturen des Geräts, des Netzsteckers oder Kabels stets und ausschließlich an vom Hersteller autorisierte Kundendienststellen. Die Kundendienststellen können Sie online unter www.shx.at abrufen. ● 12. Dieses Gerät darf ausschließlich von Erwachsenen benutzt werden. - Page 4 24. Halten Sie einen Abstand von mind. 1m zu anderen leicht entzündlichen Stoffen wie z.B.: a. unter Druck befindlichen Gefäßen (z.B. Sprühbehälter) b. Möbel c. Textilien jeglicher Art 25. Stellen Sie keine Gegenstände auf das Panel. 26. Decken Sie das Gerät während des Betriebs und der Auskühlphase niemals ab. 27.
-
Page 5: Lieferumfang
Hiermit bestätigen wir, dass dieser Artikel den grundlegenden Anforderungen, Vorschriften und Richtlinien der EU entspricht. Die ausführliche Konformitätserklärung können Sie jederzeit unter folgendem Link einsehen: www.shx.at/downloads Irrtümer und technische Änderungen vorbehalten. www.shx.at LIEFERUMFANG Im Lieferumfang der SHX-Wandpanel erhalten Sie: 1x Heizpanel 4x Wandmontagehalterungen (Kunststoffdübel) 4x Schrauben ... -
Page 6: Inbetriebnahme
Gegenstände vor dem Heizpanel. 9. Verlegen Sie keinesfalls das Kabel hinter dem Panel. HINWEIS Damit das SHX-Heizpanel bei der Montage nicht beschädigt wird, empfehlen wir die Montage zu zweit durchzuführen. VOR DER MONTAGE 1. Öffnen Sie den Karton und entnehmen das Gerät. - Page 7 STANDGERÄT 1. Platzieren beiden Standfüße auf dem Boden und achten Sie dabei darauf, dass die Schlitze parallel zueinander sind. Setzen Sie nun das Panel in die dafür vorhergesehenen Schlitze in Standfüße, wobei diese mindestens 12cm vom äußeren Rand entfernt sein müssen. 2.
- Page 8 4. Halten Sie das Panel nun an die Kunststoffdübel. 5. Montieren Sie anschließend das Panel an die Wand, indem Sie die mitgelieferten Schrauben durch das Panel in die Dübel schrauben und festziehen. 6. Bringen Sie anschließend die Abdeckungen der Schrauben an. Dafür wird ein üblicher Klebstoff empfohlen.
- Page 9 FUNKTIONEN EINSTELLEN Betätigen Sie bitte den ON/OFF-Schalter seitlich am Gerät um das Panel in einen betriebsbereiten Modus zu versetzen. Auf dem Display leuchtet „OF“ auf – dies bedeutet, dass sich das Gerät im Stand-By Modus befindet. 1. GERÄT EINSCHALTEN Um das Gerät einzuschalten, drücken Sie die -Taste auf dem Bedienfeld –...
- Page 10 AUSSCHALTEN: 1. Schalten Sie das Gerät mithilfe der -Taste ein. 2. Ihnen wird nun die Standard-Anzeige auf dem Display angezeigt. (ON und Raumtemperatur-Anzeige). 3. Drücken Sie sooft die -Taste bis „OF“ auf dem Display blinkt. 5. Stellen Sie anschließend mithilfe der -Tasten die gewünschte Zeit ein, wann sich das Gerät ausschalten soll (0-24 Stunden) 4.
- Page 11 5. Drücken Sie auf „Gerät hinzufügen“ und wählen ein Ihr Internet aus. 6. Geben Sie das W-LAN Passwort ein und drücken OK um zu bestätigen und Ihr Gerät mit dem W-LAN zu verbinden. 7. Wenn auf Ihrem Smartphone angezeigt wird, dass der Vorgang erfolgreich war und die W-LAN Anzeige auf dem Display des Heizgeräts aufhört zu blinken und durchgehend leuchtet, dann ist das Panel mit Ihrem W-LAN verbunden.
-
Page 12: Schutzeinrichtung
1. Klicken Sie im Bedienfeld auf das Symbol für die Kindersicherung um diese einzuschalten. SCHUTZEINRICHTUNG Das SHX-Panel ist mit einer Schutzeinrichtung ausgestattet, die sowohl das Gerät schützen, als auch eine Brandgefahr ausschließen sollen. Bitte beachten Sie, dass es sich bei dem Mechanismus nicht um einen Autostopp- oder eine sonstige Komfortfunktion handelt. -
Page 13: Reinigungshinweise
Möchten Sie das Gerät von der Wand demontieren, dann entfernen Sie zunächst vorsichtig die Abdeckungen der Schrauben und anschließend die Schrauben.. HINWEIS Damit das SHX-Heizpanel bei der Demontage nicht beschädigt wird, empfehlen wir Ihnen diese zu zweit durchzuführen. Verpacken Sie das Gerät und bewahren Sie es an einem sicheren, kühlen und trockenen Ort auf. -
Page 14: Behebung Von Problemen
BEHEBUNG VON PROBLEMEN Bevor Sie sich mit unserer Kundenhotline/ Servicestelle in Verbindung setzen, prüfen Sie bitte, ob sich der Fehler anhand der untenstehenden Hinweise beheben lässt. PROBLEM MÖGLICHE URSACHE LÖSUNG Wiederherstellung Stromausfall. Stromversorgung abwarten. Das Gerät ist nicht an der Gerät korrekt Das Heizpanel schaltet... -
Page 15: Technische Informationen
TECHNISCHE INFORMATIONEN Technische Informationen Artikelnummer: SHX55HP201WWS Eingangsspannung: 220-240V Frequenz: 50-60Hz Stromstärke: 550 W Heizbereich: 0-37°C Gewicht 7,4kg Abmessungen 800x600x11mm Schuss Home Electronic GmbH Kontaktadressen für weitere Informationen Scheringgasse 3, A-1140 Wien und Serviceline: Tel: +43 (1) 97 0 21 – 0 Serviceline: +43 (1) 97 0 21 –... -
Page 16: Erforderliche Angaben Zu Elektrischen Einzelraumheizgeräten
Erforderliche Angaben zu elektrischen Einzelraumheizgeräten Artikelnummer SHX55HP201WWS Angabe Symbol Wert Einheit Angabe Einheit Nur bei elektrischen Speicher- Einzelraumheizgeräten: Wärmeleistung Art der Regelung der Wärmezufuhr: Nennwärmeleistung 0,55 Manuelle Regelung der Wärmezufuhr nein mit integriertem Thermostat Mindestwärmeleistung Manuelle Regelung der Wärmezufuhr (Richtwert) mit Rückmeldung der Raum- und/oder... -
Page 17: Garantie
Mit diesem Qualitätsprodukt von SHX haben Sie eine Entscheidung für Innovation, Langlebigkeit und Zuverlässigkeit getroffen. Für dieses SHX Gerät gewähren wir eine Garantiezeit von 2 Jahren ab Kaufdatum gültig in Österreich und Deutschland! Sollten in diesem Zeitraum wider Erwarten dennoch Servicearbeiten an Ihrem Gerät notwendig sein, garantieren wir Ihnen hiermit eine kostenlose Reparatur (Ersatzteile und Arbeitszeit) oder (nach Ermessen der Firma Schuss) das Produkt auszutauschen. -
Page 18: English
Technical informations Required information on electrical individual room heaters Warranty Please note that the SHX panel is not suitable for continuous operation and may only be used in well-insulated rooms. PLEASE READ THE INSTRUCTIONS CAREFULLY, BEFORE USING THE PRODUCT. PROTECT YOURSELF AND OTHERS BY FOLLOWING THE SAFETY INSTRUCTIONS. IF... - Page 19 10. If the device has a defect, switch it off and contact the customer hotline. 11. Always contact the manufacturer's authorized service center for any repairs to the device, power plug or cable. You can access the customer service centers online at www.shx.at. ●...
-
Page 20: Recycling, Disposal And Declaration Of Conformity
You can view the detailed declaration of conformity at any time under the following link: www.shx.at/downloads Subject to errors and technical changes. www.shx.at DELIVERY CONTENT The scope of delivery of the SHX tower heater includes: 1x heating panel 4x plastic dowel ... -
Page 21: Description Of The Device
The SHX-heating panel can be mounted on walls or other vertical surfaces. Please note: 1. The SHX heating panel may only be installed with the wall mounting brackets supplied. 2. Make sure that the wall you mount the panel on can carry the weight of the panel. - Page 22 Remove the packaging completely from the device. Then check the device for damage. Carefully unwind the power cord, also paying attention to damage. You can use the SHX convector both as a free-standing device and as a wall heater. Please proceed as follows: STANDING DEVICE Place the two feet on the floor, making sure that the slots are parallel to each other.
- Page 23 3. Insert the four rails fitting into the holes in the wall. 4. Now hold the panel against the four rail fittings matching the four holes on the device. 5. Now mount the panel against the wall, by screwing the screws trough the panel into the rails. 6.
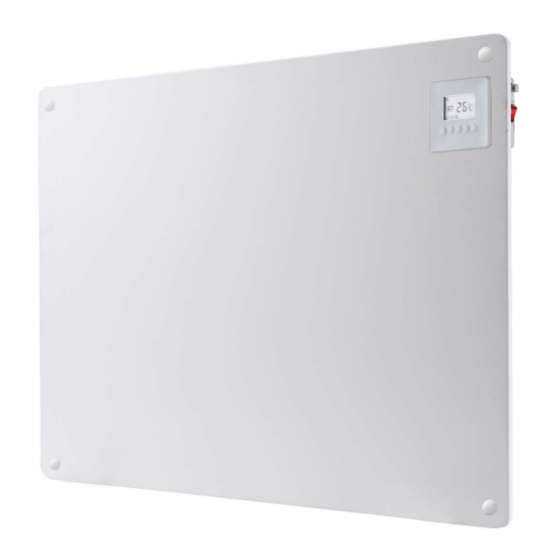
- Page 24 DESCRIPTION OF THE DISPLAY AND CONTROL PANEL Indicator WIFI Indicator CHILD LOCK Indicator ECO-MODE 4.+ 5. Indicator SET TEMPERATURE Indicator ON/OFF 7.+ 8. Indicator ROOM TEMPERATURE Button ON/OFF Button SET/WIFI Button INCREASE Button DECREASE Button CHILD LOCK SET THE FUNCTIONS Please press the ON / OFF switch on the side of the device to put the panel in an operational mode.
- Page 25 3. TIMER-FUNKTION You can use the timer function to switch the heating panel on and off automatically. TURN ON: 1. Switch on the device using the button. 2. You will now see the standard display on the display. (ON and room temperature display).
- Page 26 5. WIFI FUNCTION The panel is equipped with a WIFI function. DOWNLOAD THE APP There are two ways to download the app for installation on your smartphone: Methode A: Methode B: Open the App Store/Play Store on Scann the QR-Code with your your phone.
- Page 27 You can now use your smartphone as a remote control: 1. Set the temperature 1. Open the "Tuya Smart" app to select the heating panel. 2. Click on the device to be operated and call up the device user interface. The power switch in the lower left corner of the phone display turns off and the color of the display is dark red, indicating that the device is turned off.
-
Page 28: Safety Measuments
SAFETY MEASURMENTS The SHX panel is equipped with protective devices that protect the device and are designed to prevent a fire. Please note that neither mechanism is an auto stop or other comfort function. Always switch the device off, pull out the mains plug and wait until the heater cools down before you move, clean or store the device. -
Page 29: Troubleshooting
NOTE We recommend to do the disassembly of the panel heater in pair, so it doesen’t get damaged. Pack the device and store it in a safe, cool and dry place. TROUBLESHOOTING Before you contact our customer hotline / service center, please check whether the error can be remedied using the information below. -
Page 30: Technical Informations
TECHNICAL INFORMATIONS Technical information Item no. SHX55HP201WWS Current 550W Heating area 0-37°C Input voltage 220-240V Frequency 50-60Hz Weight 7,4 kg Measurements 800 x 600 x 11 mm Contact addresses for further information Schuss Home Electronic GmbH Scheringgasse 3, A-1140 Wien Tel: +43 (1) 97 0 21 –... -
Page 31: Required Information On Electrical Individual Room Heaters
REQUIRED INFORMATION ON ELECTRICAL INDIVIDUAL ROOM HEATERS Model identifier(s): SHX55HP201WWS Item Symbol Value Unit Item Unit Type of heat input, for electric storage Heat output local space heaters only (select one): manual heat charge control, Nominalheat output 0,55 with integrated thermostat... -
Page 32: Seite 2 Von
WARRANTY By purchasing a SHX quality product you have acquired an innovative, long lasting and reliable item. For this SHE device we grant a warranty of 2 years from the date of purchase, valid in Austria only. In the unlikely event that service work is required on your device in this period we warrant free repair (spare parts and labour) or (subject to Schuss’s decision) to replace the product.
Need help?
Do you have a question about the SHX55HP201WWS and is the answer not in the manual?
Questions and answers