Table of Contents
Advertisement
Advertisement
Table of Contents

Subscribe to Our Youtube Channel
Related Manuals for Xtool A30 Pro


Summary of Contents for Xtool A30 Pro
- Page 1 A30 Pro Intelligent Diagnosis System...
- Page 2 You may not use the trademarks, service marks, domain names, logo and company name of Xtool or other companies mentioned without written permission from the trademark holder. Xtool reserves the right for the final interpretation of...
-
Page 3: Copyright
QUICK GUIDE Copyright This manual is designed for A30 Pro Intelligent Diagnosis System and only apply to it. Any company or person can’t copy and backup this introduction book in any form (Electronic, mechanical, photocopy, record or other form) without written permission of Xtool. -
Page 4: Disclaimer
Xtool assume no liability or responsibility for those. To know more details, please visit official website:... -
Page 5: Caution
QUICK GUIDE Caution Always keep safe condition to diagnose vehicle ⚫ Wear the goggles accord with ANSI standard ⚫ Keep clothes, hair hand, tool, tester etc. away from ⚫ running or calorific engine Before start engine, you should confirm parking ⚫... - Page 6 QUICK GUIDE area When the ignition switch is turned on or the ⚫ engine is running, don’t connect or disconnect the diagnostic equipment Keep the diagnostic device dry and clean, away ⚫ from gasoline, water and grease. If necessary, use a clean cloth coated with a mild detergent to clean the surface of the device Don’t operate the diagnostic equipment while...
- Page 7 QUICK GUIDE generating incorrect data, please ensure that the vehicle battery is sufficiently charged and the connection of the vehicle diagnostic socket is clean and safe Don’t put the diagnostic device on the vehicle ⚫ distributor. Strong electromagnetic interference will cause damage to the device Aftersales-services E-Mail: supporting@xtooltech.com Tel: +86 755 21670995 or +86 755 86267858...
-
Page 8: Table Of Contents
QUICK GUIDE Content Trademarks ..................I Copyright ..................II Disclaimer..................IV Safety instruction ................. IV Caution .................... V Aftersales-services ................. 7 Content ....................i Product Brief ................1 Product Specification ............2 2.1. Appearance ..............2 2.2. Ports and Button ............4 2.3. - Page 9 QUICK GUIDE Start Diagnosis ..............10 3.1. Activation ..............10 3.2. Main Interface ............11 3.3. Diagnosis ..............13 VIN Identification ............. 14 Vehicle Selection ............... 15 Demo ..................16 Basic Function ..............18 3.4. Upgrade ............... 28 3.5. Settings ................ 30 3.6.
-
Page 10: Product Brief
QUICK GUIDE 1. Product Brief A30 Pro intelligent diagnosis system is a professional vehicle diagnosis device for Japanese automobile. It supports the detection and bi-directional control test for vehicle drive, chassis and body system. It has basic diagnostic functions such as reading fault code, clearing fault code, reading live data, freezing frame, and etc. -
Page 11: Product Specification
QUICK GUIDE 2. Product Specification 2.1. Appearance A30 Pro series Intelligent Diagnosis System. Front view Back view... - Page 12 A30 Pro products are equipped with VCI as standard, and the host and VCI are connected via Bluetooth, which is convenient for connection.
-
Page 13: Ports And Button
QUICK GUIDE 2.2. Ports and Button Items Description Charge Lamp Display status of charge... - Page 14 QUICK GUIDE Display function menu LCD display product Cancel selection (Or operation) Back or return to previous menu Via direction key to move Direction key choosing appoint menu Vehicle Open/switch vehicle diagnosis diagnosis function DB15 Only for charging connector Speedy guide Open/switch introduction book Confirm selection Connect device to PC to update...
-
Page 15: Parameter
QUICK GUIDE 2.3. Parameter Items Description System Android ARM Cortex A7 Quad-Core,Basic frequency 1.2GHz Mali-400 MP2 GPU 16GB Display screen 4-inch 320x480 Color touch display screen Working voltage 9~18V Battery 3000mAh built-in lithium battery Working temperature -20℃-60℃ Storage temperature -30℃-70℃ Note: The working temperature and storage temperature are verified in a laboratory environment, which are for reference only... -
Page 16: Packing List
QUICK GUIDE 2.4. Packing list Category Name OBD II-16 Test HONDA-3 Connectors NISSAN-14 & Cables Main Cable USB Type-C Cable Charger DC5V AC (100-300V) 2A US plug adapter Adaptor EU plug adapter UK plug adapter F401 Main Units VCI box Certificate of Quality Accessories Packing List... -
Page 17: Connection
QUICK GUIDE 2.5. Connection A30Pro Main test line Vehicle Please connect your vehicle to A30 Pro follows below steps: 1. First open the A30 Pro host;... - Page 18 QUICK GUIDE 2. Connect the host and VCI via Bluetooth; 3. Connect the VCI to the car with the main test line; 4. Start the diagnosis. *Note The DB15 port on bottom only reserved for charging. Please do not connect directly the A30Pro to vehicle by main test line, which could lead to a communication failure...
-
Page 19: Start Diagnosis
Note 1.Generally, A30 Pro will be activated in advance when it leaves the factory, but if you do a factory reset of the device, then you need to activate it again. -
Page 20: Main Interface
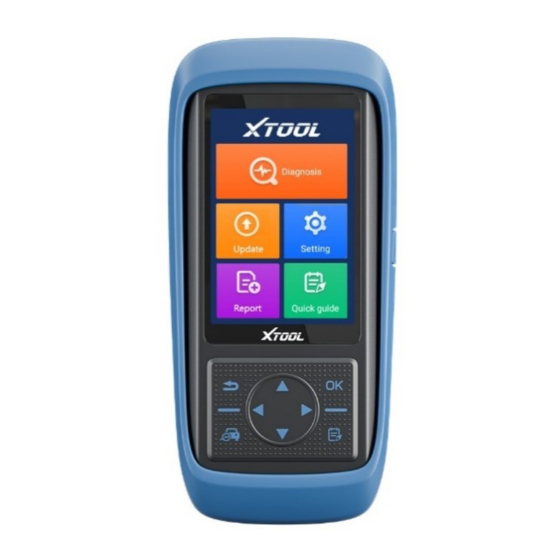
QUICK GUIDE 3.2. Main Interface After booting, the main interface as shown below. - Page 21 Click to start diagnosis function Software that can be updated to the latest version will be displayed here You could change the Language, Units, Date & Time, and so on. View all historical reports here Quick guide for A30 Pro...
-
Page 22: Diagnosis
QUICK GUIDE 3.3. Diagnosis This function is the core module of A30 Pro, which support full system diagnosis for vehicles. -
Page 23: Vin Identification
QUICK GUIDE VIN Identification According to practical requirement, user can choose to automatic identification, or manual input the car VIN code... -
Page 24: Vehicle Selection
QUICK GUIDE Vehicle Selection A30 Pro supports 98% of the car on the market from America, Europe, Asia, and China. User can choose vehicle model for diagnosis according to their needs. -
Page 25: Demo
QUICK GUIDE Demo This function is used for demonstration. User can view all of the functions in A30 Pro without changing any settings. - Page 26 QUICK GUIDE ⚫ Automatic Diagnosis Support automatic scanning and diagnosis of the whole vehicle system ⚫ System Diagnosis Supports scanning and diagnosis of a single system...
-
Page 27: Basic Function
⚫ Quick Clear Code Support fast clearing of fault codes Basic Function A30 Pro will enter diagnose function after confirming vehicle model. The normal function includes reading ECU version information, Read ECU code, read fault code, read freeze frame, quick clear codes, read live data,... - Page 28 QUICK GUIDE and Reset control unit. There will be some differences among different vehicle models.
- Page 29 QUICK GUIDE Read ECU Info This function allows user to read ECU version information. Some electronic control system displays system identification or system information menus, which have the same meaning, and read information such as software, hardware version numbers, part numbers, and etc.
- Page 30 QUICK GUIDE Read Trouble Code This function allows user to read the fault code stored in the electronic control ECU. When the fault code is read, the screen will display it and its definition.
- Page 31 QUICK GUIDE Clear Trouble Code This function allows user to clear current and historical trouble codes memory in ECU.
- Page 32 QUICK GUIDE The trouble codes cannot be erased without eliminating the related fault. If a problem is not solved, the related code will remain, and be stored in ECU, which leads to it can be read by diagnostic. Read Freeze Frame This function allows user to read the trouble codes that are stored in the ECU at the moment, when vehicle has faults.
- Page 33 QUICK GUIDE Read Live Data This function allows user to read the parameters of the system on operating condition, such as oil pressure, temperature, engine speed, fuel oil temperature, coolant temperature, intake air temperature, etc. By analyzing these parameters, user can find out which part works abnormally, and narrow maintenance scope.
- Page 34 QUICK GUIDE Function Select...
- Page 35 QUICK GUIDE Read live data...
- Page 36 QUICK GUIDE Reset Control Unit (Bi-directional Control) This function allows user to figure out whether a specific subsystem or component in the car works well or not, and to make the tester outputs function. (This picture is only for reference) The vehicle engineers responsible for designing computer control systems programmed them so a scan tool could request information or command a module to...
-
Page 37: Upgrade
Users could check the individual part to see what is working properly by actuation test. 3.4. Update The A30 Pro supports one-click upgrade to renew software quickly to experience the latest function;... - Page 38 QUICK GUIDE Notice: when a new software is released, an update notice will be shown on screen, customer can choose to upgrade or not.
-
Page 39: Settings
QUICK GUIDE 3.5. Settings Select the "Settings" menu to open the setting interface. You can set the language, unit and system-related options on this interface. The following 8 options as shown below:... - Page 40 QUICK GUIDE ◼ Language:Please select the language according to the device configuration, otherwise the diagnosis interface menu will not be displayed.
- Page 41 QUICK GUIDE ◼ Please follow the steps below to switch languages▼ Step 1: Contact your dealer and leave a message about the language you need and the S/N of your device until they notify you that the language change is complete Step 2: Settings->Language->Choose language Step 3: OS Settings->Language &...
- Page 42 QUICK GUIDE ◼ Display/Lightness:Users can adjust the brightness of display and the time interval of the host's automatic standby according to their own conditions to achieve better experience.
- Page 43 QUICK GUIDE ◼ Bluetooth:You can select the Bluetooth to pair. ◼ Date/Time:User can set the date and time of the system here...
- Page 44 QUICK GUIDE Set date...
- Page 45 QUICK GUIDE Set time ◼ Other settings:Users can clean up the system cache and...
- Page 46 QUICK GUIDE restore factory settings Notice Before clearing the cache and restoring the factory settings, please confirm whether the required information has been saved or backed up, if the losses caused by this, Xtooltech assume no liability or responsibility for that.
- Page 47 QUICK GUIDE ◼ About:Users can the information of the device.
- Page 48 QUICK GUIDE ◼ Tool tip Pull down the top of the screen to call out the notification bar, you can view the current system time, power, Bluetooth and wireless connection information, and quickly adjust the lightness of the display...
-
Page 49: Report
QUICK GUIDE 3.6. Report... -
Page 50: Quick Guide
3.7. Quick Guide A30 Pro provides an online user manual, which could be used to learning the product function at any time. User can open Quick Guide by click the menu icon on screen, or press button on the bottom right. -
Page 51: Shenzhen Xtooltech Intelligent Co., Ltd
QUICK GUIDE Shenzhen Xtooltech Intelligent Co., Ltd Company address: 17&18/F, Building A2, Creativity City, Liuxian Avenue, Nanshan District, Shenzhen, China Factory address: 2/F, Building 12, Tangtou Third Industrial Zone, Shiyan Street, Baoan District, Shenzhen, China Service Hotline: 0086-755-21670995/86267858 Email: supporting@xtooltech.com Fax: 0755-83461644 Website: www.xtooltech.com...
Need help?
Do you have a question about the A30 Pro and is the answer not in the manual?
Questions and answers
After reset my xtool a30pro, I cannot put my S/N number and always said registration fail.
@Soe thuya tun
To resolve the registration failure issue for the Xtool A30 Pro after resetting it, follow these steps:
1. Connect to Wi-Fi – Ensure the device is connected to a stable Wi-Fi network.
2. Enter the Activation Page – When prompted, go to the activation page.
3. Verify Phone Number – Input your phone number as requested.
4. Enter Verification Code – After receiving the authentication code via message, enter it correctly.
5. Complete Activation – Follow on-screen instructions to finish verification.
Make sure to activate the system only once, as required. If the issue persists, check for network stability or retry the verification process.
This answer is automatically generated