
Related Manuals for Zanussi ZCK66350BA


Summary of Contents for Zanussi ZCK66350BA
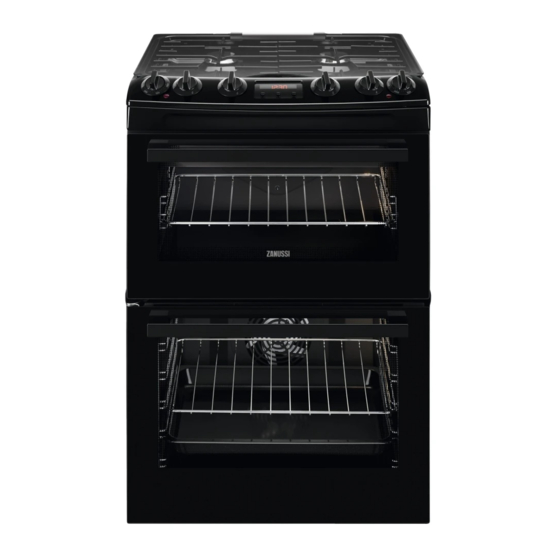
- Page 1 User Manual GETTING STARTED? EASY. ZCK66350BA ZCK66350WA ZCK66350XA EN User Manual Cooker...
-
Page 2: Safety Information
VISIT OUR WEBSITE TO: Get usage advice, brochures, trouble shooter, service and repair information: www.zanussi.com/support SAFETY INFORMATION Before the installation and use of the appliance, carefully read the supplied instructions. The manufacturer is not responsible for any injuries or damage that are the result of incorrect installation or usage. - Page 3 This appliance is not intended to be used on ships, boats or • vessels. Do not install the appliance behind a decorative door in order • to avoid overheating. Do not install the appliance on a platform. • Do not operate the appliance by means of an external timer or •...
-
Page 4: Safety Instructions
The means for disconnection must be incorporated in the fixed • wiring in accordance with the wiring rules. WARNING: Use only hob guards designed by the • manufacturer of the cooking appliance or indicated by the manufacturer of the appliance in the instructions for use as suitable or hob guards incorporated in the appliance. -
Page 5: Care And Cleaning
• Make sure that there is air circulation around the • To prevent damage or discoloration to the appliance. enamel: • The information about the gas supply is on the – do not put ovenware or other objects in the rating plate. -
Page 6: Internal Lighting
• Replace immediately the door glass panels INTERNAL LIGHTING when they are damaged. Contact the WARNING! Risk of electric shock. Authorised Service Centre. • Be careful when you remove the door from the appliance. The door is heavy! • Concerning the lamp(s) inside this product and •... -
Page 7: Levelling Of The Appliance
LEVELLING OF THE APPLIANCE For the minimal distances of fitting check the table. Use small feet on the bottom of appliance to set the appliance top surface level with other surfaces. Minimum distances OTHER TECHNICAL DATA Dimension WARNING! These instructions are only valid in the countries whose symbols appear on this booklet's cover. -
Page 8: Pressure Test
PRESSURE TEST Supply piping should not be less than The Rapid injector is used as a pressure test point. R3/8. Connection is made to the Rc 1. Connect the pressure gauge to the Rapid 1/2 (1/2 “ B.S.P.) female threaded. injector. -
Page 9: Product Description
• The recommended cross-section area is six WARNING! The power cable must square millimetres (6 mm²). not touch the part of the appliance • When you refit the mains terminal cover, make shaded in the illustration. sure that the lower tabs are located inside the bottom edge of the aperture, before you fix the two screws into the top edge of the mains terminal cover. -
Page 10: Before First Use
HOB OVERVIEW Steam outlet - number and position depend on the model Semi-rapid burner Auxiliary burner Rapid burner Semi-rapid burner COOKER CONTROL PANEL Knob for the top oven Knobs for the hob Display Knob for the main oven Temperature indicator for the main oven Temperature indicator for the top oven ACCESSORIES For roasting and grilling. -
Page 11: Hob - Daily Use
1. Set the maximum temperature. To set a new time, refer to "Setting the time". 2. Let the appliance operate for 1 hour. PREHEATING 3. Set the function Preheat the empty appliance before first use. 4. Let the appliance operate for 15 minutes. Accessories can become hotter than usual. -
Page 12: Hob - Hints And Tips
BURNER OVERVIEW A. Burner cap B. Burner crown C. Ignition candle D. Thermocouple REPLACING BURNER PARTS TURNING THE BURNER OFF 1. Put carefully the burner crown on the burner To put the flame out, turn the knob to the off body. -
Page 13: Hob - Care And Cleaning
Diameter of cookware Burner (mm) Rapid 180 - 240 / 260 Semi-rapid 120 - 220 / 240 Auxiliary 80 - 160 DIAMETERS OF COOKWARE 1) When a single pot is used on the hob WARNING! Use cookware with diameters applicable to the size of burners. -
Page 14: Top Oven Functions
TOP OVEN FUNCTIONS Symbol Oven function Application Off position The oven is off. Oven Lamp To turn on the lamp without a cooking function. 100 - 250 Conventional Cooking To bake and roast food on one shelf position. Dual Circuit Grill To grill flat food in medium quantities in the middle of the shelf. - Page 15 ACTIVATING AND DEACTIVATING THE TOP / MAIN OVEN It depends on the model if your appliance has knob symbols, indicators or lamps: • The indicator comes on when the oven heats up. • The lamp comes on when the oven operates.
-
Page 16: Oven - Clock Functions
2. Put the deep pan into the oven on the necessary shelf position. OVEN - CLOCK FUNCTIONS DISPLAY A. Clock functions B. Timer The display works only with the main C. Clock function oven. BUTTONS Button Function Description MINUS To set the time. CLOCK To set a clock function. -
Page 17: Oven - Hints And Tips
4. Turn the knob for the oven functions to the off DURATION works only for the main position. oven. CANCELLING THE CLOCK FUNCTIONS SETTING THE MINUTE MINDER 1. Press the again and again until the necessary function indicator starts to flash. 1. -
Page 18: Conventional Baking - Top Oven
Baking results Possible cause Remedy The cake bakes unevenly. The oven temperature is too Next time set a longer baking time high and the baking time is and lower oven temperature. too short. The cake batter is not evenly Next time spread the cake batter distributed. -
Page 19: Thermaflow® Baking - Main Oven
Food Temperature (°C) Time (min) Shelf position Shortcrusts: Quiche, Tarts, Flans 180 - 200 25 - 50 Scones 220 - 230 8 - 12 Shepard`s Pie 190 - 200 30 - 40 Souffles 170 - 180 20 - 30 Vegetables: Baked Jacket Potatos 180 - 190 60 - 90 Vegetables: Roast Potatos... - Page 20 Food Temperature (°C) Time (min) Shelf position Pastry: Puff Follow manufacturer`s instructions. Reduce the temperature for Fan oven by 20 °C. Plate Tarts 180 - 190 25 - 45 Quiches / Flans 170 - 180 25 - 45 Scones 210 - 230 8 - 12 1 –...
-
Page 21: Information For Test Institutes
The grilling area is set in centre of the shelf. DUAL GRILL - TOP OVEN Food Time (min) Shelf position Bacon Rashers 5 - 6 Chicken Joints 20 - 40 Chops - Lamb 15 - 25 2 - 3 Chops - Pork 20 - 25 2 - 3 Fish - Whole / Trout / Makarel... - Page 22 Tempera- Shelf posi- Food Function Time (min) Accessories ture (°C) tion Apple pie, 2 tins (ø 20 Conventional 80 - 100 Grid cm) on the grid, diag- Cooking onally shifted Apple pie, 2 tins (ø 20 Thermaflow® 80 - 100 Grid cm) on the grid, diag- onally shifted...
-
Page 23: Oven - Care And Cleaning
Tempera- Shelf posi- Food Function Time (min) Accessories ture (°C) tion Toast Full Grill 3 - 8 Grid Beef burger Dual Circuit Grill 15 - 25 (first Grid / side) Roasting 10 - 20 (second side) OVEN - CARE AND CLEANING WARNING! Refer to Safety chapters. -
Page 24: Removing And Cleaning The Door Glasses - Top Oven
REMOVING AND CLEANING THE DOOR Before activating the catalytic cleaning GLASSES - TOP OVEN remove all the accessories from the oven. The door glass in your product can be different in type and shape from the The walls with catalytic coating are self-cleaning. examples you see in the image. -
Page 25: Replacing The Lamp
REPLACING THE LAMP WARNING! Risk of electric shock. The lamp can be hot. 1. Turn off the oven. Wait until the oven is cold. 2. Disconnect the oven from the mains. 3. Put a cloth on the bottom of the cavity. The back lamp The lamp glass cover is at the back of the cavity. -
Page 26: Service Data
We recommend that you write the data here: Model (MOD.) ......... Product number (PNC) ......... Serial number (S.N.) ......... ENERGY EFFICIENCY PRODUCT INFORMATION FOR HOB ACCORDING TO EU 66/2014 Model identification ZCK66350BA ZCK66350WA ZCK66350XA Type of hob Hob inside Freestanding Cooker Number of gas burners... -
Page 27: Hob - Energy Saving
• If it is possible, always put the lids on the its user manual. cookware. PRODUCT INFORMATION FOR OVENS AND PRODUCT INFORMATION SHEET* Supplier's name Zanussi ZCK66350BA Model identification ZCK66350WA ZCK66350XA Top oven: 105.6 Energy Efficiency Index Main oven: 95.4... -
Page 28: Environmental Concerns
Energy efficiency class is not applicable for Russia. EN 60350-1 - Household electric cooking appliances - Part 1: Ranges, ovens, steam ovens and grills - Methods for measuring performance. OVEN - ENERGY SAVING When possible, do not preheat the oven before cooking. - Page 32 WWW.ZANUSSI.COM/SHOP...
Need help?
Do you have a question about the ZCK66350BA and is the answer not in the manual?
Questions and answers