Table of Contents
Advertisement
Advertisement
Table of Contents

Related Manuals for Zanussi ZCE560DW


Summary of Contents for Zanussi ZCE560DW
- Page 1 Cooker ZCE560 ZCV561 ZCV563...
-
Page 2: Table Of Contents
Contents Safety instructions _ _ _ _ _ _ _ _ _ _ _ _ _ _ _ _ _ 2 Cooking tables _ _ _ _ _ _ _ _ _ _ _ _ _ _ _ _ _ _ _ _ 15 Description of the appliance _ _ _ _ _ _ _ _ _ _ _ _ _ _ _ 6 Care and cleaning _ _ _ _ _ _ _ _ _ _ _ _ _ _ _ _ _ _ 17 Before first use _ _ _ _ _ _ _ _ _ _ _ _ _ _ _ _ _ _ _ _ _ 7... -
Page 3: Cleaning The Appliance
extinguish a fire with water, but can get hot. • Do not use harsh abrasive switch off the appliance and cleaners or sharp metal then cover flame e.g. with a lid scrapers to clean the oven or a fire blanket. door glass and other surface •... - Page 4 • CAUTION: This appliance is designed only for oven, run it empty at maximum temperature for 45 cooking food and is intended for indoor domestic minutes. At the same time you need to properly household use only and should not be used for ventilate the environment in which the product is any other purpose or in any other application, installed.
- Page 5 During cleaning and maintenance • Always turn the appliance off before operations such as cleaning or maintenance. You can do it after plugging the appliance off or turning the main switches off. • Do not remove the control knobs to clean the control panel.
-
Page 6: Description Of The Appliance
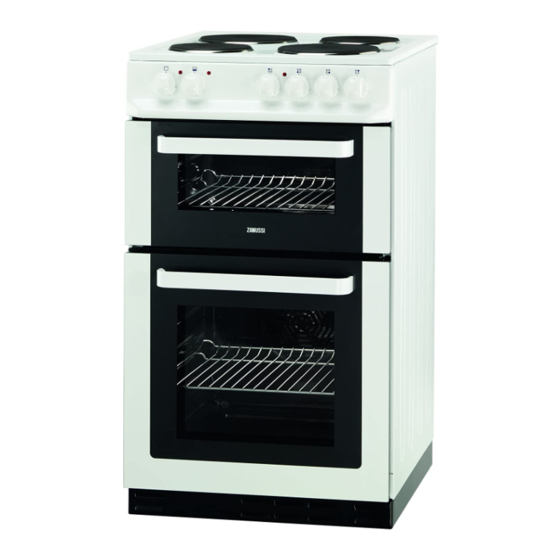
Top Oven/Grill Door Top Oven/Grill Door Handle Main Oven Door Tubular heating element Grill Pan Shelf Fan Cover Levelling Feet Ceramic Hob Hot Hob Indicator Controls and their functions ZCE560DW, ZCV561DW/DX Front Left Grill Front Right Main Oven Back Right Back Left... -
Page 7: Before First Use
ZCV563DDW/DX/DN Timer Front Left Top Oven/Grill Front Right Main Oven Back Right Black Left Before first use should be kept away. During this period an odour Rating plate may be emitted, it is therefore advisable to open a • This is situated on the lower front frame of the window for ventilation. -
Page 8: Grill And Oven Furniture
• To prevent discolouration, regularly wipe away • Baking trays, dishes etc., should not be placed condensation and foodstuff from surfaces. directly against the grid covering the fan at the back • For your safety wall coverings at the rear of the of the oven. - Page 9 IMPORTANT! The increase and decrease control buttons operate Press the “mode“ ( slowly at first and then more rapidly. They should be key until “dur” indicator pressed separately. lamp starts to flash. Adjust the desired cooking period by using “+” or “-” keys.
-
Page 10: The Hob
period and end time have to be adjusted. The Setting the Cooking Period and Finish Time cooking period is adjusted as explained above. “Mode” key is pressed until “End” indicator lamp flashes in order to adjust the ending time. “+” and “-” keys must be used. -
Page 11: The Grill
Accessible parts may be hot when the grill is in use. Young children should be kept away. WARNING! Never cover the grill pan or grid with foil as this Using the grill (ZCE560DW,ZCV561DW/DX) can lead to grill fires. Using the grill (ZCV563DW/DX/DN) IMPORTANT! -
Page 12: Hints And Tips
for different thicknesses of food. At the end of grilling, as in all other cooking • Food should be thoroughly dried before grilling to processes; turn the top oven switch off. Take the grill minimise splashing. Brush lean meats and fish pan out by using an oven glove and put the pan onto lightly with a little oil or melted butter to keep them a safe place. -
Page 13: The Top Oven (Zcv563Dw/Dn/Dx)
The top oven (ZCV563DW/DX/DN) towards you until the shelf stop is reached. Tilt shelf Using the Top Oven up at the front to that the stops clear the side supports. Lift shelf clear. To insert a shelf, reverse the above steps. Hints and tips •... -
Page 14: The Main Oven
The main oven The fan oven is particularly suitable for cooking larger are briefly explained in the following lines. The quantities of food. The advantages of fan oven detailed information for their usage will also be cooking are: explained in the following pages. Defrost function Preheating The fan oven quickly reaches its temperature, so it is... -
Page 15: Cooking Tables
Defrost • Always cook thoroughly immediately after thawing. • Do not leave food at room temperature once it is defrosted. Cook raw food immediately or store cooked food in the fridge, once it has cooled. • Care must always be taken when handling foods in the home. - Page 16 FOOD FAN OVEN TOP OVEN APPROX COOK TIME COOKING TEMP COOKING TEMP °C °C 180 - 190 0:15 - 0:25 Biscuits 180 - 190 200 - 220 200 - 220 Bread 0:25 - 0:35 Bread rolls/buns 200 - 220 200 - 220 0:15 - 0:30 Small / Queen Cakes 160 - 170...
-
Page 17: Care And Cleaning
Shelf positions are counted from the bottom of the that they are evenly spaced when more than one is oven. used. Main oven shelf positions are not critical but ensure Roasting chart Meat Temperature Cooking time 0:20 - 0:35 minutes per ½kg (1lb) Beef/ Beef boned 160 - 180 °C and 0:20 - 0:35 minutes over. -
Page 18: General Information
• Apply a small amount of hob cleaner in the centre of each area to be cleaned. Cleaning the solid hob (ZCE560DW) • Dampen a clean paper towel or a plastic pad designed for non-stick saucepans and rub Clean the hob after each use. - Page 19 • Rust stain, bath and sink stain removers. To remove burnt on foodstuff • Any of the above products may cause damage to • We strongly recommend the use of a Ceramic Hob the hob. Scraper (incorporating a single edge razor blade) •...
-
Page 20: What To Do If
Cleaning between the outer and inner door glass WARNING! Rough handling, especially around the edges of the front panel, can cause the glass to break. Removal of inner Glasses (if applicable ) After Cleaning: • Push the glass towards under the location bracket “A”. -
Page 21: Installation
Problem Possible solution The grill, ovens and timer do not work. • Check that the appliance has been wired in to the appliance supply and is switched on at the wall. • Check that the main appliance fuse is working. •... -
Page 22: Technical Data
operating it. This adjustment can be made by turning • The cable should be routed away from potentially the levelling feet clockwise or anti-clockwise, if hot areas. required. It is possible to raise the product up to maximum of 35 mm via the levelling feet. If it Connection diagrams as given below: becomes necessary to move the appliance after the levelling feet have been adjusted, it is advisable to lift... -
Page 23: Environmental Information
Ceramic Hob Rating 1200 W 145 mm 180 mm 1800 W 180 mm(dual zone) 1700 W 1800 W 180 mm Solid Hob Rating 145 mm hotplate 1000 W 145 mm rapid hotplate 1500 W 180 mm hotplate 1500 W 2000 W 180 mm rapid hotplate Environmental Information The symbol... -
Page 24: European Guarantee
Tel: Electrolux 08445 613 613 (*) AEG-Electrolux 08445 611 611 (*) Zanussi-Electrolux 08445 612 612 (*) (*) Calls may be recorded for training purposes Electrolux Group (Irl) Ltd Long Mile Road, For Customer Service in The Republic of Ireland Dublin 12, Republic of Ireland Tel: +353 (0)1 4090751 Email: service.eid@electrolux.ie... - Page 25 Slavonska avenija 3, 10000 Zagreb Long Mile Road Dublin 12 Ireland +353 1 40 90 753 Italia +39 (0) 434 558500 C.so Lino Zanussi, 26 - 33080 Porcia (PN) Latvija +37 17 84 59 34 Kr. Barona iela 130/2, LV-1012, Riga...
- Page 26 +421 2 43 33 43 22 Electrolux Slovakia s.r.o., Electrolux Slovensko Domáce spotrebièe SK, Seberíniho 1, 821 03 Bratislava Suomi www.electrolux.fi Electrolux Service, S:t Göransgatan +46 (0)771 76 76 76 Sverige 143, S-105 45 Stockholm Tarlabaþý caddesi no : 35 Taksim +90 21 22 93 10 25 Türkiye Ýstanbul...
- Page 28 To buy accessories, consumables and spare parts at our online shop please visit: www.zanussi.co.uk www.zanussi.com...
Need help?
Do you have a question about the ZCE560DW and is the answer not in the manual?
Questions and answers