Advertisement
Quick Links
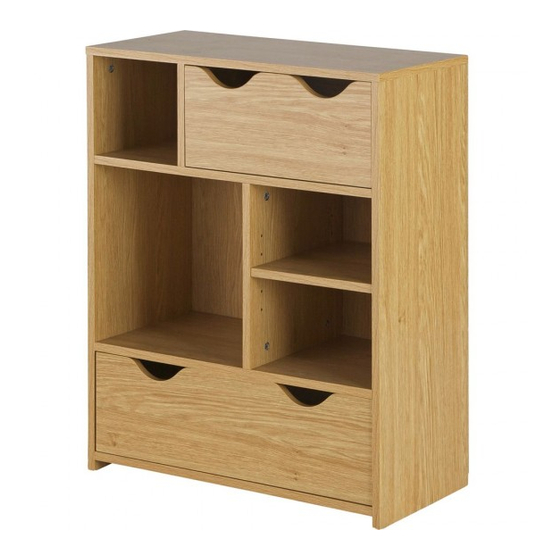
Ashley Multifunction Storage Unit
Assembly Instructions
248/6622D
- Please keep for future reference
Dimensions
Width - 60cm
Depth - 30cm
Height - 76cm
Important
– Please read these instructions fully before starting assembly
If you need help or have damaged or missing parts, call the Customer Helpline: 08456 400800
Issue 1 - 26/03/14
Advertisement

Related Manuals for Argos 248/6622D


Summary of Contents for Argos 248/6622D
- Page 1 Ashley Multifunction Storage Unit Assembly Instructions 248/6622D - Please keep for future reference Dimensions Width - 60cm Depth - 30cm Height - 76cm Important – Please read these instructions fully before starting assembly If you need help or have damaged or missing parts, call the Customer Helpline: 08456 400800...
-
Page 2: Care And Maintenance
Safety and Care Advice Important – Please read these instructions fully before starting assembly • Check you have all the • Do not stand or put weight on • We do not recommend the components and tools listed on the product, this could cause pages 2 and 3. - Page 3 Components - Panels Please check you have all the panels listed below Lower divider Upper shelf Lower shelf (568 x 296mm) (568 x 296mm) (321 x 296mm) Drawer Rail Bottom shelf (568 x 296mm) (238 x 40mm) Left side Right side Top panel Upper divider (600 x 298mm)
-
Page 4: Tools Required
Components - Fittings If you have damaged or missing components, call the Customer Helpline: 08456 400800 Note: The quantities below are the correct amount to complete the assembly. In some cases more Large metal cam x 24 Large metal dowel x 24 Wood dowel x 24 14mm Screw x 3 Drawer stop x 3... - Page 5 Assembly Instructions Step 1 Fitting dowels Screw metal dowels into Upper and Lower Shelves as shown. Note: Insert metal dowels as far as shown. Do not over tighten. Firmly push wooden dowels into indicated holes. Step 2 Attaching panels Position Upper and Lower shelves onto the Lower Divider as shown, make sure...
- Page 6 Assembly Instructions Step 3 Screw Drawer stops Make sure holes for shelf to the indicated position are on this face. on Lower shelf using Screws shown. Step 4 Screw metal dowels into Left and Right side panels shown. Firmly push wooden dowels into indicated holes.
- Page 7 Assembly Instructions Step 6 Bottom Screw metal dowels into Upper shelf Taped edge Firmly push wooden dowels into indicated holes. Position Upper divider onto Upper shelf. Secure with Metal Cams Check holes for shelves face each other. Step 7 Screw metal dowels into underside of Top panel Firmly push wooden...
- Page 8 Assembly Instructions Step 8 Small drawer assembly Fix drawer sides to small drawer back using screws Slide small drawer base into the Foiled side grooves. face upwards. Note: Foiled side face upwards as shown. Screw Small metal dowels into holes on back of Small drawer front Position Small drawer...
- Page 9 Assembly Instructions Step 9 Large drawer assembly Fix drawer sides to Large drawer back using screws Slide Large drawer Foiled side base into the face upwards. grooves. Note: Foiled side face upwards as shown. Screw Small metal dowels into holes on back of Large drawer front Turn the large drawer...
- Page 10 Assembly Instructions Step 10 Lay the unit from Step 7 on its face. Attach back panels to back of the unit using nails Carefully stand the unit upright. Step 11 Slide Drawers into the space as shown. Leave empty Cover all visual cam holes for Wall strap.
Need help?
Do you have a question about the 248/6622D and is the answer not in the manual?
Questions and answers