Table of Contents
Advertisement
Quick Links
Advertisement
Table of Contents

Subscribe to Our Youtube Channel
Related Manuals for Garlando TOORX MOTION


Summary of Contents for Garlando TOORX MOTION
- Page 1 INSTRUCTION...
-
Page 2: Part List
When you open the carton, and you will find the below parts in the carton PART LIST : DES. Specification DES. Specification Main frame Lock washer 5#Allen wrench Bolt M8*45 Bolt Safety key 4.2*19 IPAD rack Silicone oil Bolt M8*16 MP3 wire option Wrench with screw... - Page 3 Assembly Instructions STEP 1: Open the carton, get out the above spare parts, and put the Main Frame onto the level ground. STEP 2: Holding computer frame uprights, use the 5# Allen wrench to lock the computer to the upright tube tight by bolt (51) and lock washer(64)...
- Page 4 STEP 3: 1. Pull up the uprights as left picture. Notice: Support the upright with hand to avoid falling down to have any hurt. STEP 4 1、 Use 5# Allen wrench(12) , firstly lock right upright onto base frame bolt(70) lock washer (...
- Page 5 STEP 5 Use wrench with screw driver(78) to lock the left base cover(59) onto the base frame with bolt (19). The right side can be assembled referring to the left side. NOTICE: the base cover should buckle into base frame vigorously.
-
Page 6: Folding Instruction
Folding Instruction Pulling up: Pull up the base frame at position A, till hearing the sound that the air pressure bar B is locked into the round tube Pulling down: Support place A with hand , kick the place of air pressure bar, then the main frame will... -
Page 7: Technical Parameter
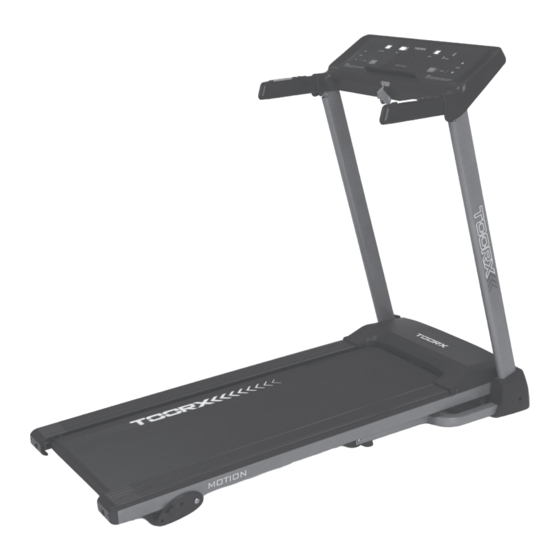
Technical Parameter BUILT UP 1476*1170*649mm POWER As the rating label showing SIZE(mm) FOLDABLE Maximum output 760*1300*649mm As the rating label showing SIZE(mm) power RUNNING BOARD 400*1200 0.8-12KM/H SPEED RANGE SIZE(mm) 43KG NET WEIGHT 1 LCD WINDOW WITH BLUE Speed, time, distance, Calories, Pulse BACKGROUND Grounding Methods This product must be grounded. -
Page 8: Button Function
Operation Guide OVERVIEW SHOWING SPEED:Display the speed, TIME:Display the time DIST. Display the distance CAL/PULSE:Display the calories/heart rate 3. BUTTON FUNCTION “PROGRAM” button: Press this button to choose program from manual mode—P1----P15---FAT; “MODE” button: When machine in ready state, press this button to choose the mode: mode-time count down, mode-distance count down, mode-calories count down;... -
Page 9: Heart Rate
SPEED ▲/▼ to change the speed. When it counts down to 0, the machine will stop smoothly. Certainly, you can press ‘STOP’ button or take out the safety key from the console to stop the machine. 4. 3. Preset programs: Press ‘PROG’... -
Page 10: Sleep Function
7.USB FUNCTION( Option): When treadmill is power on, you may insert any USB memory stick which contains audio files. The computer will detect the audio files on the memory stick and play the music directly. 8.MP3 FUNCTION( Option): When the power on, Contacting the external MP3 equipment, the computer will play. The voice is adjustable from operate the external MP3 equipment, the voice should be adjusted on the proper section to protect the computer loudhailer. - Page 11 programs table: Setting time/20= interval running time TIME PROGRAM SPEED SPEED SPEED SPEED SPEED SPEED SPEED SPEED SPEED SPEED SPEED SPEED SPEED SPEED SPEED...
-
Page 12: Running Belt Adjustment
Running Belt Adjustment WARNING: ALWAYS UNPLUG THE TREADMILL FROM THE ELECTRICAL OUTLET BEFORE CLEANING OR SERVICING THE UNIT. Clean: General cleaning the unit will greatly prolong the treadmill. Keep treadmill clean by dusting regularly. Be sure to clean the exposed part of the deck on either side of the walking belt and also the side rails. - Page 13 Center The Running Belt Place treadmill on a level surface. Run Treadmill approximately 6-8KM/H, checking the running condition. If the belt has drifted to the right, pull out of the save clock and switch, turn the right adjusting bolt 1/4 turn clockwise, then start running until centering the belt.
-
Page 14: Exploded Drawing
EXPLODED DRAWING... -
Page 15: Parts List
PARTS LIST Item Spec. Qty. No. Item Spec. Qty. Main frame 1 43 Barb cushion Base frame 1 44 Magnetic ring Left upright tube Brown single wire 4 Right upright tube 1 46 Bolt M8*25 5 Computer bracket 1 47 Lock nut Bolt ST4.2*25... - Page 16 Bolt ST4.2*9.5 4 Computer top cover Computer bottom 1 78 Wrench with screw driver cover IP rack 1 79 Bolt ST4.2*12 8 Speed +/- 1 80 Bolt M8*12 Start/stop 1 81 M6*65 Bolt Control board Computer bottom cover 42 Computer top wire...
- Page 17 GARLANDO SPA Via Regione Piemonte, 32 - Zona Industriale D1 15068 - Pozzolo Formigaro (AL) - Italy www.toorx.it - info@toorx.it...
Need help?
Do you have a question about the TOORX MOTION and is the answer not in the manual?
Questions and answers