Advertisement
Quick Links
※組立てる前にこの説明書を良くお読みになり十分に理解してください。
Before commencing assembly, please read these instructions thoroughly!
THE FINEST RADIO CONTROL MODELS
For Advanced Flyers.
上級者向
RADIO CONTROLLED .15 ENGINE POWERED
目 次 INDEX
●キットの他にそろえる物
REQUIRED FOR OPERATION
●組立て前の注意
BEFORE YOU BEGIN
●本体の組立て
ASSEMBLY
●スペアパーツ
SPARE PARTS
●取扱いの注意
OPERATING YOUR MODEL SAFELY
安全のための注意事項
この無線操縦模型は玩具ではありません!
●この商品は高い性能を発揮するように設計されています。
組立てに不慣れな方は、模型を良く知っている人にアド
バイスを受け確実に組立ててください。
●小さい部品があるので、組立て作業は、幼児の手がとど
かない所で必ず行ってください。
●動かして楽しむ場所は万一の事故を考えて、安全を確認
してから責任をもってお楽しみください。
●組立てた後も、説明書がいつでも見られるように大切に
保管してください。
※製品改良のため、予告なく仕様を変更する場合があります。 SPECIFICATIONS ARE SUBJECT TO CHANGE WITHOUT NOTICE.
© 2001 KYOSHO/禁無断転載複製
R
DUCTED FAN AIRCRAFT
●First-time builders should seek the advice of experienced modellers
●Assemble this kit only in places out of children's reach!
●Take enough safety precautions prior to operating this model.
You are responsible for this model's assembly and safe operation!
●Always keep this instruction manual ready at hand for quick
reference, even after completing the assembly.
WINGSPAN: 1000mm
INSTRUCTION MANUAL
SAFETY PRECAUTIONS
This radio control model is not a toy!
before commencing assembly and if they do not fully understand
any part of the construction.
組立/取扱説明書
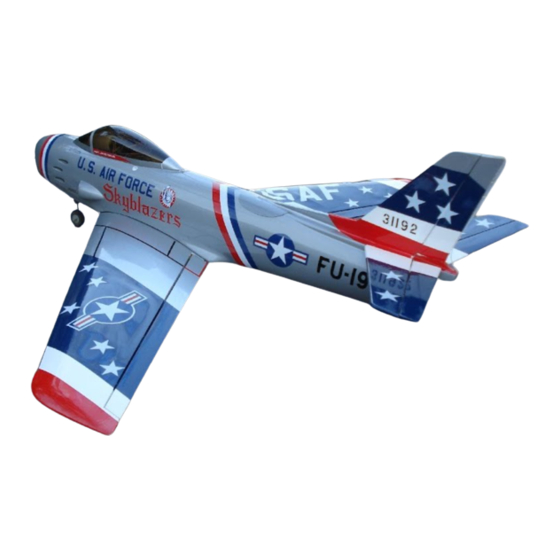
F‑86F セーバー
2
2
3~14
15
16
No. 11086
Advertisement

Related Manuals for Kyosho F-86F Sabre


Summary of Contents for Kyosho F-86F Sabre
- Page 1 You are responsible for this model’s assembly and safe operation! してから責任をもってお楽しみください。 ●Always keep this instruction manual ready at hand for quick ●組立てた後も、説明書がいつでも見られるように大切に reference, even after completing the assembly. 保管してください。 No. 11086 ※製品改良のため、予告なく仕様を変更する場合があります。 SPECIFICATIONS ARE SUBJECT TO CHANGE WITHOUT NOTICE. © 2001 KYOSHO/禁無断転載複製...
- Page 2 Read through the manual before you begin, so you will have an overall idea of what to do. ●重要な注意事項があるマークです。 必ずお読みください。 キットの内容をお確かめください。万一不良、不足がありましたら、お買い求めの販売店にご相談いただくか、 Do not overlook this symbol! 当社「ユーザー相談室」までご連絡ください。 Check all parts. If you find any defective or missing parts, contact your local dealer or our Kyosho Distributor. 説明書に使われているマーク Warning! Symbols used throughout this instruction manual, comprise: 2mmの穴をあける(例)。 別購入品...
- Page 3 主翼 低粘度瞬間接着剤をヒンジに Main Wing しみこませ確実に接着する。 Install the hinges completely before applying instant glue. 主翼とエルロンの中心を合わせる。 Align the centre of the main wing with the aileron. 8㎜ 主翼 8㎜ Main Wing 向きに注意。 Note the direction. 線に合わせてカット。 上 Cut it in accordance with the line. 確実に接着する。 すき間があく場合はエポキシで埋める。 上反角翼端で32mm 飛行中にはずれると操縦不可能に...
- Page 4 カットした残りの1本はP.8 で使用。 主翼 Use the rest of wire in step Main Wing プロポに付属 のビス。 Included with the radio set. エルロンサーボ Aileron Servo 主翼 Main Wing Warning! 35mm 35mm 確実に接着する。 飛行中にはずれると操縦不可能に なり事故につながります。 If it comes off during flights, you may lose control of your airplane, resulting in an accident ! 約 8mm Approx. 8mm...
- Page 5 胴体 Fuselage 5㎜ 下 Bottom 110㎜ 20㎜ 前 Front 前 Front 上 6.0mm Top ファンケース Fan Case 3 x 14mm TPビス 3 x 14mm TP Screw TP Screw 胴体 Fuselage 少し下げる。 Lower this side. まっすぐ下げる。 Initially insert the 少し上げる。 fan case as shown in the picture.
- Page 6 胴体 Fuselage 線が上 The line is on the top. この位置に合わせる。 Align it with the back edge of the wing saddle. 38mm 38mm 胴体&主翼 3 x20mm Fuselage & Main wing 3x 20mm ビス Screw 3 x 20mm ビス ワッシャー Screw Washer ワッシャー...
- Page 7 パイピング 5㎜ PPパイプの先端を斜めにカットすると 12㎜ Piping 後ろに出しやすい。 後ろ Cut the tip of pipe as illustrated to Back 20㎜ 後ろに出す寸法。 allow smooth insertion. PPパイプ ( 太 ) とアルミパイプを Figures on the 各長さにカットする。 picture are the Cut PP pipe (thick) and aluminum length of the PP pipe as following length.
- Page 8 エンジン 2.6 x 8mm Engine 2.6 x 8mm TPビス TP Screw 2.6 x 12mm ビス Screw 2.6 x 12mm ビス Screw エンジン/マフラー Engine/Muffler 後ろから見て約45゜ に取付。 Position the muffler so that ビス 2.6 x 22mm the 3x5mm screw is 45 degrees Screw to the engine. 3 x 15mm セットビス...
- Page 9 胴体 Fuselage Warning! 3 x 25mm キャップスクリュー Cap Screw 確実にナットを締める。 飛行中にはずれると操縦不可 能になり事故につながります。 ドライブナット 7 mm ワッシャー Drive Nut Tighten the nut securely. Washer If it comes off during flights, you may lose control of your airplane, resulting in an accident ! 3 x 25mm ドライブナットがきつい...
-
Page 10: Horizontal Tail
胴体 60mm 70mm Fuselage 60mm マジックファスナーは半分にカットして使う。 Cut the velcro in half before installing. マジックファスナー Velcro 10mm 3 x 10mm 胴体 250mm 17mm 12mm Fuselage 3 x 10mm ビス Screw 3mm ナイロンナット Nylon Nut ニードル延長 キャブレターへ Needle Extension 3mm ワッシャー To the carburetor Washer シリコンチューブ Silicone Tube (キャブへ) 下から見た図... - Page 11 2.6 x 12mm 水平尾翼 フィルム面をカット。 Horizontal Tail ( Stabiliser ) Cut away only the film. 1.5mm 2.6 x 12mm TPビス TP Screw 12mm 12mm 2.6 x 12mm 確実に接着する。 A=A' 水平尾翼上反角 飛行中にはずれると操縦不可能に Warning! Confirm A = A’ なり事故につながります。 Securely glue together. If it comes off during flights, you may lose control of your airplane, resulting in an accident ! 垂直尾翼...
- Page 12 ラダーリンケージ Rudder Linkage 3 x 30mm ビス Screw 3mm ナット 3mm ワッシャー Washer 5㎜ 3.1mm ホーンチップ ( L ) 9㎜ Horn chip ( L ) 15mm 15mm ペンチでつぶす。 70mm 70mm 70mm ワイヤー Crimp this part with a pliers. Wire PPパイプ ( 細 ) 2 x 6㎜パイプ...
- Page 13 エレベーターリンケージ ロッド振れ止め Elevator Linkage Support block for elevator rod. Warning! 確実にハンダする。 エレベーターロッド 飛行中にはずれると操縦不能に Elevator Rod なり事故につながります。 Make sure to solder securely. If not properly solderd, a faliure in flight may occur. ホーン合わせてカット。 ハンダ Cut off shaded portion. Solder 15㎜ 30mm 6㎜ 3mmバルサ 斜めにカット。...
- Page 14 胴体 2x6mm Fuselage 2x6mm 2 x 6mm TPビス TP Screw デカール Decals 下穴 Pilot holes 各主翼を確実にネジ止めする。 重心位置/舵角調整 飛行中にはずれると操縦不能になり事故につながります。 C of G position/ Adjustment Warning! Ensure all screws are securely tightened before flight. 図の様に各舵が動くように調整する。 重心位置 この調整幅は普通の飛行に適した舵角ですので楽しみ方に よって調整は変更してください。 Adjust the travel of each control surface to the values in the diagrams.
- Page 15 デカール 付属のデカールは、パッケージを参考に貼って下さい。 Decals For the correct placement of decals, please refer to the box top and illustrations below. ( 反対側 ) ( 反対側 ) ( 反対側 ) ( 反対側 ) ( 反対側 ) ( 反対側 ) ( 反対側 ) ( 反対側 ) ( 反対側 ...
- Page 16 離陸滑走中、機速が乗らないうちに無理にエレベーターのアップで機体を浮かそうとし、うまく離陸出来ない人が多いよう です。この飛行機は、プロペラ機と同じ感覚でのエレベーターアップの操作は、離陸滑走後の上昇速度の低下を招きます。 平坦な滑走路で機速が乗るまで我慢して直線滑走後、滑らかにエレベーターを操作してください。 滑 走 路 一般のプロペラ機と違って長く(60〜70m)平坦な離陸滑走距離が必要となります。 また滑走路面は、なるべくスムーズに機体が走る飛行場を選び、かつ凸凹の無いコースを滑走させてください。 燃 料 今まで当社でテストした中で一番のお薦めの燃料は、 KYOSOHO PRO SPEC FUEL レーシング 30% (No.73801 ¥3,600)です。 重心位置 本機の重心位置は、主翼中央部前縁から185mmに合わせてください。これより前にすれば飛行は安定しますが、離陸 や着陸時に速度が速くなり、操縦しにくくなります。また、これより後ろにすると安定感が薄れ操縦が難しくなるでしょう。 頭上げ現象 一般のプロペラ機の場合、機速が乗らなくてもプロペラの後流がエレベーターやラダーに当たって、ある程度コントロ ールはききますが、ダクテッドファン機の場合 プロペラの後流はありませんので、機体の離陸速度に応じて舵が効き 始めます。もし、トリムアップで飛ばしてた場合、離陸時に頭上げを起しやすくなりますので、滑走して機体が浮いた 瞬間、すぐにエレベーターで頭上げを抑え、ダウンをあてる気持ちで離陸させてください。一度、上空で、トリム調整 を終えれば、離陸した瞬間の頭上げは防げるでしょう。 ノーズギヤ 出来るだけ機体が平行になるように、ノーズギヤの上部カラーに2〜3mm入るように取り付け、調整してください。 エアーインテーク 空気の取り入れは、多いほうがよいのですが、胴体上部にこ れ以上穴を空けても効き目は期待出来ません。ただ、下面の ノーズギヤの両サイドに長方形の穴(80×20mm)くらいの穴 20mm を2箇所くらい空けるとよいでしょう。ただし、ほこりや砂 利の吸い込みには十分注意してください。 80mm © 2001 KYOSHO /禁無断転載複製 PRINTED IN JAPAN...
-
Page 17: Before Flying
This will result in serious injury! 〇 × 風 オプションパーツは純正パーツ以 WIND 外使用しない。 Only use KYOSHO genuine parts! 京商株式会社 〒243‑0034 神奈川県厚木市船子153 ●ユーザー相談室直通 TEL.046‑229‑4115 メーカー指定の純正部品を使用して お問い合わせは:月曜〜金曜(祝祭日を除く) 10:00〜18:00 安全にR/Cを楽しみましょう。 PRINTED IN CHINA 62150106-3...
Need help?
Do you have a question about the F-86F Sabre and is the answer not in the manual?
Questions and answers