Advertisement
Quick Links
※ご使用前にこの説明書を良くお読みになり十分に理解してください。
Before beginning assembly, please read these instructions thoroughly!
THE FINEST RADIO CONTROL MODELS
組立/取扱説明書
INSTRUCTION MANUAL
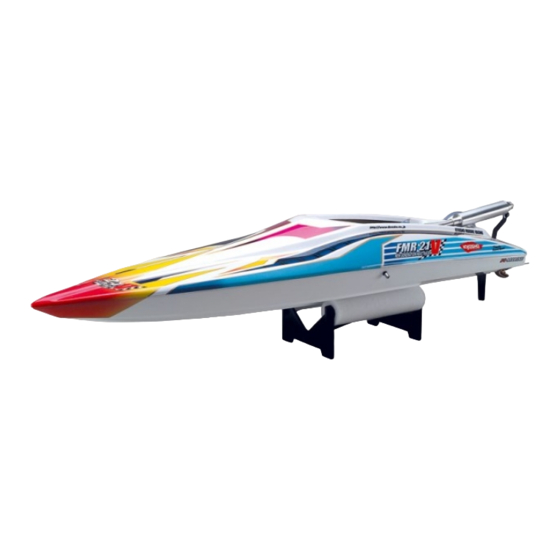
RADIO CONTROLLED .21 ENGINE POWERED HEAT RACER
目 次 INDEX
●キットの他にそろえる物
REQUIRED FOR OPERATION
●プロポの準備/組立て前の注意
RADIO PREPARATION/BEFORE YOU BEGIN
●本体の組立て
ASSEMBLY
●取扱いの注意
OPERATING YOUR MODEL SAFELY
●分解図
EXPLODED VIEW
●スペアパーツ・オプションパーツリスト
SPARE PARTS & OPTIONAL PARTS
安全のための注意事項
この無線操縦模型は玩具ではありません!
●この商品は高い性能を発揮するように設計されています
ので組立てに不慣れな方は、模型を良く知っている人に
アドバイスを受け確実に組立ててください。
●組立て作業は、幼児の手のとどかない所で行ってください。
●動かして楽しむ場所は万一の事故を考えて、安全を確認
してから責任をもってお楽しみください。
●組立てた後も説明書がいつでも見られるように大切に保
管してください。
※製品改良のため、予告なく仕様を変更する場合があります。 *SPECIFICATIONS ARE SUBJECT TO BE CHANGED WITHOUT NOTICE.
2003 KYOSHO CORPORATION/禁無断転載複製
C
R
LENGTH: 970mm (38.2'')
UNDER SAFETY PRECAUTIONS
This radio control model is not a toy.
First-time builders should seek the advice of experienced
●
modellers before beginning assembly and if they do not fully
understand any part of the construction.
Assemble this kit only in places out of children's reach!
●
Take enough safety precautions prior to operating this model.
●
You are responsible for this model's assembly and safe
operation!
Always keep this instruction manual ready at hand for quick
●
reference, even after completing the assembly.
2
3
4〜14
15
16〜17
18
No. 41471
Advertisement

Related Manuals for Kyosho FMR 21V


Summary of Contents for Kyosho FMR 21V
- Page 1 You are responsible for this model's assembly and safe してから責任をもってお楽しみください。 operation! ●組立てた後も説明書がいつでも見られるように大切に保 Always keep this instruction manual ready at hand for quick ● 管してください。 reference, even after completing the assembly. No. 41471 ※製品改良のため、予告なく仕様を変更する場合があります。 *SPECIFICATIONS ARE SUBJECT TO BE CHANGED WITHOUT NOTICE. 2003 KYOSHO CORPORATION/禁無断転載複製...
-
Page 2: Tools Required
No.96152 シリコンシール SILICONE SEAL Silicone Sealant シリコンシール剤 ■−ドライバー(中) ■ニッパー Silicone Sealant Slotted Screwdriver (M) Wire Cutters No.96154 KYOSHO スペシャルグルー ■ドリル (2,2.5,5mm) KYOSHO Special Glue Diameter drill(2,2.5,5mm) ■ハサミ Scissors 瞬間接着剤 ■カッターナイフ Instant Glue Sharp Hobby Knife ■エポキシ接着剤 Epoxy Glue キットに入っている工具 Epoxy A ■5.5mmボックスドライバー... -
Page 3: Radio Preparation
●TPビス締をめるときは・・・ Check the contents of this kit. 締めこみが固くても部品が固定されるまで締めてください。 Should parts be missing, immediately contact the retail shop or ただし、部品が変形するまで締めるとビスがきかなくなります。 your nearest Kyosho distributor. When tightening a self-tapping (TP) screw: ●小さな部品の形やサイズを間違えないようにする。 Even if it becomes difficult to turn, continue tightening. 図を参考にして確認しながら組立てる。... - Page 4 スポンジチューブ(短) 船台 Sponge Tube(short) Stand 燃料タンク バリをとる。 Fuel Tank Remove the flashing. 59 ワッシャー Washer シリコンチューブ(細) Silicon Tube (Thin) 5mmナット 5mm Nut が動く様に5mmナット を締める。 Tighten the 5mm Nut and make sure is able to move as shown. 5mmナット 5mmNut 船体 Hull 中に入っている スポンジチューブ(長)...
- Page 5 エンジン Engine エンジン付属 Included with engine エンジン Engine が走航中にゆるまない様にしっかり 締め込む。 Tighten sufficiently so it cannot become loose during operation. エンジン 3 x 12mm 3 x 12mm Engine 向きに注意。 Note the direction. 前 3 x 12mm キャップビス Front Cap Screw 短 Short 防振ゴム...
- Page 6 船体 の向きを合わせる Hull Align with direction of ここでは接着しません。 Do not glue here. 曲がっている部分が前になる様に取り付ける。 Attach so bent section is facing bow (forwards). を船体後面に合わせる Align with rear of hull. 船体 Hull 船体 5 x 12mm Hull 5 x 12mm 六角ボルト Hex Bolt 5mmスプリングワッシャー ...
- Page 7 ブラケット 4x3mm Bracket 4×3mmセットビスは 4 x 3mm セットビス Set Screw をつぶさない程度に締め 込む。 Tighten 4x3mm Set Screw doesn't come out. の向きに注意する。 突き当たりまで差し込む。 Note the direction of Insert all the way. ブラケット Bracket 3 x 20mm キャップビス Cap Screw 3mm フランジナット Flanged Nut 図の位置で が軽く回る様に3×20mm キャップビスを締め込む。...
- Page 8 メカボックス スポンジテープ Radio Box Sponge Tape 3 x 8mm TPビス 3x8mm すき間が無い様に貼る。 TP Screw Apply sponge tape around the entire rim, leaving no gaps. アンテナグロメット Antenna Grommet スポンジテープ Sponge Tape メカボックス Radio Box 3x8mm 3 x 8mm TPビス TP Screw ラダーサーボ...
- Page 9 メカボックス Radio Box メカボックス 3x8mm Radio Box 3 x 8mm TPビス 3x8mm TP Screw スロットルサーボ Throttle servo. 3x8mm メカボックス セロテープを巻いておく。 Radio Box 受信機 Wrap in adhesive tape. Receiver 電池ボックス Battery Box アンテナ Antenna 別購入品 瞬間接着剤で接着する。 Must be purchased separately! Apply instant glue (CA glue, super glue).
- Page 10 メカボックス Radio Box サーボ付属 3 x 3mm セットビス Supplied with Set Screw the servo. カットする。 Cut Off. 76mm 16mm 3x3mm 3x3mm 10mm 船体 Hull 10mm 図の位置に穴をあける。 110mm Make holes as per the diagram. 65mm 10mm 船体 Hull 3x14mm 3 x 14mm 化粧ビス...
- Page 11 船体 3 x 3mm セットビス Set Screw Hull スロットルスティック中立 スロットルスティック前進全開 With the throttle stick in neutral. With the throttle stick pushed up. 3x3mm をスターターで引っ張った時に が当たらない 様に取り付ける。 Attach so it doesn't contact when pulling starter. スターター 上記の指示になる様に をカットして調整する。 Starter. を の内側又は外側 and adjust according to the illustration above. に通す。...
- Page 12 メカボックス Radio Box Oリング P2 O-ring P2 Oリング P5 O-ring P5 スイッチ Switch < > < > 向きに注意。 Note the direction. スイッチに付属のビス。 Supplied with the switch. プロポの説明書を参考に、 メカボックス コネクターを接続する。 Radio Box Connect as per radio instruction manual. 閉まる。 Close. 開く。 Open.
- Page 13 で取外した スポンジチューブを元に戻す。 マフラー Put back Sponge Tube, Which was pulled out at Muffler 3 x 10mm キャップビス Cap Screw シリコンチューブ10×13mm Silicone Tube 10x13mm ジョイントパイプ Joining Pipe 3 x 8mm TPビス マフラー TP Screw Muffler マニホールド 3 x 10mm Manifold ナイロンナット Nylon Nut 3mm ヘッドワッシャー...
- Page 14 図を参考に シリコンチューブで配管する。 船体 Connect Silicone Tubes as shown in the diagram. Hull シリコンチューブ Silicone Tube シリコンチューブ Silicone Tube シリコンチューブ Silicone Tube シリコンチューブ Silicone Tube オプションパーツ OPTIONAL PARTS オプションのターンフィンを取り付けると旋回性能が向上します。 Attachment of optional turn fins delivers improved turning performance. No.94074 ターンフィンセット(S.M.L) Turn Fin Set(S,M,L) 大きさによって性能が変化するので 走航させながら選んでください。 Turn Fin size affects performance. Run the boat while choosing Turn Fin size. 直進性・旋回安定性を 向上させる場合、左側 にもターンフィンを 取り付けます。 Attaching a left Turn Fin can result in improved straight running performance and turning stability.
- Page 15 取扱いの注意 OPERATING YOUR MODEL SAFELY 事故やケガ等の危険防止のため、次のことを必ずお守りください。 In order to avoid accidents and personal injury, be sure to observe the following: ●燃料は、引火性があります。 ●R/Cボートは、湖や河川などの水辺で楽しむものです。 Fuel is highly inflammable and high-explosive! 操縦する方や同行の方が思わぬ事故に合わないように 火気のあるところや室内では絶対に使用しない。 注意し、必ず安全な場所で走航させてください。 NEVER use fuel indoors or in places with open fires and With R/C boats, discover a new world of pleasure.
- Page 16 94281 WP11 94281 FV002 FV001 FV004 94855 WP11 HJ12 5x12mm FV002 3x3mm WP11 94852 FV005 3x3mm 94891 FV010 4x3mm 3x20mm FV003 FV005 FV012 FV009 FV014 FV011 4x3mm W0148 FV008 WP11 3x12mm FV011 © 2003 KYOSHO CORPORATION / 禁無断転載複製 FMR 21V...
-
Page 17: Optional Parts
Drain Valve ラダーリンケージセット(FMR 21V) 防水スポンジテープ 26 27 28 x 1 FV005 1300 94450 45 x 2 Rudder Linkage Set(FMR 21V) Waterproof Sponge Tape 21フローティングマウント アンテナグロメット FV006 21 22 x 1 20 x 2 37 x 4 12000 54 x 5 94851 .21 Froating Engine Mount... - Page 18 "Kyosho Direct-Mail-Parts-Order-System" is available only for Japanese market. *発送手数料、消費税率は平成15年 7月 1日現在のものです。 京商スペアパーツ・オプションパーツの購入方法 これらの購入方法は日本国内に限らせていただきます 部品を こわしちゃった 購入方法による手数料、お届け日数のめやす。 ●部品をこわしたり、なくしてしまった場合で もスペアパーツ や オプションパーツを購入 購入方法 発送手数料 お届け予定日数 し、元どおりに直す事ができます。 お店に在庫がない場合は お店で 日 不要 3〜4 パーツ直送便 で ●パーツはお店で直接購入していただくか、お 円 6〜7 日 現金書留 で 店に行けない場合は、インターネットか郵便を お店に 円 郵便振込 10〜12 日...
- Page 19 The service mentioned below is available only for Japanese market. 組立や、操作上で不明な点のお問い合わせ方法 これらのサービスは日本国内に限らせて頂きます 組立てたり、操作してみて上手くいかない点などございましたら、ご購入いただいた 販売店または、京商ユーザー相談室へお問い合わせください。 京商ユーザー相談室へお問い合わせの際は、お電話いただくか、下記のお問い合わせ 用紙に必要事項をご記入のうえ、ファックスまたは郵便でお送りください。 京商へのお問い合わせ先 → 「京商ユーザー相談室」 京商にお問い合わせの際は、「京商ユーザー相談室」にご連絡ください。 お問い合わせの際は、お手元に商品や組立/取扱説明書をご用意のうえ、組立/取扱説明書のページ数, 行程番号, 部品番 号(キーNo.)を用いるなど、なるべく具体的にお知らせください。 0 4 6 ‑ 2 2 9 ‑ 4 1 1 5 電話でのお問い合わせは、月曜〜金曜(祝祭日を除く)10:00〜18:00。 電話でのお問い合わせ: フ ァ ッ ク ス では、24時間お問い合わせの受付をして居ります。回答は、翌営業日 0 4 6 ‑...
Need help?
Do you have a question about the FMR 21V and is the answer not in the manual?
Questions and answers