Advertisement
INSTRUCTION MANUAL
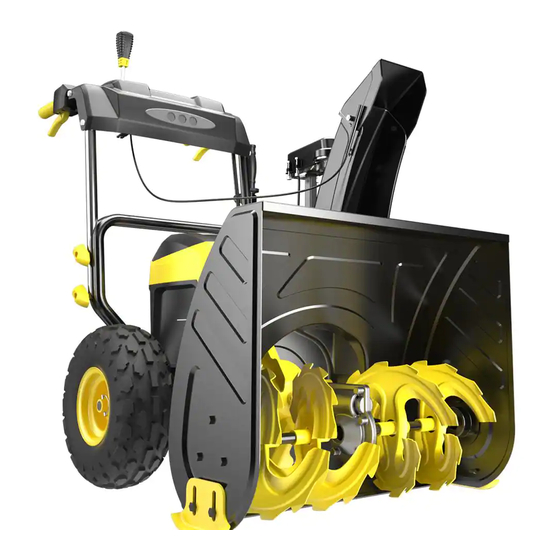
EN 80V 24 inch Cordless Snow Blower
FR Souffleur de neige sans fil 80V 24 Pouces
ES Soplador de nieve inalámbrico 80V 24 Pulgadas
Model # DB2805
Have product questions or need technical support? Please feel free to contact us!
Website:
www.Amerisuninc.com
www.PowerSmartUSA.com
Toll free: 1-800-791-9458 Mon-Fri 9-5 EST
Email: support@amerisuninc.com
Advertisement
Table of Contents

Related Manuals for Powersmart DB2805


Summary of Contents for Powersmart DB2805
- Page 1 EN 80V 24 inch Cordless Snow Blower FR Souffleur de neige sans fil 80V 24 Pouces ES Soplador de nieve inalámbrico 80V 24 Pulgadas Model # DB2805 Have product questions or need technical support? Please feel free to contact us! Website: www.Amerisuninc.com...
-
Page 3: Table Of Contents
32.3x24.8x22in Weight: 126 lbs Thank you for purchasing PowerSmart products. It is crucial and highly recommended that you read this instruction manual in its’ entirety, as this is an invaluable tool and reference point in understanding the operation of your unit. -
Page 4: Introduction
INTRODUCTION Thank You for Purchasing a PowerSmart ® Product. This manual provides information regarding the safe operation and maintenance of this product. Every effort has been made to ensure the accuracy of ® the information in this manual. PowerSmart reserves the right to change this product and specifications at any time without prior notice. - Page 5 SYMBOL INSTRUCTION This page depicts and describes safety symbols that may appear on this product. Read, understand, and follow all instructions on the machine before attempting to assemble and operate. Safety Alert Indicates a potential personal injury hazard. Always wear safety goggles or safety glasses Eye Protection with side shields and a full-face shield when operating this product.
-
Page 6: Training
Wet Conditions Do not expose to rain or use in damp locations. Alert Ingress Protection IPX4 Protection from splashing water Degree Volt Voltage Amperes Current Hertz Frequency (cycles per second) Watt Power Minutes Time Direct Current Type or a characteristic of current WARNING: To ensure safety and reliability, all repairs should be performed by a qualified service technician. - Page 7 PREPARATION • Thoroughly inspect the area where the equipment is to be used and remove all doormats, sleds, boards, wires, and other foreign objects. • Do not operate the equipment without wearing adequate winter garments. Avoid loose-fitting clothing that can get caught in moving parts. Wear footwear that will improve footing on slippery surfaces.
- Page 8 CLEARING A CLOGGING DISCHARGE CHUTE Hand contact with the rotating auger assembly inside the discharge chute is the most common cause of injury associated with snow blowers. Never use your hand to clean out the discharge chute. To clear the chute: SHUT THE MOTOR OFF! •...
-
Page 9: Knowing Your Snow Blower
KNOWING YOUR SNOW BLOWER Please use the illustration below to familiarize yourself with the location and function of the components that control of your snow blower. 1 7 18 Drive Control Lower Handle Chute Deflector Control Knob Auger Control Battery Box Clean Out Tool Upper Handle Shear Pin... -
Page 10: Assembly
ON/OFF Located on the left of the panel,the ON/FF button must be pressed down before motor can be started. Auger Control Trigger Located on the left side of the handle, the Auger Control Trigger is used to engage and disengage the augers. Squeeze the Auger Control Trigger to engage the augers;... - Page 11 Unpacking • Grasp the rear handle and the front part of the product at the same time to carefully lift the tool up and out of the carton. Remove any other accessories from the carton. Make sure that all items listed in the packing list are included.
- Page 12 Fig.3 Step 3: Installing The Chute Assembly 1. Insert Lower Discharge Chute/Support Tube Assembly into the designated Chute opening for the Lower Discharge Chute, while inserting the Support Tube into the designated base of the Frame. (See Figure 4). 2. Secure Support Tube to base with (2) Screws and nuts provided Fig.4 Step 4 : Skid Shoes Installation and Adjustments 1.
-
Page 13: Operation
4. Place a spacer board on the ground underneath the auger shave plate between the skid shoes. The thickness of the board should be the same as the height above the ground you wish to raise the auger shave plate. The skid shoes should not touch the board. 5. - Page 14 To Remove Battery Pack 1. Remove safety key. 2. Press and hold the battery latch button at the bottom of the battery pack. 3. Remove battery pack from the product. Fig.8 NOTICE: Make sure that the latch on the snow blower snaps into place and that the battery pack is secured to the unit before starting operation.
- Page 15 Drive Trigger Fig 10 Adjusting the Chute The chute can be adjusted to change both the direction and the distance of the discharged snow to assist you in moving snow away from one area and placing it in another. The throwing distance of the snow blower is adjusted by moving the handle on the panel. 1.
- Page 16 WARNING: Do not force the chute so far forward that a gap appears between the deflector and the chute itself. Snow or other debris could be thrown through the gap and back at the operator, resulting in serious personal injury. WARNING: Do not adjust the chute deflector while the bail switch is engaged.
- Page 17 Battery Charge Level Indicator The battery pack are equipped with a push button for checking the charge level. Simply press the push button to read off the battery charge level from the LEDs of the battery indicator: Lights Light Indicators 1 Light On The battery is at 25% capacity and requires charging.
- Page 18 OPERATING TIPS DANGER: Never use a snow blower on frozen lakes, rivers, or similar surfaces. Death or serious injury could occur if the ice breaks. DANGER: Never use the snow blower on a rooftop or other unstable surface, which can result in death or serious personal injury.
-
Page 19: Maintenance
MAINTENANCE WARNING: To avoid serious personal injury, always remove the battery pack from the snow blower before cleaning or performing any maintenance. WARNING: When servicing, use only identical replacement parts. Use of any other parts may create a hazard or cause product damage. To ensure safety and reliability, all repairs should be performed by a qualified service technician. - Page 20 AUGER OR IMPELLER JAMS WARNING! The auger and impeller rotate at fast speeds which can cause harm or even amputation to a person's body parts. Even if you do not see the auger or impeller rotating, it may start at any time if the machine is running.Remove the Safety Key before cleaning the jams.The chute clean-out tool is fastened to the upper tube with mounting clips.
- Page 21 3. Remove (Qty. 4) hex nuts and remove big bottom plate. 4. Separate the belt from the drive pulley as shown in step 4. 5. Remove the auger belt from bottom as shown in step 5. Step 4 Step 5 AUGER BELT INSTALLATION WARNING! Entanglement Hazard –...
-
Page 22: Troubleshooting
AUGER BELT AND RELATED COMPONENT INSPECTION When replacing your snow blower auger belt, it is important to determine the cause of the failure (if applicable) and take corrective action to avoid repeated failure. Inspect the belt: • Correct size and type •... -
Page 23: Exploded View & Parts List
EXPLODED VIEW AND PARTS LIST Panel Assembly Part Stock# Description Part Stock# Description 303020240 Hex Flange Bolt M8x20 303030077 Flange Lock Nut M8 303160873 Lower Handle 203050637 2805 Panel 303020140 T-Screw M8×50 203010876 PC Board Fixed Back Cover 303043010 Concave pad 8 301013039 PC Board 203021419... - Page 24 Chute Assembly Part Stock# Description Part Stock# Description 303020275 Helx Bolt M8×40 303160836 Chute Steering Motor Gear 303041022 Spring Washer 8 303020165 Square Bolt M8×30 303042023 Flat Washer 8 303071053 Chute Steering Fixing Plate 303080523 Chute Support Tube 306110004 Self-plugging Rivet 6×12 303020503 Hex Flange Bolt M6×35 303030077...
- Page 25 Frame Assembly...
- Page 26 Part Stock# Description Part Stock# Description 303020248 Hex Flange Bolt M6×12 203010907 Right Bracket 203050513 Big Bottom Plate 303160838 Auger Motor Casing 45# 303240647 Controller 147×150×17 303160658 DB7004 Small Pulley Wheel 303043068 Flat Washer 4 303043069 Flat Washer 6 303010026 Screw 4.2×12 303041009 Spring Washer 6...
- Page 27 AUGER HOUSING ASSEMBLY...
- Page 28 Part Stock# Description Part Stock# Description 303020245 Hex Flange Bolt M8×14 303181158 Auger Welded D00000690 Bearing Seat 303030076 Flange Normal Nut M8 203060013 Plastic Bearing 303071330 24" Shovel 203050109 Auger Spacer 2 303020542 Square NeckBolt M8×14 203060012 Auger Sleeve 303181292 Auger Hosuing Welded 303180409 Right Auger Welded...
- Page 29 To make a claim under this Limited Warranty, you must return the entire power tool product; transportation prepaid, to PowerSmart. The owner must include a legible copy of the original receipt, which shall list the date of purchase, along with the company’s name where the product was purchased.
Need help?
Do you have a question about the DB2805 and is the answer not in the manual?
Questions and answers