Advertisement
Quick Links
Advertisement

Related Manuals for Motorola solutions APX 8000 M2


Summary of Contents for Motorola solutions APX 8000 M2
- Page 1 TWO-WAY RADIOS APX 8000 MODEL 2 SNO911 - LAW Model 2...
- Page 2 CONTENTS 1/1 APX 8000 M2 FRONT COVER CONTENTS 1/1 DECLARATION OF CONFORMITY RF ENERGY EXPOSURE TRAINING AND PRODUCT SAFETY INFORMATION SOFTWARE VERSION COPYRIGHTS AND DISCLAIMER ANALOG AND DIGITAL AUDIO GETTING STARTED RADIO PARTS AND CONTROLS FLEET MAP PREPARING YOUR RADIO FOR USE...
- Page 3 DECLARATION OF CONFORMITY Per FCC CFR 47 Part 2 Section 2.1077(a) Responsible Party Name: Motorola Solutions, Inc. Address: Motorola Solutions, Inc., 1303 East Algonquin Road, Schaumburg, IL60196-1078, U.S.A. Phone Number: 1-800-927-2744 Hereby declares that the product: Model Name: APX 8000 conforms to the following regulations: FCC Part 15, subpart B, section 15.107(a), 15.107(d) and section 15.109(a)
- Page 4 DECLARATION OF CONFORMITY APX 8000 M2 Note: This equipment has been tested and found to comply with the limits for a Class B digital device, pursuant to part 15 of the FCC Rules. These limits are designed to provide reasonable protection against harmful interference in a residential installation.
- Page 5 Your Motorola Solutions two-way radio is designed, manufactured, and tested to comply with all applicable national and international regulations for human exposure to radio frequency electromagnetic energy. When two-way radios are used as a consequence of employment, applicable regulations may require users to be fully aware of and able to control their exposure to meet occupational requirements.
- Page 6 1 in. (2.5 cm) away from the nose or lips. Antenna should be kept away from the eye. • When worn on the body, always place the radio in a Motorola Solutions approved clip, holder, holster, case, or body harness for this product.
- Page 7 APX 8000 M2 RF ENERGY EXPOSURE TRAINING AND PRODUCT SAFETY INFORMATION Acoustic Safety Exposure to loud noises from any source for extended periods of time may temporarily or permanently affect your hearing. The louder the volume of the radio, the sooner your hearing will be affected.
- Page 8 APX 8000 M2 RF ENERGY EXPOSURE TRAINING AND PRODUCT SAFETY INFORMATION Operational Warnings The following explains the operational warnings: • For Vehicle With Air Bags – Refer to vehicle manufacturer's manual prior to installation of electronic equipment to avoid interference with air bag wiring.
- Page 9 • Do not allow conductive material such as jewelry, keys, or beaded chains to touch exposed battery terminals. Repair Repairs to a Motorola Solutions intrinsically safe radio product certified by, for example, FM, UL, CSA, CENELEC, should only be done at a location that has been audited under the certifying body's repair and service standard.
- Page 10 Approved accessories or options, or both. This Approved portable and battery combination must be strictly observed. There must be no substitution of items, even if the substitute has been previously Approved with a different Motorola Solutions communications equipment unit. Approved configurations are listed by the Approving Agency (FM, UL, CSA, CENELEC).
- Page 11 1. This device may not cause harmful interference. 2. This device must accept any interference received, including interference that may cause undesired operation. 3. Changes or modifications made to this device, not expressly approved by Motorola Solutions, could void the user's authority to operate this equipment.
- Page 12 COPYRIGHTS AND DISCLAIMER APX 8000 M2 Computer Software Copyrights The Motorola products described in this manual may include copyrighted Motorola computer programs stored in semiconductor memories or other media. Laws in the United States and other countries preserve for Motorola certain exclusive rights for copyrighted computer programs including, but not limited to, the exclusive right to copy or reproduce in any form the copyrighted computer program.
- Page 13 ANALOG AND DIGITAL AUDIO APX 8000 M2 Although digital radio functions similar to analog radio, digital radios however are developed to offer more capabilities and features than analog radios. For instance, a single digital radio channel can support simultaneous radio users thus reducing bandwidth consumption.
- Page 14 GETTING STARTED APX 8000 M2 This Interactive End User Toolkit (IEUTK) covers the basic operation of the APX 8000 Model 2 and Model 3 portables. However, your dealer or system administrator may have customized your radio for your specific needs. Check with your dealer or system administrator for more information.
- Page 15 GETTING STARTED APX 8000 M2 The following special notations identify certain items: Example Description Home button or Buttons and keys are shown in bold print or as an icon. This means “Press the right side of the 4-way Navigation button.”...
- Page 16 GETTING STARTED APX 8000 M2 Additional Performance Enhancement The following are some of the latest creations designed to enhance the security, quality and efficiency of the radios. ASTRO 25 Enhanced Data ASTRO 25 Enhanced Data is optimized to handle different message sizes and variable update rates from different applications of the radio.
- Page 17 GETTING STARTED APX 8000 M2 Conventional Talkgroup and Radio Scan Enhancements A few enhancements have been made to the Conventional Talkgroup at the system. These enhancements improve the Scan feature operation significantly when multiple agencies are using a single conventional radio frequency channel. These enhancements al l ow users to use Selective Squelch to operate on only the subset of talkgroups that are relevant to the users rather than all talkgroups o n the channel.
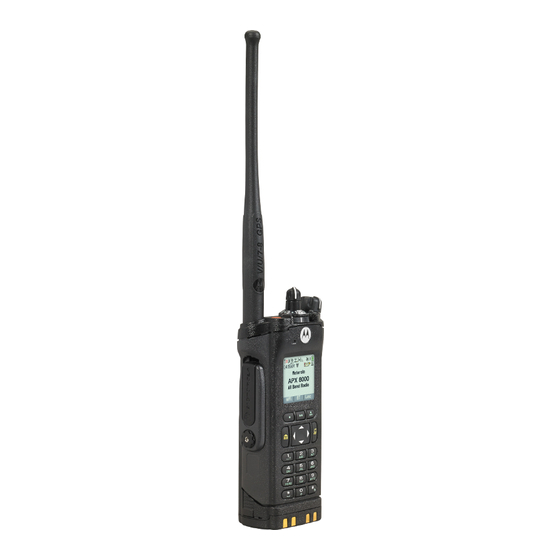
- Page 18 RADIO PARTS AND CONTROLS APX 8000 M2 Model 2 Antenna 16-Position Select Knob* On/Off/Volume Control Knob Conv 3-Position A/B/C Menu Menu Switch* ZONE ZONE A: Zone Select SCNL SCNL B: Zone Select Microphone PRFL PRFL C: Zone Select NUIS NUIS...
- Page 19 RADIO PARTS AND CONTROLS APX 8000 M2 Antenna 16-Position Select Knob* On/Off/Volume Control Knob Display Microphone Light/Flip* Main Speaker Push-to-Talk (PTT) Button Zone Down* Battery Zone Up* Battery Latch * These radio controls/buttons are programmable. CONTENTS < PREV NEXT >...
- Page 20 RADIO PARTS AND CONTROLS APX 8000 M2 2-Position Concentric 3-Position A/B/C Switch* Switch* A: Blank A: Zone Select B: Scan B: Zone Select C: Zone Select Top (Orange) Button* On/Off/Volume Conv: Blank Control Knob Trk: Emergency Antenna Top Display 16-Position Select Knob* * These radio controls/buttons are programmable.
- Page 21 FLEET MAP 1-7 APX 8000 M2 Information redacted, please contact your local trainer or contact SNO911 Wireless Technology CONTENTS < PREV NEXT >...
- Page 22 FLEET MAP 8-14 APX 8000 M2 Information redacted, please contact your local trainer or contact SNO911 Wireless Technology CONTENTS < PREV NEXT >...
- Page 23 FLEET MAP 15-21 APX 8000 M2 Information redacted, please contact your local trainer or contact SNO911 Wireless Technology CONTENTS < PREV NEXT >...
- Page 24 FLEET MAP 22-29 APX 8000 M2 Information redacted, please contact your local trainer or contact SNO911 Wireless Technology CONTENTS < PREV NEXT >...
- Page 25 PREPARING YOUR RADIO FOR USE APX 8000 M2 Attaching/Removing the Battery With the radio turned off, slide the battery into the radio’s frame until Note: If your radio is side latches click into place. preprogrammed with volatile-key retention, the encryption keys are...
- Page 26 PREPARING YOUR RADIO FOR USE APX 8000 M2 Attaching/Removing the Antenna With the radio turned off, set the antenna in its receptacle and turn clockwise to attach it to the radio. To remove the antenna, turn the antenna counterclockwise.
- Page 27 PREPARING YOUR RADIO FOR USE APX 8000 M2 Attaching/Removing the Accessory Connector Cover The accessory connector is located on the antenna side of the radio. It is used to connect accessories to the radio. Note: To prevent damage to the connector, shield it with the connector cover when not in use.
- Page 28 PREPARING YOUR RADIO FOR USE APX 8000 M2 Using the Carry Holder To remove the radio from the carry holder, place the tip of Position the radio within the your fingers on the ledge of the carry holder and push at the carry holder with the main bottom of the radio until the radio is released from it.
- Page 29 PREPARING YOUR RADIO FOR USE APX 8000 M2 Charging the Battery To avoid a possible explosion: • DO NOT replace the battery in any area labeled “hazardous atmosphere”. • DO NOT discard batteries in a fire. The Motorola-approved battery shipped with your radio is uncharged. Prior to using a new battery, charge it for a minimum of 16 hours to ensure optimum capacity and performance.
- Page 30 PREPARING YOUR RADIO FOR USE APX 8000 M2 Battery Charger To charge the battery, place the battery, with or without the radio, in a Motorola-approved charger. The charger’s LED indicates the charging progress. Single Unit Charger Multi Unit Charger Continued…...
- Page 31 PREPARING YOUR RADIO FOR USE APX 8000 M2 IMPRES Adaptive Charger • IMPRES Monitors the usage pattern of the battery and, • IMPRES Stores that information in the battery, then • Performs a recondition cycle only when needed. • Will not overheat the battery regardless of how long it is left in the charger.
- Page 32 PREPARING YOUR RADIO FOR USE APX 8000 M2 Charge Indicator Description Single Flash Green Charger has successfully powered up. Steady Red Battery is in rapid charge mode. Flashing Green Battery has completed rapid charge (>90% available capacity). Battery is in Top-Off charge (Trickle Charge) and requires approximately 1 hour.
- Page 33 PREPARING YOUR RADIO FOR USE APX 8000 M2 NOTE: Automatic Reconditioning of the Battery: Toward the end of the rapid charge cycle (STEADY RED indication), the battery voltage When the IMPRES battery is properly inserted exceeds the normal operating voltage of the radio.
- Page 34 PREPARING YOUR RADIO FOR USE APX 8000 M2 Manually Terminating Reconditioning: At any time during the reconditioning process (STEADY YELLOW indication), remove and 5 seconds reinsert the battery within . This causes the charger to terminate the reconditioning process and begin the charging process.
- Page 35 PREPARING YOUR RADIO FOR USE APX 8000 M2 Initial Battery Charge: Must be in an IMPRES Adaptive Charger to properly calibrate the IMPRES battery and enable the Smart Energy features. This process is indicated by a STEADY YELLOW indicator light.
- Page 36 PREPARING YOUR RADIO FOR USE APX 8000 M2 Turning on/off the Radio Rotate the On/Off/Volume Control Knob clockwise until you hear a click. If the power-up test is successful, you see SELFTEST on the radio’s display momentarily, followed by the home screen.
- Page 37 PREPARING YOUR RADIO FOR USE APX 8000 M2 Adjusting the Volume To increase the volume, turn the On/Off/Volume Control Knob clockwise. To decrease the volume, turn this knob counterclockwise. Note: Ensure that the main speaker is pointed towards you for increased loudness and intelligibility, especially in areas with loud background noises.
- Page 38 IDENTIFYING RADIO CONTROLS APX 8000 M2 Programmable Features Any reference in this manual to a control that is Assignable Radio Functions “preprogrammed” means that the control must be – Bluetooth On/Off Allows you to turn on/off the Bluetooth. programmed by a dealer or a qualified radio technician using the radio’s programming software, in order to assign a feature...
- Page 39 IDENTIFYING RADIO CONTROLS APX 8000 M2 – Emergency Depending on the programming, initiates or Assignable Settings or Utility Functions cancels an emergency alarm or call. – Light/Flip Press the button to toggle the display backlight – Internet Protocol Address Displays the Internet Protocol on or off;...
- Page 40 IDENTIFYING RADIO CONTROLS APX 8000 M2 Accessing the Preprogrammed Functions You can access various radio functions through one of the following ways: • A short or long press of the relevant programmable buttons. • Use the Menu Select Buttons (...
- Page 41 IDENTIFYING RADIO CONTROLS APX 8000 M2 Using the Navigation Buttons Home Button button returns you to the Home (default) screen. In most cases, this is the current mode. For selected radio features, the button is also used to save user-edited radio settings or information before returning you to the home screen.
- Page 42 IDENTIFYING RADIO CONTROLS APX 8000 M2 Push-To-Talk (PTT) Button The PTT button on the side of the radio serves two basic purposes: • While a call is in progress, the PTT button allows the radio to transmit to other radios in the call.
- Page 43 IDENTIFYING STATUS INDICATORS APX 8000 M2 Status Icons Received Signal Strength Indicator (RSSI) The 130 x 130 pixel front liquid crystal display (LCD) of your The number of bars displayed represents the received radio shows radio status, text entries, and menu entries. The signal strength for the current site, for trunking only.
- Page 44 IDENTIFYING STATUS INDICATORS APX 8000 M2 Monitor (Carrier Squelch) Top Display View/Program Mode Selected channel is being monitored (during conventional Radio is in the view or program mode. • On steady = View mode operation only). • Blinking = Program mode Vote Scan Enabled The vote scan feature is enabled.
- Page 45 IDENTIFYING STATUS INDICATORS APX 8000 M2 Secure Operation Bluetooth On • On = Secure operation. Bluetooth is on and ready for Bluetooth connection. • Off = Clear operation. • Blinking = Receiving an encrypted voice call. AES Secure Operation • On = AES Secure operation.
- Page 46 IDENTIFYING STATUS INDICATORS APX 8000 M2 LED Indicator The LED indicator shows the operational status of your radio. CONTENTS < PREV NEXT >...
- Page 47 IDENTIFYING STATUS INDICATORS APX 8000 M2 – Solid red Radio is transmitting. – Blinking red Radio is transmitting at low battery condition. – Double blinking red Radio is in Emergency Mode. – Rapidly blinking red Radio has failed the self test upon powering up or encountered a fatal error.
- Page 48 IDENTIFYING STATUS INDICATORS APX 8000 M2 Intelligent Lighting Indicators This feature temporary changes the radio’s display backlight color and the alert text background color to help signal that a radio event has occurred. Note: This feature must be preprogrammed by a qualified radio technician.
- Page 49 IDENTIFYING STATUS INDICATORS APX 8000 M2 Orange Emergency Alerts Critical Alerts CONTENTS < PREV NEXT >...
- Page 50 IDENTIFYING STATUS INDICATORS APX 8000 M2 Alert Tones Your radio uses alert tones to inform you of your radio’s condition. The following table lists these tones and when they occur. You Hear Tone Name Heard Short, Radio Self Test Fail When radio fails its power-up self test.
- Page 51 IDENTIFYING STATUS INDICATORS APX 8000 M2 You Hear Tone Name Heard Short, Valid Key-Press When correct key is pressed. Medium-Pitched Radio Self Test Pass When radio passes its power-up self test. Tone Clear Voice At beginning of a non-coded communication.
- Page 52 IDENTIFYING STATUS INDICATORS APX 8000 M2 You Hear Tone Name Heard Two High-Pitched Tones GPS Fails When the GPS signal is lost or when GPS fails. Ringing Fast Ringing When system is searching for target of Private Call. Enhanced Call Sent When waiting for target of Private Call to answer the call.
- Page 53 GENERAL RADIO OPERATION APX 8000 M2 BEST PRACTICES: HIGH NOISE ENVIRONMENTS AND THE DIGITAL DIFFERENCE To minimize or eliminate the impact of background noise when using digital radios: 1. Place the microphone 1-2 “ from your mouth. 2. Place the microphone facing your mouth.
- Page 54 GENERAL RADIO OPERATION APX 8000 M2 Selecting a Zone A zone is a group of channels. [Menu] to Zone. Procedure: 2. Press the Menu Select button directly below Zone. [Zone (3-Position A/B/C)] 1. Move the preprogrammed Zone (3-Position A/B/C) to the required zone.
- Page 55 GENERAL RADIO OPERATION APX 8000 M2 Selecting a Radio Channel A channel is a group of radio characteristics, such as transmit/receive frequency pairs. Procedure: [16-Position Select Knob] 1. Turn the preprogrammed 16-Position Select Knob to the desired channel. CONTENTS <...
- Page 56 GENERAL RADIO OPERATION APX 8000 M2 Receiving and Responding to a Radio Call Once you have selected the required channel and/or zone, you can proceed to receive and respond to calls. The LED lights up solid red while the radio is transmitting. In conventional mode, the LED lights up solid yellow when the radio is receiving a transmission.
- Page 57 ADVANCED FEATURES APX 8000 M2 Scan Lists Scan lists are created and assigned to individual channels/groups. Your radio scans for voice activity by cycling through the channel/group sequence specified in the scan list for the current channel/group. Your radio supports different types of Scan Lists: •...
- Page 58 ADVANCED FEATURES APX 8000 M2 Scan Lists Viewing a Scan List Procedure: Model 2 to ScnL. 2. Press the Menu Select button directly below ScnL. to view the members on the list. 4. Press to exit the current display and return to the home screen.
- Page 59 ADVANCED FEATURES APX 8000 M2 Scan Lists Editing the Scan List This feature lets you change scan list members and priorities. Press the Menu Select button directly below Rcl to view Procedure: the next member of the scan list.
- Page 60 ADVANCED FEATURES APX 8000 M2 Priority Status Below the Sel, Del, and Rcl screen, press the Menu Select button directly below Sel to view and/or change the priority status of the currently displayed channel. Below the Sel, Del, and Rcl screen, press the Sel button one or more times to view and/or change the scan list status icon of the currently displayed channel.
- Page 61 ADVANCED FEATURES APX 8000 M2 Scan Turning Scan On or Off This feature allows you to monitor traffic on different channels by scanning a preprogrammed list of channels. Model 2 Procedure: [Preprogrammed Button] 1. Turn the preprogrammed Scan Switch to the Scan on or Scan off position, to initiate or stop scan.
- Page 62 ADVANCED FEATURES APX 8000 M2 Scan Deleting a Nuisance Channel If a channel continually generates unwanted calls or noise (termed a “nuisance” channel), you can temporarily remove The 16-Position the unwanted channel from the scan list. Select Channel Knob * This capability does not apply to priority channels or the designated transmit channel.
- Page 63 ADVANCED FEATURES APX 8000 M2 Scan Restoring a Nuisance Channel Procedure: The 16-Position To restore the deleted nuisance channel, do one of the Select Channel following: Knob * • Turn the radio off and then turning it on again.
- Page 64 ADVANCED FEATURES APX 8000 M2 Emergency Operation The Emergency feature is used to indicate a critical situation. Note: The radio operates in the normal dispatch manner while in Emergency Call, except if enabled, it returns to one If the Top (Orange) button is preprogrammed to send an...
- Page 65 ADVANCED FEATURES APX 8000 M2 Emergency Operation Sending an Emergency Alarm When you receive the dispatcher’s acknowledgement , This feature allows you to send a data transmission, which identifies the radio sending the emergency, to the dispatcher. the display shows Ack received.
- Page 66 ADVANCED FEATURES APX 8000 M2 Emergency Operation Changing Channels during Emergency For ALL Emergency transmissions, when changing channels: • If the new channel is also preprogrammed for Emergency, The 16-Position Select Channel you can change channels while in Emergency operation.
- Page 67 ADVANCED FEATURES APX 8000 M2 Global Positioning System/ Global Navigation Satellite System GPS Operation The GPS technology uses radio signals from earth orbiting satellites, to establish the location coordinates, maximizing your view of clear unobstructed sky is essential for optimum performance.
- Page 68 ADVANCED FEATURES APX 8000 M2 Global Positioning System/ Global Navigation Satellite System Saving a Waypoint Procedure: 4. Press the Menu Select button directly below Exit to exit While in the current location display: the feature and return to the main screen.
- Page 69 ADVANCED FEATURES APX 8000 M2 Global Positioning System/ Global Navigation Satellite System Viewing a Saved Waypoint Procedure: 8. Press the Menu Select button directly below Back to return to the previous screen. While in the current location display: 1. Press the Menu Select button directly below Optn.
- Page 70 ADVANCED FEATURES APX 8000 M2 Global Positioning System/ Global Navigation Satellite System Deleting a Single Saved Waypoint Procedure: Model 2 While in the current location display: 1. Press the Menu Select button directly below Optn. to Waypoints. 3. Press the Menu Select button directly below Sel.
- Page 71 ADVANCED FEATURES APX 8000 M2 Global Positioning System/ Global Navigation Satellite System Deleting All Saved Waypoints 8. Press the Menu Select button directly below Yes to Procedure: delete all waypoints. While in the current location display: Press the Menu Select button directly below No to return 1.
- Page 72 ADVANCED FEATURES APX 8000 M2 Global Positioning System/ Global Navigation Satellite System Measuring the Distance and Bearing from a Saved Waypoint Procedure: Model 2 While in the current location display: 1. Press the Menu Select button directly below Optn.
- Page 73 ADVANCED FEATURES APX 8000 M2 Global Positioning System/ Global Navigation Satellite System Location Feature While in Emergency Mode When the Emergency feature is activated by pressing the emergency button, the radio exits the Location menu and returns to the Home (default) screen so that you can see which channel the emergency signal is going out on.
- Page 74 ADVANCED FEATURES APX 8000 M2 Trunking System Controls Out-of-Range Radio When your radio goes out of the range of the system, it can no longer lock onto a control channel. The 16-Position Select Channel Knob * On/Off/Volume Procedure: Control Knob 1.
- Page 75 ADVANCED FEATURES APX 8000 M2 Trunking System Controls Site Trunking Feature If the zone controller loses communication with any site, that site reverts to site trunking. Model 2 The display shows the currently selected zone/channel combination and Site trunking.
- Page 76 ADVANCED FEATURES APX 8000 M2 Mission Critical Wireless - Bluetooth - This feature allows your radio to extend its functionality by connecting to external proprietary Motorola accessories. Note: It is recommended to use Motorola proprietary Mission Critical Wireless (MCW) devices with APX radios during Mission Critical operations as other Bluetooth devices may or may not meet the mission critical standard.
- Page 77 ADVANCED FEATURES APX 8000 M2 Mission Critical Wireless - Bluetooth - Turning the Bluetooth On Procedure: [Preprogrammed Button] 1. Press the preprogrammed button to turn the Bluetooth on. You hear a short, medium-pitched tone. The display shows momentary Bluetooth on, and appears to indicate Bluetooth is on.
- Page 78 ADVANCED FEATURES APX 8000 M2 [Menu] to BT. 2. Press the Menu Select button directly below BT to access the Bluetooth feature screen. to Status. 4. Press the Menu Select button directly below On. The display shows momentary Status on, and appears to indicate Bluetooth is on.
- Page 79 ADVANCED FEATURES APX 8000 M2 Mission Critical Wireless - Bluetooth - Turning the Bluetooth Off Procedure: [Preprogrammed Button] 1. Press the preprogrammed button to turn the Bluetooth off. You hear a short, medium-pitched tone. The display shows momentary Bluetooth off, and disappears.
- Page 80 ADVANCED FEATURES APX 8000 M2 Mission Critical Wireless - Bluetooth - Re-Pair Timer There are two options for configuring the radio’s Bluetooth Re-Pair Timer Re-Pair Timer Scenarios pairing type. The type defines the duration the radio and the Options accessory retain the pairing information.
- Page 81 ADVANCED FEATURES APX 8000 M2 Mission Critical Wireless - Bluetooth - Bluetooth Drop Timer The Bluetooth Drop Timer has two different settings and The radio could not control the Drop Timer of Personal Area functions, depending upon the selection of the Re-Pair Timer.: Networking (PAN), Dial-Up Networking (DUN), Commercial Off-The-Shelf (COTS) and data services.
- Page 82 ADVANCED FEATURES APX 8000 M2 Mission Critical Wireless - Bluetooth - Pairing with Low Frequency-Motorola Proximity Pairing (LF-MPP) Feature Ensure that Bluetooth feature of your radio is on and the Bluetooth tones are enabled. Bluetooth tones, Bluetooth menu and preprogrammed buttons must be preprogrammed by a qualified radio technician.
- Page 83 ADVANCED FEATURES APX 8000 M2 Note: Once a COTS headset is paired to your radio, it is 2. The radio tries to establish connection with the device always connected. Therefore the battery life of the accessory once paired. is aligned with the Talk Time power consumption, not the Standby Time consumption.
- Page 84 ADVANCED FEATURES APX 8000 M2 Mission Critical Wireless - Bluetooth - Radio Indications of Lost Bluetooth Connection The radio shows when the devices have a Bluetooth connection. Below is the scenario and radio indications when the connection is interrupted.
- Page 85 ADVANCED FEATURES APX 8000 M2 Mission Critical Wireless - Bluetooth - Standard Pairing Feature Note: Bluetooth tones, Bluetooth menu and preprogrammed The Bluetooth Standard Pairing feature enables your buttons must be preprogrammed by a qualified radio Bluetooth enabled radio to search for other Bluetooth enabled technician.
- Page 86 ADVANCED FEATURES APX 8000 M2 Searching and Pairing the Bluetooth Device The BT Searching screen shows the name of Bluetooth devices found if there are any. Bluetooth Search in Bluetooth Standard Pairing method is used to scan for other Bluetooth devices nearby. It is set to To stop the searching press the Menu Select button Off by default.
- Page 87 ADVANCED FEATURES APX 8000 M2 [Preprogrammed Button] 1. Press the preprogrammed button, to enable the Bluetooth Search feature. The display changes to BT Searching screen and it shows Searching for BT devices. If the feature fails to initiate, you hear the radio sounds a short, low-pitched tone.
- Page 88 ADVANCED FEATURES APX 8000 M2 Turning Bluetooth Visibility On 1. Press the preprogrammed button to enable the Bluetooth Turning Bluetooth visibility to on enables other Bluetooth visibility feature. devices to search for your radio. You hear a short, medium-pitched tone.
- Page 89 ADVANCED FEATURES APX 8000 M2 Turning Bluetooth Visibility Off 1. Press the preprogrammed button to disable the Procedure: Bluetooth visibility feature. With the Visibility turns On, You hear a short, medium-pitched tone. to BT. The display shows momentary Visible Off.
- Page 90 ADVANCED FEATURES APX 8000 M2 Mission Critical Wireless - Bluetooth - PIN Authentication in Pairing For the security of your radio, Bluetooth Pairing PIN feature is designed to enable your radio to verify the correct device to pair before initiating the pairing.
- Page 91 ADVANCED FEATURES APX 8000 M2 Pairing the Authentication PIN when Receiving a Pairing Press the Menu Select button below Ok if the PIN is Request correct. If the device or profile does not support this feature, the radio Press the Menu Select button below Cncl to reject if the prompts BT profiles not supported as your radio only PIN number is incorrect.
- Page 92 ADVANCED FEATURES APX 8000 M2 Pairing the Authentication PIN with the Generated The radio and device continue pairing. Numeric PIN The display shows Pairing in progress. Note: If the device or profile does not support this feature, the The display shows <Device Friendly Name> pair failed.
- Page 93 ADVANCED FEATURES APX 8000 M2 Pairing the Authentication PIN by Manually Keying in the 4. Press Ok to proceed. Same PIN Press the Menu Select button below Cncl to reject. Note: If the device or profile does not support this feature, the The display shows Cancel pairing in progress...
- Page 94 ADVANCED FEATURES APX 8000 M2 Mission Critical Wireless - Bluetooth - Turning On/Off the Bluetooth Audio Procedure: Press the Menu Select button directly below Off to route [Preprogrammed Button] the audio routing from the headset to the radio. 1. Press the preprogrammed button to route the audio The display shows momentary Off.
- Page 95 ADVANCED FEATURES APX 8000 M2 Mission Critical Wireless - Bluetooth - Viewing the Bluetooth Active Devices Procedure: to BT. 2. Press the Menu Select button directly below BT to access the Bluetooth feature screen. to Device. 4. Press the Menu Select button directly below Sel.
- Page 96 ADVANCED FEATURES APX 8000 M2 Mission Critical Wireless - Bluetooth - Clearing All Bluetooth Devices Information The following methods are options on how to clear all Bluetooth devices information. The result of all the methods is [Menu] the same. You can use the options interchangeably...
- Page 97 ADVANCED FEATURES APX 8000 M2 Wi-Fi Turning Wi-Fi On or Off This feature allows you to turn Wi-Fi on or off. Wi-Fi can be used for wireless programming of the radio with the Radio Management tool. Note: Wi-Fi Network Name (SSID) for the radio to connect to must be preprogrammed by a qualified radio technician.
- Page 98 ADVANCED FEATURES APX 8000 M2 Wi-Fi Checking the Wi-Fi Configuration and Status of the Radio Procedure: The display shows the current status of the Wi-Fi as [Menu] described next. to WiFi. Searching Looking for available Wi-Fi networks that 2. Press the Menu Select button directly below WiFi.
- Page 99 UTILITIES APX 8000 M2 Using the Flip Display This feature allows you to flip the content of the top display upside down. It is particularly useful when you would like to read the top display while the radio is still in the carry holder attached to your belt.
- Page 100 UTILITIES APX 8000 M2 Controlling the Display Backlight You can enable or disable the radio’s display backlight as Note: The backlight remains on for a preprogrammed time needed, if poor light conditions make the display or keypad before it automatically turns off completely or returns to the difficult to read.
- Page 101 UTILITIES APX 8000 M2 Selecting a Radio Profile This feature allows you to manually switch the visual and Procedure: audio settings of the radio. The display, backlight, alert tones, [Menu] and audio settings are defined according to the to Prfl.
- Page 102 UTILITIES APX 8000 M2 Selecting the Audio Speaker This feature allows you to select the speaker route for the Procedure: radio's audio from either the main or the secondary speaker using the radio profile settings. [Menu] to Prfl. While both speakers function together with the secondary speaker enhancing intelligibility of the received audio during 2.
- Page 103 UTILITIES APX 8000 M2 Turning Keypad Tones On or Off You can enable and disable keypad tones, if needed. The 16-Position Select Channel Procedure: Knob * [Menu] On/Off/Volume to Mute. Control Knob 2. Press the Menu Select button directly below Mute.
- Page 104 UTILITIES APX 8000 M2 IMPRES Battery Annunciator This feature displays the current capacity and charges cycles To access battery info screen: of your battery when a IMPRES Battery is powering your radio. Procedure: This feature must be enabled in your radio to see the to Batt.
Need help?
Do you have a question about the APX 8000 M2 and is the answer not in the manual?
Questions and answers