
Related Manuals for Soundstream VRCPAA-70M


Summary of Contents for Soundstream VRCPAA-70M
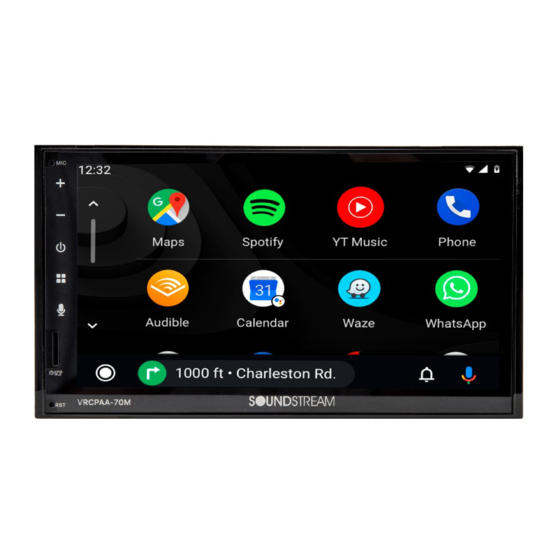
- Page 1 Owner’s Manual 2 DIN 7'' Monitor 2-Din Headunit Touch screen MP3/MP4/USB/SD AM/FM Radio Support Carplay Support Android Auto Support Bluetooth VRCPAA-70M...
- Page 2 INTRODUCTION • Clean only with a dry cloth or other similar materials. • Install your product in a dry, well-ventilated location that does not interfere with your vehicle’s safety equipment. • Do not block any ventilation openings when installing this product. •...
-
Page 3: Table Of Contents
CONTENTS Touch Button Function Introduction ........ .01 Remote Control Introduction ..........02 Functions & Applications ..........04 Safety Note Basic Operation Main Menu Radio Phone External Play Device Music Settings Operation Aux In Android Auto/Carplay Common Trouble-shooting ..........10 Wiring Connection ............11 Installation &... -
Page 4: Touch Button Function Introduction
TOUCH BUTTON FUNCTION INTRODUCTION 1. Microphone: Built-in Microphone. 2. Volume+: long press to increase volume continuously; short press to increase volume by step. 3. Volume-: long press to decrease volume continuously; short press to decrease volume by step. 4. Power: when the screen open, short press into mute mode, short press once agian to unmute;long press to close the screen;... -
Page 5: Remote Control Introduction
REMOTE CONTROL INTRODUCTION SETTING 01. Long Press: Power On / Off. Short Press: Mute / Unmute. 02. Short Press: CP/AA/BtPhone - Answer a call. 03. Short Press: CP/AA/BtPhone - Hang up the phone. 04. Short Press: Enter the CP/AA interface. 05. - Page 6 REMOTE CONTROL INTRODUCTION 12. Short Press: Radio - Switch to the next preset. USB/SD - Next track. CP/AA/BTphone - Next track. Long Press: Radio - Automatic seek (forward). USB/SD - Fast forward. 13. Short Press: Radio - Switch to the previous preset. USB/SD - Previous track.
-
Page 7: Functions & Applications
FUNCTIONS APPLICATION Basic Operations F-camera: Turn on the front camera. Seting : Shows the Settings interface. Main Menu AV-In : Shows the AUX interface. Card : Shows the TF Card interface, Please refer to the actual menu display for reference. enabling playback for compatible files. -
Page 8: Phone
FUNCTIONS APPLICATION Short press to search backward 【 】 VRCPAA-70M for stations automatically,Long press to step back. Short press to search forward 【 】 for stations automatically,Long press to step. RDS Function : Dial RDS will allow you to display... -
Page 9: External Play Device
Note: You can also manage data device to your unit, the calls through your phone. following interface will appear. Calling Record Check for dialed/answered/ missed calls history. Touch icon to enter calling record interface: VRCPAA-70M : Delete dialed calls. Phone Book VRCPAA-70M GOTO... -
Page 10: Music
FUNCTIONS APPLICATION 1. USB List Menu 2. Play previous song/media 3. Play/pause current song/media 4. Please next song/media 5. Repeat mode Repeat all - Repeat off - Repeat single 6. Random playback on/off 7. Next page 8. EQ settings 9. Numbers selection playback Time Setting Touch “time”... - Page 11 FUNCTIONS APPLICATION General Setting EQ: Touch EQ icon to enter below menu: Surround Touch To set relevant functions on/off . More items can be accessed by sliding the menu. Brightness : Left and right slide icon to adjust screen’s brightness. Video Control: Touch the icon to set the brightness Surround...
-
Page 12: Aux In
Connect iPhone to the unit to enter the CarPlay interface. AUX In SoundStream Insert video input connector to The unit can be used to make calls, input video’s input jack, audio play music, view maps, check input conencto to input audio’s... -
Page 13: Common Trouble-Shooting
COMMON TROUBLE-SHOOTING Problem Cause Correct action Check fuse Replace fuse Cannot power on Other factors Press RES button on the causing MPU to panel using a sharp point malfunciton then power on After ignition Change battery or switch off, setting Reset information and save fuse information are lost... -
Page 14: Wiring Connection
WIRING CONNECTION Audio- out FR Audio-in R White Audio-in L Yellow Video-in Yellow Camera-in Pink Parking Orange Reverse Black External Microphone Black AA/ACP F- Camera +12V Black F- Camera -GND Blue BT Antenna Sub-out2 Black F-Camera-Video Radio Antenna Yellow Video- out 2 Yellow Video- out 1 Blue... -
Page 15: Installation & Accessories
INSTALLATION $ ACCESSORIES 1.Putthe 2 brackets to the left and right side of the headunit. 2.Use screws to fix the brackets to the unit. Note: 1. Make sure the ignition is turned off, and disconnect the cable from the vehicle battery’s negative (-) terminal. -
Page 16: Parking & Speaker Connection
PARKING & SPEAKER CONNECTIONS: Connect the speakers according the Note: To watch video the parking wire should be c onnec t ed t o break si gnal . 2 c abl es are following diagram, incorrect connections connected to a Hands-Free device (not included). will damage the unit or your loudspeakers Parking wire Note: The parking wire is connected with brake... -
Page 17: Specification
SPECIFICATION: General Power Supply................DC10-16V Grounding System............Negative Ground Current Drain................15A(Max.) Speaker Impedance..........4 ohm per channel Frequency Response............20Hz~20kHz Operating Temperature............-20~+60℃ Dimensions........178mm(W)x168mm(D)x100mm(H) TFT Display TFT Screen Size.................7 inch Resolutionn.................800x480 Pixels FM Radio Frequency Range(USA)..........87.5~107.9MHz Frequency Range(Europe)..........87.5~108.0MHz Enable Sensitivity (S/N=30dB)............≤15dB SN Ratio...................≥55dB Stereo Separation................≥30dB AM Radio Frequency Range(USA).............530~1710KHz Frequency Range(Europe)..........522~1620KHz...
Need help?
Do you have a question about the VRCPAA-70M and is the answer not in the manual?
Questions and answers
Can’t heat hands free cell phone through radio
To enable hands-free cell phone functionality on the Soundstream VRCPAA-70M radio:
1. Use the built-in microphone for voice input.
2. Press the "Voice Recognition" touch button to activate voice control.
3. Pair your phone with the radio via Bluetooth.
4. Once connected, you can make and receive calls hands-free using voice commands or the touch interface.
Make sure Bluetooth is enabled on your phone and the device is properly paired.
This answer is automatically generated
Is there a function to disable auto start of radio when I turn my car on? Sometimes I'd like to start with it turned off. I have to manually turn it off.