Table of Contents
Advertisement
Advertisement
Table of Contents
Troubleshooting

Related Manuals for Soundstream VRN-65HXB


Summary of Contents for Soundstream VRN-65HXB
-
Page 2: Warning
WARNING! To promote safety, certain functions are disabled unless the parking brake is on. The Unit is designed to detect parked status and must be connected to the power supply side of the parking brake switch. Improper connection or use of his connection may violate applicable law and may result in serious injury or damage. -
Page 3: Table Of Contents
CONTENTS WARNING!........................2 OPERATION PRECAUTIONS ..................2 CONTENTS ........................ 3 ACCESSORIES ......................4 UNIT INSTALLATION AND REMOVAL…………………………………………………..5 WIRING CONNECTIONS ................... 6 FRONT PANEL ......................8 REMOTE CONTROL ....................9 REMOVE BATTERY ....................11 MAIN MENU ......................12 RADIO ........................12 DVD PLAYER ....................... -
Page 4: Accessories
ACCESSORIES Package contains the following accessories for installation and operation of the unit. (1) Washer, Spring Washer, 1 each M5 Nut (2) Metal Mounting Strap (3) Hex Bolt (4) Screw Max. 8mm (7/32 x max. 5/16 in) (5) Metal Mounting Sleeve (6) Release Key (7) Tapping Screw (8) Rubber Cushion... -
Page 5: Unit Installation And Removal
INSTALLATION / UN-INSTALLATION Note Before starting installation of the unit, make sure the wiring is connected properly. Use only the parts provided with the unit to ensure proper installation. The use of unauthorized parts may cause malfunction. Install the unit where it does not get in the driver’s way and will not injure the passenger in case there is a sudden stop, like an emergency stop. -
Page 6: Wiring Connections
WIRING CONNECTIONS Make sure you have good chassis ground. A good ground connection will eliminate most electrical noise problems. A good chassis ground requires a tight connection to the vehicle’s metal chassis. The area around the ground connection should be clean, bare metal without rust, paint, plastic, dust, or dirt for a good electrical connection. - Page 7 Connecting the reversing line to taillight on the car After connecting, when you start up the reverse gear, the unit will receive the picture from car rear view camera. Note: Only use groundless loudspeakers. Use only loudspeakers of minimal 40Watt, using fewer watts may result in damaging your loudspeakers at higher volumes.
-
Page 8: Front Panel
FRONT PANEL 1. RESET Button Press it with a thin, sharp object. The device will then be reset to factory default settings. IR Sensor IR Remote control signal receiving window. 3. EJECT Button Press to eject a disc. If the disc is not removed for about 10 seconds after eject, the disc is reinserted automatically. -
Page 9: Remote Control
REMOTE CONTROL 1. POWER / MUTE Press and hold to Power it on or off. Short press this button to mute the volume output, press it again to resume volume. 2.DIAL/ ANSWER button (Only for Bluetooth) Press to make a call after inputted a phone number or answer an incoming call. 3. - Page 10 / button In DVD mode, Press button to skip to the next track, press and hold button for two seconds to activate fast forward(FF) in a track. In RADIO mode, press to start manual searching button Frequency up. 14. Cursor buttons Use the buttons to select the menu item, the title tracks it or to show next frame.
-
Page 11: Remove Battery
REMOVE BATTERY Note: The distance may vary according to the brightness of ambient light. If the remote is not used for an extended period of time, remove the battery to prevent possible damage from battery leakage and corrosion. Do not place any objects between the remote control unit and the sensor on the unit. Do not drop the remote control onto the floor;... -
Page 12: Main Menu
MAIN MENU The best way to discover the program is to explore each screen in detail, and to find out how to move from one to another. Read this chapter for a guided tour. Unit starts by displaying the Main menu. This is the root of the screen hierarchy, and you can simply access all features by tapping on the touch screen buttons. -
Page 13: Dvd Player
Note: When a radio signal is not received, the default for ST / MO function, once received radio function automatically converted to ST. DVD PLAYER To start DVD Player, tap on DVD icon from main menu screen. TOUCH SCREEN MENU Touch this icon access to camera mode directly. -
Page 14: Setting Control
USB Device To play MP3/ MP4/ WMA files from a USB flash memory, insert a USB flash memory into the USB port on the right side of the unit. The unit will play automatically MP3/MP4/ WMA/JPEG files. Or repeatedly press the MODE button to select USB mode. -
Page 15: Sound Setting
Sound EQ: User Flat Classic Pop Rock User. BALANCE/FADER: Adjust the balance and fader to left or right. BEEP: Select keypad sound on or off. LOUD: Select loud on or off. LOUD LEVEL: Adjust the loud level SUBWOOFER: Turn subwoofer on or off. SUBWOOFER LPF:80HZ 120HZ 160HZ SUBWOOFER LEVEL: Adjust the subwoofer level... -
Page 16: Dvd Setting
EEPROM RESET: Select this to device will then be reset to factory default settings. UNLOCK ALL CHANNELS: Select this to unlock all channels. LOCK/UNLOCK CHANNELN SET: Select this to lock or unlock selected channels. CODE CHANGE: Select this to change the parental lock code. -
Page 17: Siriusxm Setting
SiriusXM Vehicle Tuner Connections SiriusXM Satellite Radio operation reqiured the connection of the SiriusXM-Connect Vehicle Tuner(sold separately). Note:The SiriusXM-Connect Vehicle Tuner must have the SiriusXM logo to be compatible with the VRN-65HXBRP. Line up the connenctor with the pins on the cable.It can only be inserted as shown above. Push the cable into the head unit's connector until it slicks.Attempting to insert the cable differently from shown above may cause damage to the cable or head unit. - Page 18 *To enter a 4 Digit code, choose from the two options as below: Enter the 4 Digit code using the remote control, by press the numbers directly. The default code is “0000” if the code has not been changed with the “CODE CHANGE” feature.
-
Page 19: Gps Section
Search channel SiriusXM Advisory Messages Message Description Ensure the SiriusXM antenna cable is connected to the SiriusXM tuner correctly. Check the SiriusXM antenna wire for breaks or sharp bends. Check Antenna Replace the antenna if necessary. Press RESET located on the top left corner of the front panel. If the message remains, the antenna may have been damaged. -
Page 20: Bluetooth Section
When the unit have connect with phone, the BT icon will turn on and the Mobile phone name (if available) will be display on the panel. According to mobile pairing device manual,after searching new device(SoundStream), select it, input password "0000" and confirm ok, device paring is finished. - Page 21 1. Dial BUTTON Tap on Dial button to enter call mode. In Call mode, the unit can be used as your phone. Making and receiving calls are possible with BLUETOOTH. Simply tap phone number and tap button to make a call, and tap button to hang up.
-
Page 22: Av-In Mode
AV IN MODE To start AV-IN Mode, tap on AV-IN button from main menu screen.Connect the external audio/video signal source to this unit. Select AV-IN mode in the main menu. OTHER FUNCTIONS Subwoofer Connect the subwoofer to the unit using sub output (see electrical diagram). Tap MENU on screen enter into main menu setting choose setting menu. -
Page 23: Notes On Disc
NOTES ON DISC Only use groundless loudspeakers. Use only loudspeakers of minimal 40Watt, using fewer watts may result in damaging your loud speakers at higher volumes. Use 4~8 (Ohm impedance) loudspeakers only; using higher or lesser impedance may damage the unit. Do not use 3-cable loudspeakers and do not connect the loudspeakers minus to the car body. -
Page 24: Troubleshooting
TROUBLESHOOTING Symptom Cause Remedy Power does not turn Replace with fuse of the same amperage. Fuse is blown If the fuse blows again, consult your store (No sound is of purchase produced.) In correct wiring Consult your local retailer. 1. Turn off the unit. 2. -
Page 25: Troubleshooting
TROUBLESHOOTING SYMPTOM CAUSE SOLUTION IF THE POWER SUPPLY IS PROPERLY THE CAR IGNITION IS CONNECTED TO THE CAR NOT ON. ACCESSORY SWITCHES THE IGNITION NO POWER KEY TO “ACC”. THE FUSE IS BLOWN. REPLACE THE FUSE. PRESENCE OF DISC REMOVE THE DISC IN THE PLAYER DISC CANNOT BE LOADED. -
Page 26: Technical Specifications
TECHNICAL SPECIFICATIONS General Power supply: 11~16V DC Current consumption: max. 10 A Maximum power output: 52W x 4 channels (max) DVD/ VCD/ MP3/MP4/VIDEO /CD/CD- Compatible formats: R/-RW/DVD±R/±RW/PICTURE PLAYBACK Dimensions (W x D x H) / weight: 178*165*100 mm/2 kg Working temperature range: - +60 ESP function: 10 sec. -
Page 27: Map User Instruction
Map User Instruction Thank you for choosing map as your navigator. Start using map right away. This document is the detailed description of the navigation software. You can easily discover map while you are using it; however, we still recommend that you read this manual to fully understand the screens and features. - Page 28 CONTENTS...
- Page 29 Getting started When using the navigation software for the first time, an initial setup process starts automatically. Do as follows: Select the program language. If your preferred language does not appear on the screen, tap or drag the list up or down with your finger to view all available languages.
- Page 30 Getting started Set your preferred time format and units. Tap to confirm your preferences. Set your preferred route planning options. Tap to confirm your preferences. The initial setup is now complete. Tap The application starts.
- Page 31 Navigation menu Startup screen: the Navigation menu After the initial setup, and whenever the software is started, the Navigation menu appears. You have the following options: •Tap to select your destination by entering an address or selecting a place of interest, a location on the map or one of your Favorite destinations.
- Page 32 Destination menu In the Navigation menu, tap . The Destination menu provides you with the following options: •Tap to specify an address as your destination. •Tap to select a place of interest as your destination. •Tap to navigate to a location selected on the map. •Tap to choose from the list of your favorite destinations.
- Page 33 Navigating to an address In the Navigation menu, tap , then tap . In the US, the screen proposes only the country while in other countries you can see the city or town where you are located. If needed, change the country or the state. Tap the button showing the name of the country.
- Page 34 Navigating to an address Enter the street name: 1.Tap 2.Use the keyboard to enter a part of the street name. 3.Tap to select the street that is offered in the input field or to browse the list of all streets matching your input. Select a street from the list.
- Page 35 Quick Find With the help of Quick Find, you can search for a location near to a known Place of Interest. Search for the Place by its name first and then find your destination on the map. Do as follows (starting from the Navigation menu): Start entering the name of the Place of Interest on the virtual keyboard.
- Page 36 Navigating to a place of interest On the Map screen, tap to return to the Navigation menu. In the Navigation menu, tap , then tap . You are offered the following preset search categories: •Tap to get a list of gas stations along the route or if it is not available, around your current position or your last known position.
- Page 37 An example of navigating to a place of interest Example: To find a park around your destination, do as follows (starting from the Navigation menu): The list of place categories appears. Tap or slide your finger to browse the list, and tap to browse the whole category, or tap narrow down your arch.
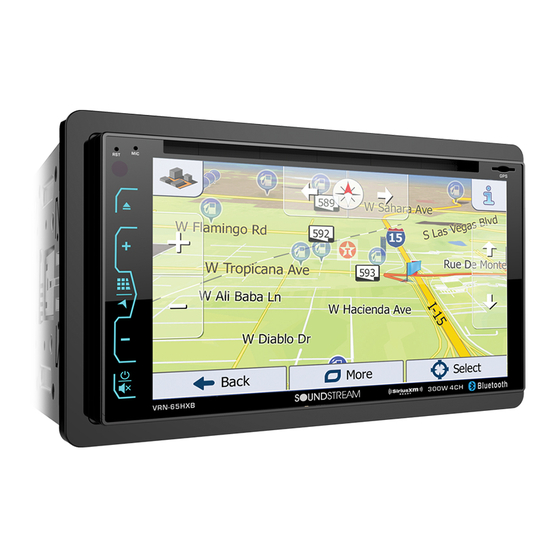
- Page 38 The Map screen The Map screen is the most important and frequently used screen of the software. The Vehimarker (a blue arrow by default) represents your current position, and the orange line shows the recommended route. There are screen buttons and data fields on the screen to help you navigate.
- Page 39 'More' menu The 'More' menu provides you with various additional applications. In the Navigation menu, tap • : Visit www.naviextras.com to get additional content, such as new maps or 3D landmarks and useful applications. • : Access the Picture Viewer. •...
- Page 40 Settings menu In the Navigation menu, tap .The Settings menu provides you with the following options (scroll the list to see all): • : Adjust the different sound volumes, change the voice guidance profile, or enable and set up warnings. •...
Need help?
Do you have a question about the VRN-65HXB and is the answer not in the manual?
Questions and answers
We are not able to connect to the units Bluetooth with our iPhones. Any advice?
To connect your Soundstream VRN-65HXB Bluetooth unit to your iPhone:
1. Turn on the unit.
2. Enable Bluetooth on your iPhone.
3. Pair the iPhone with the unit.
4. Once pairing is complete, the text "Enter Number" will appear on the unit's panel, confirming connection.
5. The unit will auto-connect to the last paired phone when powered on.
If auto-connect fails, long-press the Bluetooth button on the remote to activate auto-connect mode.
This answer is automatically generated
I bought a used Motorhome on a 2019 Ford E450 chassis with a Sound Stream VRN-65HXBRP radio. I cannot get the GPS to work. Do I need a SD card, and if I do what number should it be? (An Amazon number would be nice.)