Advertisement
Quick Links
www.smarTrike.com
Thank you for buying smarTrike
If you have any assembly questions,
please contact us for assistance
or store returns.
www.smartrike.com/support
USA: 1-855-SMTRIKE
(1-855-768-7453)
Watch a live assembly !
Scan this code to view
a step-by-step visual guide, and
assemble your product with ease.
https://assembly.smartrike.com/Vanilla-plus-tricycle-assembly
-1-
®
6654A
Advertisement

Subscribe to Our Youtube Channel
Related Manuals for SmarTrike Vanilla Plus 665


Summary of Contents for SmarTrike Vanilla Plus 665
- Page 1 Thank you for buying smarTrike ® If you have any assembly questions, please contact us for assistance or store returns. www.smartrike.com/support USA: 1-855-SMTRIKE www.smarTrike.com (1-855-768-7453) Watch a live assembly ! Scan this code to view a step-by-step visual guide, and assemble your product with ease.
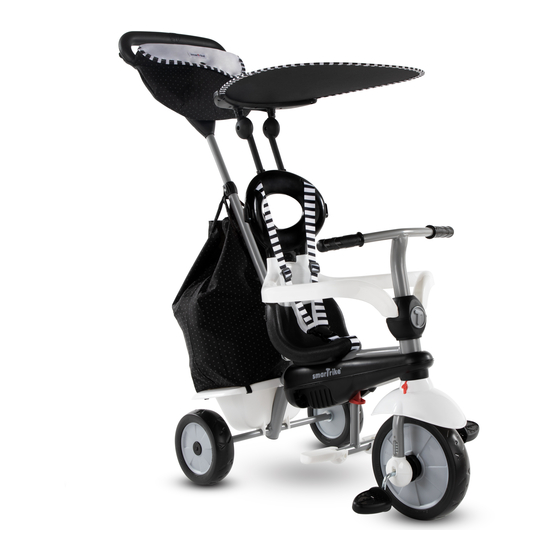
- Page 2 Vanilla Plus™ 665 Spare part For a step-by-step visual assembly guide, scan the code on the front cover...
- Page 3 Step 1 Parts needed to complete this section On one side of the rear tube, insert “M ” then insert “B” with an “ M ”. Repeat for the other side. Align "N" with the recess in the metal frame and click it into place. Firmly screw in B with O1 clockwise.
- Page 4 Step 2 Parts needed to complete this section Note: The red button aligns the hole. Place screw on slot of connector. Insert part E in trike the hole (as shown) Insert part C into the body. mudguard D. For a step-by-step visual assembly guide, scan the code on the front cover...
- Page 5 Step 3 Parts needed to complete this section insert, slightly turn until you insert, Face apple towards you. Push apple till "click" sounds. Pull wheel clutch outward for parent control mode Insert wheel in trike's body when red button on right side of the Cover the connector trike.
- Page 6 Step 4 Parts needed to complete this section Unscrew back screw with part Place and "click" F on rear O1 counterclockwise. axle. Secure basket with part O1 clockwise For a step-by-step visual assembly guide, scan the code on the front cover...
- Page 7 Step 5 Parts needed to complete this section 3a 5a Place G aligned with the rear body's hole. Insert the screw Use O2 counterclockwise to remove through G and secure in hole with screw L2 clockwise. 1. Insert H behind apple until it 'clicks'.
- Page 8 Step 6-8 Parts needed to complete this section WARNING: This product should be used on safe ground, it should not be used near steps, slopes, roadways, public highways or wet areas. WARNING: Ensure safety pin is inserted correctly and secured. 1.
- Page 9 Step 9-10 Parts needed to complete this section WARNING: Nut must be inserted correctly and secured. Insert part J into part I. Align the Insert part O2 into the Keep the nut in place, remove hole of part I with the correct the safetybar, until you the screw from part I by hole in part J.
-
Page 10: Parent Control
Parent Control 15M+ When the clutch is pulled away from the wheel there is no pedal control and the wheel is in a free-wheel position Child Control For the 24+ months stage, Push release button to place it fold up left and right footrest. back into frame. - Page 11 When the clutch is pushed closed and aligned with the front wheel, child has pedal control. For a step-by-step visual assembly guide, scan the code on the front cover -11-...
- Page 12 66528234603 -12-...
Need help?
Do you have a question about the Vanilla Plus 665 and is the answer not in the manual?
Questions and answers