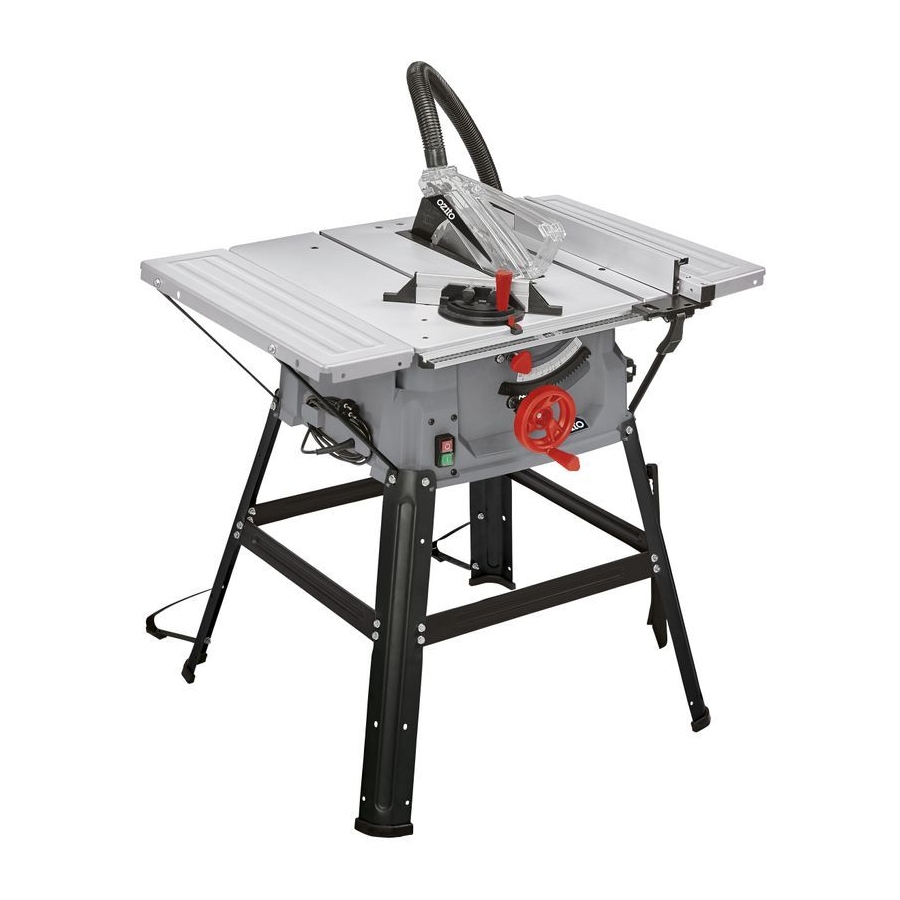
Ozito TSF-1211U Assembly Instructions
2000w 250mm
Hide thumbs
Also See for TSF-1211U:
- Original instructions manual (13 pages) ,
- Original operating instructions (33 pages)
Advertisement
TABLE SAW
2000W 250mm
ASSEMBLY INSTRUCTIONS
PARTS
1. Legs (A)- 4 pc
2. Cross struts, long (B)- 2 pc
3. Cross struts, short (C) - 2 pc
4. Side table extension - 2 pc
5. Rear table extension - 1 pc
6. Feet - 4 pc
1
2
9
6
7
8
FASTENERS
12. Bolt - 32 pc
13. Nut - 32 pc.
14. Washer, Flat - 32 pc.
12 13
14 15
ONLINE MANUAL
Scan this QR Code with your
mobile device to take you to
the online manual.
7. Dust extractor hose - 1 pc
8. Blade guard - 1 pc
9. Stabilising brackets - 2 pc
10. Support strut, side table - 4 pc
11. Support strut, rear table - 2 pc
3
4
11
10
15. Washer, Spring - 32 pc.
16. Spanner 10/13 mm
17. Spanner 10/21 mm
17
16
ASSEMBLING THE FRAME
WARNING!
OR REPLACING BLADES, MAKE SURE THAT THE
MOTOR IS OFF AND THE TOOL DISCONNECTED FROM THE
POWER SUPPLY TO PREVENT ACCIDENTAL STARTING.
1. Turn the table saw upside down
and place it on the floor (Ensure the
blade is wound fully down before
turning the saw upside down).
2. Remove the box of parts from behind the
motor; it can be easy accessed by tilting the
blade using the Blade Bevel Adjustment.
3. Attach the Base Frame Legs (A) to
the bottom of the table saw, you will
first need to remove the bolt and
washers from the table saw.
5
4. Ensure that the rectangular plastic cleats
on the table saw sit within the rectangular
slots at the top of the Base Frame Legs.
These cleats assist in support as well as
alignment. Use the bolts and washers
removed in step 3 to fasten all four legs to
the sides of the machine.
Note:
Only hand tighten at this stage, as some movement in the legs will
assist in aligning the cross struts.
5. When aligning the Cross Struts to the
Base Frame Legs, ensure that the
shorter edge is facing the table saw.
Note:
The Short Cross Struts (C) need to
be used on the sides of the table saw. Long
Cross Struts (B) front & back
6. Loosely fix the 4 Cross Struts to the
base frame legs, using the nuts, bolts
and washers supplied.
7. The Table Saw is supplied with 2
Stabilising Brackets. 2 bolts, 2 nuts
2 flat washers and 2 spring washers
are required to attach each bracket
to the bottom of the rear Base
Frame Legs.
8. Mount the Rubber Feet on the legs.
BEFORE ASSEMBLING YOUR TABLE SAW
TSF-1211U
Advertisement
Table of Contents

Related Manuals for Ozito TSF-1211U


Summary of Contents for Ozito TSF-1211U
- Page 1 Base Frame Legs. 12 13 14 15 8. Mount the Rubber Feet on the legs. ONLINE MANUAL Scan this QR Code with your mobile device to take you to the online manual. TSF-1211U...
- Page 2 5 Finally, tighten all the nuts on the base frame and table extensions to ensure steadiness. Use the supplied spanner where required, but be careful not to over tighten as this may result in damage to the base frame legs. TSF-1211U...
Need help?
Do you have a question about the TSF-1211U and is the answer not in the manual?
Questions and answers