
Related Manuals for Dogtra T&B DUAL


Summary of Contents for Dogtra T&B DUAL
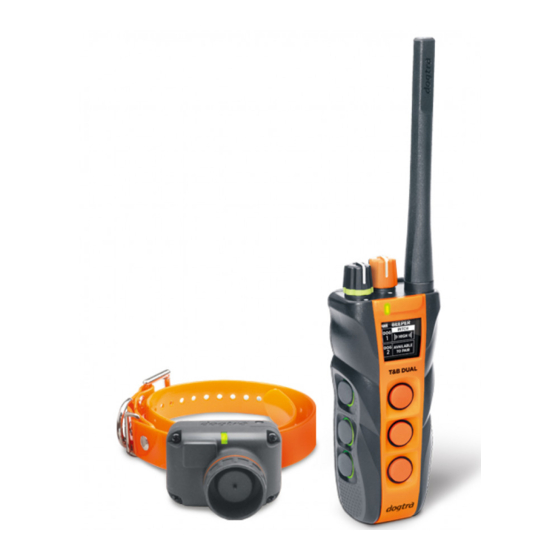
- Page 1 T&B DUAL EXPANDABLE TO 2-DOG SYSTEM AVAILABLE IN 2-DOG SYSTEM: T&B DUAL 2-DOG Owner's Manual Please read this manual thoroughly before operating the T&B DUAL Training & Beeper Collar.
- Page 2 Please read all safety and product information below before using your Dogtra product. Failure to follow these safety instructions could result in injury to you, your dog and others, or it could result in damage to your Dogtra product or other property. PRODUCT SAFETY...
- Page 3 Consult your physician or medical device maker before using your medical device with a Dogtra product. If you think that your Dogtra product is interfering with your pacemaker, defibrillator, or other medical device, stop using the Dogtra product.
-
Page 4: Table Of Contents
CONTENTS AT A GLANCE ..............MAIN FEATURES ............. OVERVIEW ............... UNDERSTANDING YOUR TRAINING SYSTEM TURNING THE T&B DUAL ON/OFF ....TRANSMITTER BUTTON FUNCTION ....1) BEEPER SETTING ..........2) TRAINING SETTING ..........RECEIVER FITTING ..........FINDING THE RIGHT STIMULATION ....MAXIMIZING THE DISTANCE ........ -
Page 5: At A Glance
The auto charger for the T&B DUAL has an input of 12-volts to 24-volts and has an output of 10-volts 1500mAH. European Charger Dogtra’s European chargers are designed for use with a 220 volt AC electrical outlet. To purchase accessories, please visit www.dogtra.com or... -
Page 6: Main Features
MAIN FEATURES • Rheostat Dial for gradual adjustments in stimulation intensity with no jumps between levels (0-127) • Two-dog model allows control of two different dogs from one transmitter • 1.5-mile range • Two different stimulation types - Nick & Constant •... -
Page 7: Overview
OVERVIEW 2nd Dog 1st Dog Rheostat Dial Rheostat Dial 2nd Dog 1st Dog Nick & Constant Nick & Constant 1st Dog 2nd Dog Training Setting: HPP Vibration Training Setting: HPP Vibration Beeper Setting: Beeper Mode Beeper Setting: Beeper Mode 2nd Dog 1st Dog Training Setting: Locate Training Setting: Locate... - Page 8 Antenna Setting Toggle Switch On/Off OLED Button Screen Battery Charging Receptacle & Rubber Plug On/Off Magnetic Red Dot T&B DUAL Transmitter...
- Page 9 Collar Strap Contact Points Battery Charging Receptacle & Rubber Plug LED Indicator Light On/Off Magnetic Red Dot T&B DUAL Receiver...
-
Page 10: Understanding Your Training System
UNDERSTANDING YOUR TRAINING SYSTEM 1. Turning the T&B DUAL On/Off To turn the handheld transmitter on, hold down the button on the right side of the transmitter until the OLED screen illuminates. To turn the transmitter off, hold down the same button on the right side of the transmitter until the OLED screen shuts off. - Page 11 Receiver On/Off Magnetic Red Dot To turn on the receiver, place the magnetic red dot on the back of the transmitter to the red dot on the receiver. Hold the two red dots together for a moment until the LED light on the receiver comes on. The receiver will emit a melody when turned on.
-
Page 12: Transmitter Button Function
2. Transmitter Button Function 1) Beeper Setting The transmitter for the T&B DUAL has seven buttons (three on the face of the transmitter, three on the left side, and one on the right). You can use the Setting Toggle Switch on the back of the transmitter to change from T (Training Setting) to B (Beeper... - Page 13 Nick/Constant Button There are three buttons each on the front and left side of the transmitter. The Nick/Constant button is the top button on each side of the transmitter. When the button is pressed quickly, the Nick function is activated and the receiver emits a single rapid pulse of electrical stimulation.
- Page 14 Beeper Mode Button (Run/Point & Point-Only) The middle button is the Beeper Mode button for each side of the transmitter. When you press the Beeper Mode button the first time, the receiver will beep twice. The beeper unit will always start in Run/Point mode. The beeper will sound every 7 seconds while the dog is running, and every 2 seconds when the dog is on point or becomes stationary.
- Page 15 Initial Beeper Mode Action Sound - Dog running/moving: emits Press Run/Point double beep every 7 seconds 2 Beeps 1st Time Mode - Dog stationary/pointing: emits double beep every 2 seconds - Dog running/moving: silent Press Point-Only 1 Beep - Dog stationary/pointing: emits 2nd Time Mode double beep every 2 seconds...
- Page 16 Pitch Setting Button You can change the pitch of the beeper by pressing the Pitch Setting button, the bottom button on each side of the transmitter. The speaker with one bar will be the low pitch, while the speaker with three bars will be the high pitch.
-
Page 17: Training Setting
2) Training Setting You can use the Setting Toggle Switch on the back of the transmitter to change from B (Beeper Setting) to T (Training Setting). The Training Setting offers Nick/ Constant, HPP Vibration, and Locate functions. 2nd Dog 1st Dog Nick/ Nick/ Constant... - Page 18 Nick/Constant Button There are three buttons each on the front and the left side of the transmitter. The Nick/Constant button is the top button on each side. When the button is pressed quickly, the Nick function is activated and the receiver emits a single rapid pulse of electrical stimulation.
- Page 19 HPP Vibration Button The middle button is the HPP Vibration button for each side of the transmitter. Pressing it will give a vibration for as long as the button is pressed, for up to 12 seconds. Button not pressed Button pressed (HPP Vibration) Locate The Locate button is the bottom button on each side of...
-
Page 20: Receiver Fitting
If the receiver is too loose, the contact will not be consistent and cause the corrections to be inconsistent. Dogtra uses medical grade stainless steel contact points and anti-microbial plastic to protect the dog’s skin. - Page 21 Attention! Leaving the receiver in the same location on the dog’s neck for an extended period of time can cause skin irritation due to the sensitivity from the contact points. If the dog is to wear the receiver for long periods, occasionally reposition the receiver every few hours so that the contact points are moved to a different location on the dog’s neck and remove the...
-
Page 22: Finding The Right Stimulation
4. Finding the Right Stimulation The T&B DUAL has a Rheostat Dial on the top of the transmitter (0 is the lowest and 127 is the highest). Remember that you will need to adjust the setting (upward or downward) depending on your dog’s temperament and threshold for stimulation. -
Page 23: Maximizing The Distance
5. Maximizing the Distance The T&B DUAL has a 1.5-mile range. Depending on the way you use your transmitter, the transmitter range may vary. To get the greatest range, hold the transmitter away from your body and avoid touching the antenna. Keep your unit properly charged for maximum signal strength. -
Page 24: Led Indicator
6. LED Indicator The LED indicator flashes every 4 seconds when the receiver is on and ready for use. The LED indicator will blink on both the transmitter and the receiver when the transmitter buttons are pressed. The LED indicator color indicates the battery life level. Green = Full charge Amber = Medium charge Red = Needs charge... -
Page 25: Charging The Battery
Note 2: The unit has a partial charge when it leaves the Dogtra facility. Upon receipt of the system, be sure to give it a full 2-hour initial charge before the first use away from any flammable substances. - Page 26 Follow the steps below to charge your system: 1. Open the rubber plugs on the battery charging receptacles and plug in the charging cable. 2. Plug the charger into a 120-volt wall outlet or, if using the auto charger, plug into a cigarette lighter only for lithium polymer batteries (use a 220 volt European charger for Europe).
-
Page 27: Handheld Transmitter Oled
8. Handheld Transmitter OLED Setting Mode Battery Stimulation Level The OLED screen indicates the stimulation level on the screen ranging from (0-127). The battery life indicator shows: 3 bars = full charge 2 bars = medium charge 1 bar= needs charge The battery life indicator only shows the remaining charge of your transmitter. - Page 28 Care for OLED Transmitters in Cold Temperature In cold temperatures (10°F or below), the Organic Light- Emitting Diode(OLED) on your transmitter may be dim or slow to respond. Wait until the display becomes visible before selecting any training level. Even though the OLED screen might be dim or slow to respond when you push the Nick or Constant button, the transmitter will still function properly.
-
Page 29: Attaching The Belt Clip
9. Attaching the Belt Clip Follow the instructions below to attach the included belt clip to the transmitter. 1. Align the belt clip to the grooves on the back of the transmitter. 2. With a firm grip, screw on the belt clip's Phillips head screws with a screwdriver. -
Page 30: Using The Test Light
10. Using the Test Light 1. To turn on the receiver, place the red dot on the back of the transmitter to the red dot on the receiver. Hold the two red dots together for a moment until the LED light on the receiver comes on. - Page 31 the transmitter. It should light up for just a moment. The higher the intensity, the brighter the test light will 5. Watch the test light as you press the Constant button on the transmitter. It should light up as long as the button is pressed.
- Page 32 a double beep every 2 seconds. If it is audible, move onto the next step. 10. Press the Beeper Mode button a third time; you should hear 3 rapid beeps. This mode will turn off your beeper and remain silent. Note 1: The pitch that the beeper will emit will vary depending on your setting with the (high/low) Pitch Setting button.
-
Page 33: Code Setting Guide
11. Code Setting Guide Before coding the transmitter, determine how you would like to use the transmitter. 1) Use as 1-dog system or 2-dog system 2) Which side, between Front or Left, you want for ‘Dog 1’ Please note that if you want to add an expandable second receiver, you must use the ‘2-Dog Set Up’... - Page 34 1-Dog Set up Press the top button to set the transmitter as a 1-dog system. Select Front side controls receiver Select Left side controls receiver The screen will show that ‘Dog ‘1 has been set up and that ‘Dog 2’ position is “AVAILABLE TO PAIR” if needed. If you want to change the side, please start over by putting the transmitter in "Setting Mode."...
- Page 35 2-Dog Set up Press the middle button to set the transmitter as a 2-dog system. Select Front side: controls Dog 1 Left side: controls Dog 2 Select Left side: controls Dog 1 Front side: controls Dog 2 The screen will show that both ‘Dog 1’ and ‘Dog 2’ have been set up.
- Page 36 Receiver Code Setting 1. Turn the transmitter on (or leave on after code setting the transmitter). Set the Rheostat Dial to 0. Turn on 2. With the receiver turned o , place the red dot on the transmitter to the red dot on the receiver.
-
Page 37: General Training Tips
GENERAL TRAINING TIPS Getting Started With Your T&B DUAL Your dog must know some basic obedience commands before beginning training with the T&B DUAL. A dog learns by first being shown a command, followed by lots of repetition over an extended period. As the dog becomes proficient at these commands, the trainer can introduce distractions and different locations to strengthen them. - Page 38 Animals (and humans) perform better in a less stressful environment. For more training information, please visit our website at www.dogtra.com.
-
Page 39: Maintenance
Troubleshooting If the unit is malfunctioning, please refer to the “Troubleshooting Guide” before sending it to Dogtra for service. If you have any questions or concerns, you may email them to info@dogtra.com, or call customer service... -
Page 40: Troubleshooting Guide
- The battery may be low, so check the LED light for battery life. - If you have a full charge and you have done all of the above, your unit may need to be serviced. Please contact customer service at info@dogtra.com or (888) 811-9111. - Page 41 If you suspect your charger/splitter is not functioning properly please contact customer service at info@dogtra.com or (888) 811-9111. You can send in your charging units to have us inspect them. - The charging pin may be damaged. Inside the charging port, there is a metal pin that should be standing straight up and stiff.
- Page 42 - For Dogtra units over two years old from the purchase date, the batteries may need to be replaced. You can replace them yourself by contacting Dogtra. But, damages incurred to the unit due to improper battery installation are not covered under any warranty and any other unauthorized servicing or tampering with the unit voids your limited lifetime warranty.
-
Page 43: Warranty And Repair Information
1+1 Year Extended Warranty Except as otherwise provided, Dogtra warrants to the original retail purchaser (“You”) that your Dogtra product shall be free of defects in materials and workmanship for a period of one (1) year from the date of purchase (“Original Warranty”). - Page 44 MERCHANTABILITY AND FITNESS FOR A PARTICULAR PURPOSE. Limitation of Remedies Dogtra’s liability is limited to the cost of repair or replacement of the Dogtra product under the Original Warranty or Extended Warranty. Any claim or action to enforce the Original and/or Extended Warranties must be commenced within thirty (30) days of such warranty’s expiration for...
- Page 45 Dogtra products. To register your product, visit www.dogtra.com/product-registration. If your product is not registered with Dogtra, You will be required to provide a receipt or other proof purchase (as provided above) to qualify for warranty service.
Need help?
Do you have a question about the T&B DUAL and is the answer not in the manual?
Questions and answers