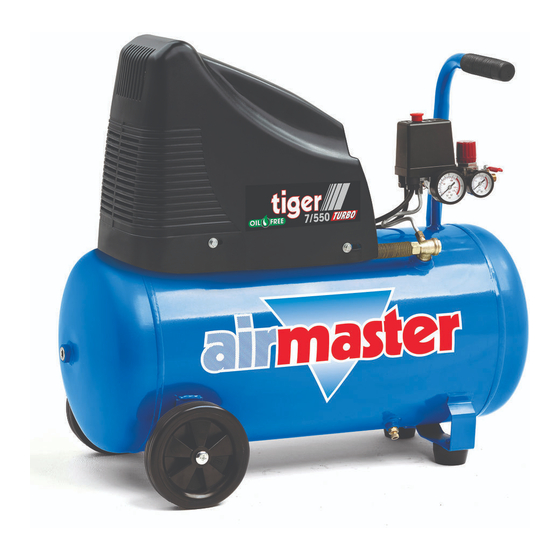
Summary of Contents for airmaster TIGER 7-550
- Page 1 50L OIL FREE AIR COMPRESSOR MODEL NO: TIGER 7-550 PART NO: 1499525 OPERATION & MAINTENANCE INSTRUCTIONS ORIGINAL INSTRUCTIONS GC0221...
-
Page 2: Specification
INTRODUCTION Thank you for purchasing this Oil-free Air Compressor. Before attempting to operate the machine, it is essential that you read this manual thoroughly and carefully follow all instructions given. In doing so you will ensure the safety of yourself and that of others around you, and you can also look forward to the product giving you long and satisfactory service. -
Page 3: General Safety Warnings
GENERAL SAFETY WARNINGS WARNING: WHEN USING ELECTRICAL TOOLS, BASIC SAFETY PRECAUTIONS SHOULD ALWAYS BE FOLLOWED TO REDUCE THE RISK OF FIRE, ELECTRIC SHOCK AND PERSONAL INJURY WARNING: READ ALL THESE INSTRUCTIONS BEFORE ATTEMPTING TO OPERATE THIS PRODUCT AND KEEP THESE INSTRUCTIONS IN A SAFE PLACE. WORK AREA 1. - Page 4 GENERAL MACHINE USE AND CARE 1. Prior to use, all operators should become familiar with the instructions in this booklet especially the ON/OFF switch for emergency stopping. 2. ALWAYS maintain the compressor with care and keep it clean for best / safest performance.
- Page 5 AIR COMPRESSOR SAFETY INSTRUCTIONS 1. ONLY USE WITHIN THE RECOMMENDED OPERATING TEMPERATURE RANGE: This compressor should only be used in an ambient temperature of between +5 C and +40 C (never at or below freezing temperatures). 2. NEVER USE AN AIR COMPRESSOR WHICH APPEARS DEFECTIVE OR IS OPERATING ABNORMALLY: If the compressor operates unusually or makes strange noises, switch off immediately and purge the air reservoir.
-
Page 6: Safety Symbols
SAFETY SYMBOLS The following safety symbols are shown on the product or it’s packaging. Please read all of the safety and operating instructions carefully before use. Read this instruction booklet carefully before positioning, operating or adjusting the compressor. This compressor produces a high sound level during operation. Ear protection should be worn. -
Page 7: Electrical Connections
ELECTRICAL CONNECTIONS WARNING! READ THESE ELECTRICAL SAFETY INSTRUCTIONS THOROUGHLY BEFORE CONNECTING THE PRODUCT TO THE MAINS SUPPLY. Before switching the product on, make sure that the voltage of your electricity supply is the same as that indicated on the rating plate. This product is designed to operate on 230VAC 50Hz. -
Page 8: Before Use
BEFORE USE ATTACHING THE WHEELS Use a spanner and X-head screwdriver to attach the wheels to the compressor. Use the parts in the positions shown. ATTACHING THE SUPPORTING FEET Insert the support foot into the position shown using the bolts, nuts and washers supplied. -
Page 9: Moving The Air Compressor
MOVING THE AIR COMPRESSOR CAUTION: TO PREVENT INJURY, ASSISTANCE MAY BE HELPFUL WHEN LIFTING THIS COMPRESSOR. 1. Stop the compressor and disconnect it from the power supply before you move it. 2. ALWAYS use the handle. To prevent damage, never lift by (or put strain on) valves or hoses. -
Page 10: Turning The Compressor On
TURNING THE COMPRESSOR ON 1. Plug the compressor into the power supply. 2. Lift the On/Off button. • The compressor will operate until the reservoir is fully pressurised and then shut down. • The compressor will start up again when the pressure in the reservoir decreases. - Page 11 THE PRESSURE GAUGES 1. The reservoir pressure gauge shows the current pressure in the reservoir. 2. The outlet pressure gauge shows the ‘user set’ outlet pressure. This can be adjusted as shown above. REMOVING AIR DRIVEN TOOLS FROM THE AIR HOSE WARNING: ALWAYS SET THE PRESSURE REGULATOR TO ZERO BEFORE YOU REMOVE OR REPLACE A TOOL.
-
Page 12: Turning The Compressor Off
TURNING THE COMPRESSOR OFF 1. Follow steps 1-3 in “Removing Tools from the Air Hose” above. 2. Disconnect the compressor from the power supply. 3. Slowly open one of the outlet valve to depressurise the reservoir. • You will hear a hissing sound as the reservoir depressurises. -
Page 13: Maintenance
If you start the compressor and the overload cutout operates again, stop the compressor and disconnect from the power supply and have your compressor examined by a qualified service agent. MAINTENANCE DRAIN THE RESERVOIR (DAILY) After use, always open the drain valve to make sure that any condensate is drained off as shown on page 13. -
Page 14: Environmental Recycling Policy
CHECKING THE NON-RETURN VALVE If the reservoir pressure decreases for no apparent reason, it is possible that the non-return valve is leaking. To check: 1. Make sure that the reservoir is not under pressure and the compressor is switched OFF. 2. -
Page 15: Troubleshooting
TROUBLESHOOTING CAUTION: DO NOT TRY TO REPAIR OR ADJUST THIS COMPRESSOR IF YOU ARE UNCERTAIN OF YOUR ABILITY. IF YOU HAVE ANY QUERIES, CONTACT YOUR DEALER. PROBLEM PROBABLE CAUSE REMEDY The compressor Bad electrical Check electrical connections. has stopped connections. Clean and tighten if and does not necessary. - Page 16 DECLARATION OF CONFORMITY (UK)
-
Page 17: Declaration Of Conformity (Ce)
DECLARATION OF CONFORMITY (CE) -
Page 18: Component Parts
COMPONENT PARTS... - Page 19 Description Description Bolt Spring washer Washer Bolt Air filter Bearing Elbow Washer Cowl Bolt Bolt Connecting rod Handle cover Seal cup Tank Press plate Checking hole plug Bolt Hex nut Crankshaft Spring washer Crankcase Flat washer Bearing Wheel Rotor Bolt Bearing Drain valve Stator...


Need help?
Do you have a question about the TIGER 7-550 and is the answer not in the manual?
Questions and answers