Table of Contents
Advertisement
Quick Links
Advertisement
Table of Contents

Related Manuals for Whynter ARC-102CS


Summary of Contents for Whynter ARC-102CS
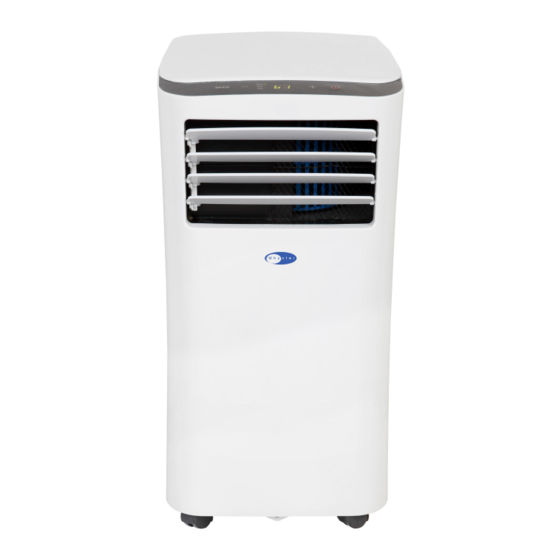
- Page 1 Whynter 10,000 BTU Portable Air Conditioner Compact Size Model # : ARC-102CS INSTRUCTION MANUAL Congratulations on your new Whynter product. To ensure proper operation, please read this Instruction Manual carefully before using this product. Keep this manual in a safe place for future reference.
-
Page 2: Table Of Contents
Table of Contents Safety Precautions Safety Precautions ................................Installation Instructions Preparation.................................... Design Notice..................................Ambient Temperature Range For Unit Operating....................Exhaust Hose Installation..............................Choosing The Right Location............................Energy Rating Information ............................. Tools Needed..................................Accessories..................................... Window Installation Kit..............................Installation....................................Operating Instructions Control Panel Features.............................. -
Page 3: Safety Precautions
Safety Precautions Read Safety Precautions Before Operation and Installation To prevent death or injury to the user or other people and property damage, the following instructions must be followed. Incorrect operation due to ignoring of instructions may cause death, harm or damage. CAUTION WARNING This symbol indicates the possibility of... - Page 4 In a thunderstorm, the power must be cut off to avoid damage to the machine due to lightning. • Your air conditioner should be used in such a way that it is protected from moisture. • e.g. condensation, splashed water, etc. Do not place or store your air conditioner where it can fall or be pulled into water or any other liquid.
- Page 5 • Do not use hazardous chemicals to clean or come into contact with the unit. Do not use the unit in the presence of inflammable substances or vapour such as alcohol, insecticides, petrol,etc. • Always transport your air conditioner in a vertical position and stand on a stable, level surface during use.
- Page 6 Caution: Risk of fire/flammable materials Explanation of symbols displayed on the unit(For the unit adopts R32/R290 Refrigerant only): This symbol shows that this appliance used a flammable refrigerant. If the refrigerant WARNING is leaked and exposed to an external ignition source, there is a risk of fire. CAUTION This symbol shows that the operation manual should be read carefully.
- Page 7 The area shall be checked with an appropriate refrigerant detector prior to and during work, to ensure the technician is aware of potentially flammable atmospheres. Ensure that the leak detection equipment being used is suitable for use with flammable refrigerants, i.e. non-sparking, adequately sealed or intrinsically safe.
- Page 8 being worked upon prior to any removal of sealed covers, etc. If it is absolutely necessary to have an electrical supply to equipment during servicing, then a permanently operating form of leak detection shall be located at the most critical point to warn of a potentially hazardous situation. 2)Particular attention shall be paid to the following to ensure that by working on electrical components, the casing is not altered in such a way that the level of protection is affected.
- Page 9 oxygen shall not be used for this task. Flushing shall be achieved by breaking the vacuum in the system with OFN and continuing to fill until the working pressure is achieved, then venting to atmosphere, and finally pulling down to a vacuum. This process shall be repeated until no refrigerant is within the system. When the final OFN charge is used, the system shall be vented down to atmospheric pressure to enable work to take place.
-
Page 10: Installation Instructions
recovery occurs. The recovery equipment shall be in good working order with a set of instructions concerning the equipment that is at hand and shall be suitable for the recovery of flammable refrigerants. In addition, a set of calibrated weighing scales shall be available and in good working order. Hoses shall be complete with leak-free disconnect couplings and in good condition. -
Page 11: Ambient Temperature Range For Unit Operating
Recommended Ambient Temperature Range For Unit Operating MODE Temperature Range (应品质要求 ,增加出风口 Cool 17-35°C (62-95°F) 与障碍物距离 13-35°C (55-95°F) 50cm(工程师 提供的数据) 。 Exhaust Hose Installation The exhaust hose and adapter must be installed or removed in accordance with the usage mode. For COOL or AUTO mode, the adapter and exhaust must be installed. - Page 12 SACC is the representative value of Seasonally Adjusted Cooling Capacity, in Btu/h, as determined in accordance with the DOE test procedure at title 10 Code of Federal Regulations (CFR) 430, subpart B, appendix CC and applicable sampling plans. TECHNICAL DATA Model: ARC-102CS Operational Modes: Air conditioner, Fan or Dehumidifier Cooling Capacity (SACC): 7000 BTU 215 sq.
-
Page 13: Tools Needed
Accessories Tools Needed -Medium Philips screwdriver; -Tape measure or ruler; -Knife or scissors; Medium Philips screwdriver; -Tape measure or ruler; -Knife or scissors; -Saw (optional, to shorten window adapter for narrow windows) ACCESSORY IMAGE ACCESSORY DESCRIPTION QUANTITY Exhaust hose adapter to the unit 1 piece Exhaust hose 1 piece... -
Page 14: Features
Control Panel Power Button Press to turn the air conditioner on and off Mode Button Press to change mode • Controls the 3 function modes: COOL, FAN, and DRY. Note: In Cooling or Dry mode, press the Mode for 3 seconds to turn the Constant Fan function on or off. When the function is turned on, the Constant Fan light will illuminate, identifying the fan will run continually. - Page 15 WATER DRAINAGE Fig. 1a The dehumidifying capacity of this unit is 68 pints per day. The patented Remove bottom self-evaporating function of the ARC-102CS unit fully exhausts all drain plug for condensation automatically in most en-vironments when humidity is Manual Drainage less than 70%.
-
Page 16: Window Installation Kit
LOCATION The air conditioner should be placed on a hard and level surface strong enough to support the unit. The unit has casters and it should only be rolled on smooth, flat surfaces. Use caution when rolling on carpet surfaces. Do not attempt to roll the unit over objects. Never place any obstacles around the air inlet or outlet and allow at least 20"... - Page 17 WINDOW KIT INSTALLATION IN A DOUBLE-HUNG WINDOW 1. Open window or sliding door for approxi-mately 5” Foam seal A (adhesive type) 2. Cut the foam seal A and B (adhesive type) to the proper length and attach it to the bottom of the window.
-
Page 18: Operation Instructions
Operation Instructions BEFORE USING YOUR APPLIANCE Remove the exterior and interior packing Before connecting the appliance to the power source, let it stand upright for approximately 4 hours. This will reduce the possibility of a malfunction in the cooling system from handling during transportation SWITCHING ON/OFF THE AIR CONDITIONER The appliance can be switched ON or OFF by pressing the POWER button on the control panel or the ON/OFF but-ton on the remote control... - Page 19 TIMER (DELAYED SWITCH ON / OFF) FUNCTION This function mode enables a delayed switch ON or delayed switch OFF of the air conditioner. The time (hours) de-lay can be set, enabled and disabled. SETTING SWITCH OFF TIMER With the air conditioner operating in any function mode, press the TIMER button. The TIMER OFF light will come on. Then set the desired time delay OFF hours by pressing the UP and DOW N buttons.
- Page 20 Remote Control Other appliances in the same room controlled by a remote control (TV, radio, stereo, etc.), may cause interferences Electronic and fluorescent lamps may interfere with the signal transmissions between the remote control and the air conditioner ...
-
Page 21: Maintenance
Maintenance Safety Precautions · Always unplug the unit before cleaning or servicing. · DO NOT use flammable liquids or chemicals to clean the unit. · DO NOT wash the unit under running water. Doing so causes electrical danger. · DO NOT operate the machine if the power supply was damaged during cleaning. A damaged power cord must be replaced with a new cord from the manufacturer. -
Page 22: Troubleshooting Tips
Drain water from the air conditioner and ‘P1” appears on display Possible loose internal connection. Please contact Whynter for service The unit turns on but the com- The room temperature is outside of This unit is designed to work in ambi-... - Page 23 Troubleshooting Tips Many common portable air conditioner problems are easily resolved. Try the troubleshooting suggestions below to see if the problems can be resolved before having to contact the service department. Problem Possible Causes Solutions Windows or doors are open ...
- Page 24 All defective products and parts covered by this warranty will be repaired or replaced on a mail-in basis to Whynter’s Service Center. This warranty is not transferable. After the expiration of the warranty, the cost of labor and parts will be the re- sponsibility of the original owner.
Need help?
Do you have a question about the ARC-102CS and is the answer not in the manual?
Questions and answers