Whynter ARC-0850XP Manual

Whynter ARC-0850XP Manual

Multicool smart control enabled portable air conditioner with built-in dehumidifier and heating function

Advertisement

Quick Links

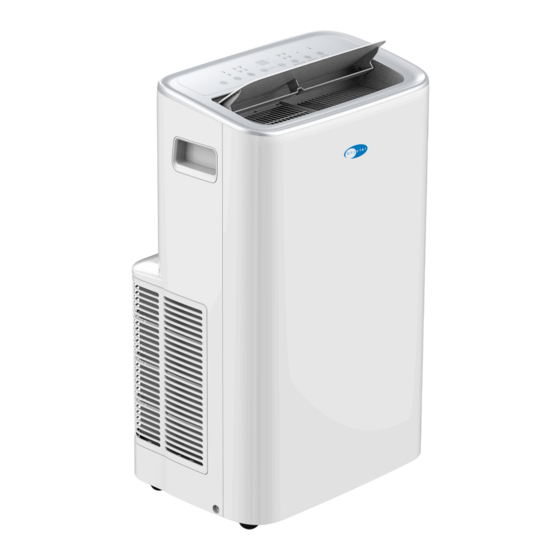
Whynter MultiCool Smart Control Enabled Portable Air Conditioner
with Built-in Dehumidifier and Heating Function*
MODELS: ARC-0850XP | ARC-1050XP | ARC-1050XPH*
Congratulations on your new Whynter product. To ensure proper operation, please read this Instruction
Manual carefully before using this product. Keep this manual in a safe place for future reference.
IMPORTANT NOTE:
Before using your air conditioner, please read
this manual carefully and keep it for future reference.

Advertisement

Table of Contents
loading
Need help?

Need help?

Do you have a question about the ARC-0850XP and is the answer not in the manual?

Questions and answers

Subscribe to Our Youtube Channel

Summary of Contents for Whynter ARC-0850XP

  • Page 1 Built-in Dehumidifier and Heating Function* MODELS: ARC-0850XP | ARC-1050XP | ARC-1050XPH* Congratulations on your new Whynter product. To ensure proper operation, please read this Instruction Manual carefully before using this product. Keep this manual in a safe place for future reference.
  • Page 2 DISPOSAL INFORMATION Thank you for choosing Whynter. Please follow the instructions provided in this user manual to obtain the very best performance from your portable air conditioner. We trust that your Whynter portable air conditioner will provide the performance and reliability that we stand for.
  • Page 3: Table Of Contents

    TABLE OF CONTENTS Page 4 SAFETY PRECAUTIONS 4 - 5 SPECIFICATIONS INTRODUCTION LIST OF INSTALLATION PARTS AND ACCESSORIES INSTALLATION GUIDE 9 - 11 CONTROL PANEL 12 - 13 REMOTE CONTROL 14 - 15 CARE AND MAINTENANCE 15 - 16 STORAGE TROUBLESHOOTING WARRANTY Explanation of Symbols...
  • Page 4: Safety Precautions

    SAFETY PRECAUTIONS To prevent death or injury to the user or other people and property damage, the following instructions must be followed. Incorrect operation due to ignoring of instructions may cause death, harm or damage. Installation must be performed according to the installation instructions. Improper installation can cause water leakage, electrical shock, or fire.
  • Page 5 Do not press the buttons on the control panel with anything other than your fingers. Do not remove any fixed covers. Contact Whynter Customer Support if this unit if it is not working properly, or if it has been dropped or damaged.
  • Page 6: Specifications

    SPECIFICATIONS Model ARC-0850XP ARC-1050XP ARC-1050XPH Operational Modes Auto | Cool | Fan | Dry Auto | Cool | Fan | Dry Auto | Cool | Fan | Dry| Heat 12,000 BTU 13,500 BTU 13,500 BTU Cooling Capacity SACC 8,000 BTU...
  • Page 7: Introduction

    PREPARATION All illustrations in the manual are for explanation purpose only. Your machine may be slightly different. The unit can be controlled by the unit control panel alone or with the remote controller. Control panel Upper air filter Horizontal louver blade (swing automatically) Carbon filter (pre-installed) Upper air intake...
  • Page 8: List Of Installation Parts And Accessories

    AMBIENT TEMPERATURE RANGE FOR OPERATION MODE MODE Temperature Range Temperature Range Heat (pump heat mode) 41-86°F (5-30°C) Cool 60-95°F (16-35°C) *only for ARC-1050XPH 55-95°F (13-35°C) LIST OF INSTALLATION PARTS AND ACCESSORIES Unit Adapter Window Slider Exhaust Hose Remote Control Window Slider A Adapter and Batteries Foam Seal A...
  • Page 9: Installation Guide

    INSTALLATION GUIDE NOTE: Once the Exhaust Hose assembly and Adjustable Window Slider are prepared, choose from one of the following two window installation methods (Hung window or Sliding Window). Exhaust hose assembly installation (window type) Press one end of the exhaust hose into the window slider adapter and the other end onto the unit adapter. The adapters will clamp automatically with elastic.
  • Page 10 INSTALLATION GUIDE Hung window installation Insert the window slider assembly into the window opening. Cut the non-adhesive foam seal C strip to match the width of the window. Insert the seal between the glass and the window frame to prevent air and insects from getting into the room. If desired, install the security bracket with 2 screws as shown.
  • Page 11 INSTALLATION GUIDE Connect the exhaust hose assembly to the window Insert the window slider adapter into the cutout of the window slider. Hung Window Sliding Window Installation Installation NOTE: Illustrations in this manual are for explanatory purposes. The actual shape of your indoor unit may be slightly different.
  • Page 12: Control Panel

    CONTROL PANEL 1. POWER / WIRELESS button Press the Power Button to turn on or off the unit. To activate wireless connection mode, press and hold the POWER button for 3 seconds until 'AP' appears on the LED display. Successful router connection within 8 minutes exits wireless mode, illuminating the Wireless indicator.
  • Page 13 CONTROL PANEL 3. UP and DOWN buttons Press to adjust (increasing/decreasing) temperature settings in 1°F/1°C increments Press to adjust Timer setting in a range of 0-24hrs. The control is capable of displaying temperature in degrees Fahrenheit or degrees Celsius. To convert from one to the other, press and hold the Up and Down buttons at the same time for 3 seconds.
  • Page 14: Remote Control

    REMOTE CONTROL The portable air conditioner can be switched on by the remote control. To transmit signals from the remote control to the air conditioner, point the front part of the remote handset towards the control panel on the air conditioner. Reception of the signal is confirmed by a beep.
  • Page 15: Care And Maintenance

    DO NOT wash the unit under running water. Doing so causes electrical danger. DO NOT operate the portable air conditioner if the power supply was damaged during cleaning. A damaged power cord must be replaced with a new cord. Contact Whynter Customer Support for more information. WATER DRAINAGE When the internal drain pan becomes full the appliance will beep 8 times and the digital display will show error code P1.
  • Page 16 If any of the error codes below appear on the display, unplug the air conditioner and allow it to sit undisturbed for 5 minutes. If the error code persists when the unit is plugged back in, please contact Whynter Customer Support.
  • Page 17: Storage

    STORAGE Be sure to store the unit in a cool, dark place. Exposure to direct sunshine or extreme heat can shorten the lifespan of the unit. The cabinet and front may be dusted with an oil-free cloth or washed with a cloth dampened in a solution of warm water and mild liquid dishwashing detergent.
  • Page 18: Troubleshooting

    Press the Reset button on the L.C.D.I. power plug Drain water from the air conditioner Possible loose internal connection. Please contact Whynter for service. The unit turns on but the The room temperature is Restore the power supply compressor does not turn...
  • Page 19: Warranty

    Should your WHYNTER product prove defective within one year from the date of purchase, contact Whynter’s Customer Support team with the serial number and proof of purchase to make a warranty claim. A Return Authorization number must be issued before returning any parts or products.

This manual is also suitable for:

Arc-1050xpArc-1050xph

Table of Contents