Advertisement
Table of Contents
- 1 Table of Contents
- 2 Disposal Information
- 3 Safety Precautions
- 4 Introduction / Technical Data
- 5 Parts Identification
- 6 Control Panel
- 7 Installation
- 8 Installation
- 9 Operation Instructions
- 10 Operation Instructions
- 11 Remote Control
- 12 Care and Maintenance
- 13 Troubleshooting
- 14 Warranty Information
- Download this manual
Advertisement
Table of Contents

Subscribe to Our Youtube Channel
Related Manuals for Whynter ARC-102CS


Summary of Contents for Whynter ARC-102CS
- Page 1 Whynter 10,000 BTU Portable Air Conditioner Compact Size Model # : ARC-102CS INSTRUCTION MANUAL Congratulations on your new Whynter product. To ensure proper operation, please read this Instruction Manual carefully before using this product. Keep this manual in a safe place for future reference.
-
Page 2: Table Of Contents
TABLE OF CONTENTS PAGE DISPOSAL INFORMATION SAFETY PRECAUTIONS INTRODUCTION / TECHNICAL DATA PARTS IDENTIFICATION 6 - 7 CONTROL PANEL INSTALLATION 9 - 11 OPERATION INSTRUCTIONS 12 - 13 REMOTE CONTROL CARE AND MAINTENANCE TROUBLESHOOTING 16 - 17 WARRANTY INFORMATION... -
Page 3: Disposal Information
We trust that your Whynter air conditioner will provide the performance and reliability that we stand for. -
Page 4: Safety Precautions
SAFETY PRECAUTIONS TO REDUCE THE RISK OF FIRE, ELECTRICAL SHOCK, OR INJURY WHEN USING YOUR AIR CONDIITIONER, FOLLOW THESE BASIC WARNING PRECAUTIONS: Before the appliance is used, it must be properly positioned and installed as detailed in this manual. • Do not under any circumstances cut or remove the third (ground) prong from the power cord •... -
Page 5: Introduction / Technical Data
INTRODUCTION / TECHNICAL DATA HOW IT WORKS The Whynter compact CFC-free, lead-free, and energy efficient 10,000 BTU portable air condi-tioner, helps you stay cool while working with better environmental standards and reducing energy consumption. This portable air conditioner is the ideal space-constrained climate-control solution. Designed with a compact modern style, the unit easily blends in with any room design and is ideal for for a kid’s room. -
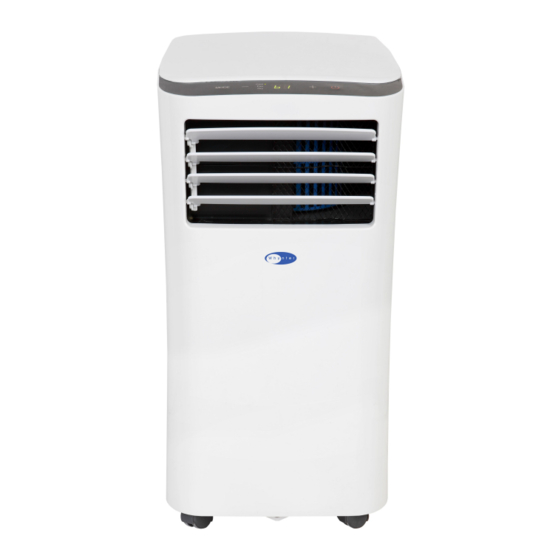
Page 6: Parts Identification
PARTS IDENTIFICATION FRONT VIEW Control Panel Side Handle (2) Front Air Vent / Louvers Casters (four) BACK VIEW Silvershield Pre-filter 3M Filter Upper Air Intake Upper Drain Port Air Exhaust Lower Air Intake Lower Drain Port... - Page 7 PARTS IDENTIFICATION ACCESSORY IMAGE ACCESSORY DESCRIPTION QUANTITY 1 piece Exhaust hose adapter to the unit 1 piece Exhaust hose 1 piece Exhaust hose adapter to the window Window slider kit 1 set Clear plastic plug (plug is in the upper corner of 1 piece the plastic bag that holds the user manual) Foam seal A (Adhesive)
-
Page 8: Control Panel
CONTROL PANEL Power Button Press to turn the air conditioner on and off Mode Button Press to change mode • Controls the 3 function modes: COOL, FAN, and DRY. Up ( + ) and Down ( - ) Buttons Adjusts set temperature (1°C/ 2°F increments) or timer hours (0 – 24 hours). ... -
Page 9: Installation
The 3M Filter is pre-installed. Note: The 3M Filter should be replaced every 2-3 months de- pending on usage. Please contact support@whynter.com for retail sales information. WATER DRAINAGE Fig. 1a The dehumidifying capacity of this unit is 68 pints per day. - Page 10 INSTALLATION LOCATION The air conditioner should be placed on a hard and level surface strong enough to support the unit. The unit has casters and it should only be rolled on smooth, flat surfaces. Use caution when rolling on carpet surfaces. Do not attempt to roll the unit over objects.
-
Page 11: Installation
INSTALLATION WINDOW KIT INSTALLATION IN A DOUBLE-HUNG WINDOW 1. Open window or sliding door for approxi- mately 5” Foam seal A (adhesive type) 2. Cut the foam seal A and B (adhesive type) to the proper length and attach it to the bottom of the window. -
Page 12: Operation Instructions
OPERATION INSTRUCTIONS BEFORE USING YOUR APPLIANCE Remove the exterior and interior packing Before connecting the appliance to the power source, let it stand upright for approximately 4 hours. This will reduce the possibility of a malfunction in the cooling system from handling during transportation SWITCHING ON/OFF THE AIR CONDITIONER The appliance can be switched ON or OFF by pressing the POWER button on the control panel or the ON/OFF but- ton on the remote control... -
Page 13: Operation Instructions
OPERATION INSTRUCTIONS TIMER (DELAYED SWITCH ON / OFF) FUNCTION This function mode enables a delayed switch ON or delayed switch OFF of the air conditioner. The time (hours) de- lay can be set, enabled and disabled. SETTING SWITCH OFF TIMER With the air conditioner operating in any function mode, press the TIMER button. -
Page 14: Remote Control
REMOTE CONTROL The portable air conditioner can be switched on by the remote control. To transmit signals from the remote con- trol to the air conditioner, point the front part of the remote handset towards the control panel on the air condi- tioner. -
Page 15: Care And Maintenance
NOTE: Silvershield pre-filter is washable and does not need to be replaced. The 3M should be replaced every 2-3 months depending on usage. Please contact support@whynter.com for retail sales information WARNING! Never operate the air conditioner without the filter in place... -
Page 16: Troubleshooting
Drain water from the air conditioner Possible loose internal connection. and ‘P1” appears on display Please contact Whynter for service The room temperature is outside of This unit is designed to work in ambi- The unit turns on but the com-... - Page 17 TROUBLESHOOTING Problem Possible Causes Solutions Windows or doors are open Close all windows and doors The unit has worked for a long There are too many people in the You may need additional cooling or time, but the room is not cold enough room another air conditioner...
-
Page 18: Warranty Information
All defective products and parts covered by this warranty will be repaired or replaced on a mail-in basis to Whynter’s Service Center. This warranty is not transferable. After the expiration of the warranty, the cost of labor and parts will be the re- sponsibility of the original owner.
Need help?
Do you have a question about the ARC-102CS and is the answer not in the manual?
Questions and answers
my room doesn't work on my unit.
@Benedict Zarco I MEAN THE REMOTE*