Advertisement
Quick Links
Advertisement

Related Manuals for Whistler WIC-1750


Summary of Contents for Whistler WIC-1750
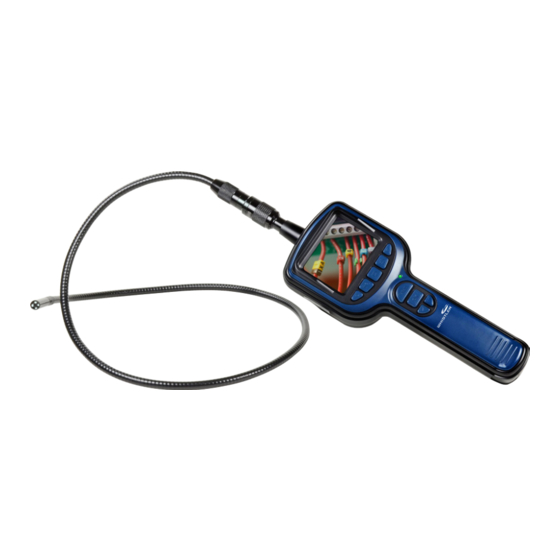
- Page 1 WIC-1750 User Guide WIC-1750 INSPECTION CAMERA MULTI-PURPOSE...
-
Page 2: Table Of Contents
TABLE OF CONTENTS Introduction ............3 Feature Descriptions ..........4 Installation ............5 - 7 Operation ............8 - 16 FCC Information ..........16 Troubleshooting ...........17 - 18 Warranty Information ........19 - 22 Specifications ............23... -
Page 3: Introduction
INTRODUCTION Dear Whistler Customer, Thank you for choosing a Whistler product. We are dedicated to providing products that represent both quality and value. Please read the user guide carefully before using this product. If you have any question concerning the operation of this... -
Page 4: Feature Descriptions
FEATURES DESCRIPTIONS 9mm Camera Lens Power Switch/Image Rotation Delete File/Zoom In Play Back Record Video Take Photo LED Power Indicator Menu 2.7 in Color LCD Monitor Down Flexible Tube Interface 3.3 ft. Flexible Tube Video Out USB Port Micro SD Card Slot Magnet Hook Mirror... -
Page 5: Installation
INSTALLATION Installation Install Batteries 1. Remove the cover. 2. Insert four (4) new AA batteries into the appropriate slots. Proper battery orientation is indicated on the battery compartment. 3. Replace battery cover. Install the Camera with Flexible Tube When connecting the camera tube to the handheld unit, make sure that the keyed ends are properly aligned. - Page 6 INSTALLATION To Insert Micro SD Card After card is inserted into the card slot successfully, an SD card icon will appear on the monitor screen; otherwise, the ‘no SD card’ icon will show. NOTE: If the device fails to read the card due to late insertion or some problem of the card, the screen displays “FORMAT SD CARD”.
- Page 7 INSTALLATION To Connect USB Cable Use a USB cable to connect the product to any PC with a USB slot. Your computer should automatically recognize the new hardware, which you may browse by double-clicking on the My Computer icon on your desktop, and then navigating into the Mobile Disk directory.
-
Page 8: Operation
OPERATION Operation 1. Press and hold the power switch to turn the camera on (refer to Fig 1). 2. The power indicator will illuminate and the LCD will become viewable. 3. If the image on the LCD is unclear, try adjusting either the brightness or mirror controls on the monitor. - Page 9 OPERATION Fig 1 Fig 2 Power On Switch LEDs Provide Illumination Fig 3 Fig 4 TIP: The flexible tube can be bent to accommodate exploration in a variety of locations. IMPORTANT: Do not immerse the monitor in water. Store in a dry place. Such measures reduce the risk of electric shock and damage.
- Page 10 OPERATION Zoom in Picture In real-time monitoring mode, press the button to zoom in (1.0X, 1.5X, 2.0X, 2.5X, 3X) the picture. LEDs Brightness Control The 5 levels of LED brightness can be adjusted by pressing the button in real- time monitoring or recording video mode. Recording Video 1.
- Page 11 OPERATION Playback Video/Picture 1. In real-time monitoring mode, press the button to toggle to the video/picture folder 2. Press the buttons to select your desired folder, and then the press OK button to toggle to the right interface: NOTE: Icon next to a file name indicates that the file is a video.
- Page 12 OPERATION Deleting Video/Picture 1. In real-time monitoring mode, press the button to toggle to the video/ picture folder. 2. Press the button to select your desired folder, and then press OK button. 3. Press the button to select your desired file, and then press the button.
- Page 13 OPERATION Language Setting 1. In the setting mode, press button to select ‘SYSTEM SETTING’, and then press OK button. 2. Press the button to select ‘Language’, and then press OK button, the following interface will appear: 3. Press the button to select your desired language 4.
- Page 14 OPERATION Formatting 1. In the setting mode, press the button to select ‘SYSTEM SETTING ’, and then press the OK button. 2. Press the button to select ‘Format’, and then press OK button. 3. Press the button to toggle between YES and NO, that is, to format or cancel.
- Page 15 OPERATION Date/Time Setting 1. In the setting mode, press the or button to select ‘Date/ Time’ and then press OK button, The right interface will appear: 2. Press OK button to select Date or Time; Press the or button to adjust selection; Press the MENU button to confirm and exit.
-
Page 16: Fcc Information
OPERATION Time Stamp Setting 1. In the setting mode, press the button to select ‘RECORDER SETTING’, and then press OK button. 2. Press the button to select ‘Time Stamp’ and then press OK button. 3. Press the and buttons to toggle between On and Off. -
Page 17: Troubleshooting
TROUBLESHOOTING Why won’t the monitor turn on? • Make sure that the monitor has been charged at least overnight before first use. Press the reset button on the unit. Message on monitor says to “See User Guide for Troubleshooting“. • Make sure that the handheld unit is turned on and that the camera tube is properly attached to the handheld unit. - Page 18 TROUBLESHOOTING Why does the video look “Scrambled”? • There are two video formats that the inspection camera can be set to: NTSC format which is used in North America. The PAL format is used in Europe and other overseas countries. Enter the menu selection and check the video format to make sure the monitor is in NTSC format.
-
Page 19: Warranty Information
All express or implied warranties for this product are limited to the above time. Whistler is not liable for damages arising from the use, misuse, or operation of this product. NOTE: Units that cannot be repaired will be replaced with the same or similar model. - Page 20 WARRANTY INFORMATION Due to the specialized equipment necessary for testing, there are no authorized service stations for Whistler products other than Whistler. When returning a unit for service, please follow these instructions: Ship the unit in the original carton or in a suitable sturdy equivalent, fully insured, with return receipt requested to: Whistler Repair Dept.
- Page 21 The minimum out-of-warranty service fee for your Whistler WIC-1750 is $35.00 (U.S.) If you require out-of-warranty service, please return your unit as outlined in the section “Service Under Warranty” along with a certified check or money order in the amount stated above.
- Page 22 WARRANTY INFORMATION In the event repairs cannot be covered by the minimum service fee, you will be contacted by a Whistler technical service specialist who will outline options available to you. If you elect not to have your unit repaired, it will be returned to you along with your certified check or money order.
-
Page 23: Specifications
SPECIFICATIONS Imaging Sensor CMOS Total Pixels 640 x 480 (NTSC) Horizontal Viewing Angle 36 Degrees Minimum Illumination 0 Lux Night Vision Range 0.5m/1.64ft Power Supply 4 x AA batteries Tube Diameter Waterproof Capacity IP67 (for lens/tube only) LCD Screen Type 2.7”TFT-LCD Effective Pixels 480 x 234... - Page 24 CORPORATE HEADQUARTERS 1716 SW Commerce Dr. Ste. 8 Bentonville, AR 72712 Toll Free (800) 531-0004 TEL (479) 273-6012 www.whistlergroup.com CUSTOMER RETURN CENTER 1412 South 1st St. Rogers, AR 72756 Email: info@whistlergroup.com 03H17 © 2017 The Whistler Group, Inc.
Need help?
Do you have a question about the WIC-1750 and is the answer not in the manual?
Questions and answers