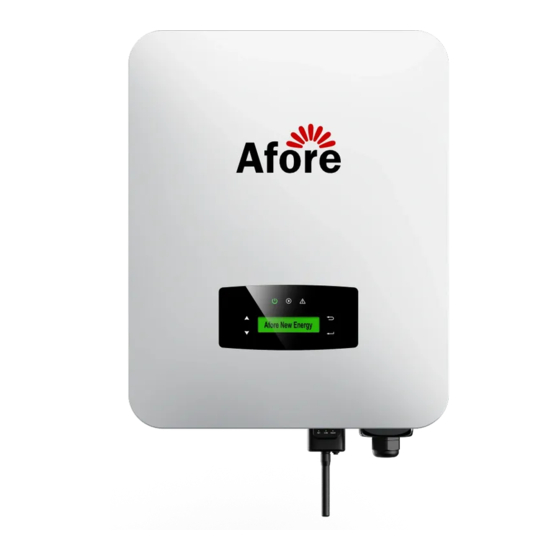
Afore HNS7000TL Installation And Operation Manual
On-grid pv inverter
Hide thumbs
Also See for HNS7000TL:
- User manual (33 pages) ,
- Installation and operation manual (29 pages)
Table of Contents
Advertisement
Quick Links
Advertisement
Table of Contents

Related Manuals for Afore HNS7000TL


Summary of Contents for Afore HNS7000TL
- Page 1 On-Grid PV Inverter Installation and Operation Manual...
-
Page 2: Table Of Contents
Contents Contents 1.About This Manual ..... 1.1 Scope of Validity ......1.2 Target Group . -
Page 3: About This Manual
About This Manual 1.About This Manual 1.1 Scope of Validity This manual describes the installation, commissioning, operation and maintenance of the following on-grid PV inverters produced by Afore New Energy: Single-Phase(One MPPT Tracker) HNS7000TL HNS8000TL Please keep this manual all the time available in case of emergency. -
Page 4: Safety & Symbols
Circuit Breaker and Surge Protector Recommendation: Type Max AC Current [A] Rated current of AC breaker[A] Single-Phase(Two MPPT Trackers) HNS7000TL HNS8000TL 35.5 SPD: Lightning protection system, refer to the following options: AC side, nominal discharge current 20KA, second grade lightning protection, protection voltage 2.5KV... -
Page 5: Explanations Of Symbols
6. Please ensure that the used device and any relevant accessories are disposed of in accordance with applicable regulations. 7. Afore inverter should be placed upwards and handled with care in delivery. Pay attention to waterproof. Do not expose the inverter to water, rain, snow or spray. -
Page 6: Installation
Installation 3.Installation 3.1 Package Unpacking On receiving the inverter, please check to make sure the packing and all of the components are not missing or damaged. Please contact your dealer directly for supports if there is any damage or missing components. Package List Open the package, please check the packing list shown as below. -
Page 7: Product Overview
Installation 3.2 Product Overview 345mm 170mm Overview of the Connection Area The following figures show the assignment of the individual connection areas on the bottom of the inverter. DCA+ DCA- DCB+ DCB- Items DC Switch DC Side For PV String AC Side Monitor Module... -
Page 8: Mounting Location
Installation 3.3 Mounting Location The inverters are designed for indoor and outdoor installation (IP65), to increase the safety, performance and lifespan of the inverter, please select the mounting location carefully based on the following rules: The inverter should be installed on a solid surface, far from flammable or corrosion materials, where is suitable for inverter’s weight and dimensions. -
Page 9: Installation On-Grid Pv Inverter
Installation Leave the enough space around inverter, easy for accessing to the inverter, connection points and maintenance. 300mm 100mm 100mm 500mm 3.4 Installation On-grid PV Inverter Step 1 26mm 35mm 26mm 328.5mm Step 2... -
Page 10: Electrical Connection
Installation Step 3 Security screw 3.5 Electrical Connection 3.5.1 PV & Grid Connection · The open-circuit voltage and short-circuit current of PV string must not exceed inverter’s range · The isolation resistance between PV string and ground must exceed 10 kΩ ·... - Page 11 Installation The on-grid PV inverters work with grid (220/230/240 Vac, 50/60 Hz). The external AC switch should be installed between inverter and grid to isolate from grid. Please make sure below requirements are followed before connecting AC cable to the inverter. ·...
- Page 12 Installation Step 2 DCA+ DCA- DCB+ DCB- N L DCA+ DCA- DCB+ DCB- N L N=Neutral line L=Live line Unscrew the row of screws, insert the wire harness into the DCA+, DCA-, DCB+, DCB-, N, L caps one by one, and tighten the screws Step 3 DCA+ DCA- DCB+ DCB- N L fix cover with screws...
- Page 13 Installation 3.5.2 Earth Connection The user must connect a protective earth (PE) terminal to prevent electric shock. And make sure this PE terminal is properly grounded. Step 1 Grounding terminal 3~5 mm Note: copper cable or aluminum cable more than 6mm² Step 2 Grounding terminal is connected to the inverter at left or right side...
-
Page 14: Communication Connection (Wifi / Ethernet / Gprs / Rs485)
Operation 3.5.3 Communication Connection The monitoring module could transmit the data to the cloud server, and display the data on the PC, tablet and smart-phone. Install the Wi-Fi / GPRS / RS485 Communication Wi-Fi / GPRS / RS485 communication is applicable to the inverter . Please refer to "Communication Configuration Instruction"... -
Page 15: Menu Structure
Operation 4.2 Menu Structure Second Level Menu HNS8000TL-2 Uersion:M xxxx First Level Menu Inverter Info Version:S xxxx Version:S xxxx S/N(Machine)Sxxxxxxxxx S/N(Wifi)xxxxxxxxxx Wifi Info IP (Wifi) 192.168.xx.xx Error Record No Error Date: Year-month-day Date Time Time: H:M:S PassWord xxxx PassWord xxxx Upstream... -
Page 16: Setting
Display the WIFI serial number and assigned IP address Date & Time Set date and time of the inverter Set the protection parameters of inverter Upstream Countercurrent 4.3 Setting 4.3.1 Startup Setting Afore New Energy Please Choose 1s Delay Your Country Enter UP/DOWN Switch countries Please Set... -
Page 17: Parameter Setting
Operation 4.3.2 Parameter Setting Enter Main Menu Enter UP/DOWN Para View: Max VoLtage: Enter Min VoLtage: Input Password Max FrEquency: XXX Min FrEquency: XXX Safety: Enter UP/DOWN Para Adj: Power Off and Enter Para: Restart Inverter Enter Finish Note: The inverter need to be restarted to finish parameter setting. -
Page 18: Commissioning
Commissioning 5.Commissioning Before starting up commissioning at site, please make sure below procedures and requirements are fully meet. · Mounting location is meet the requirements. · All of the electrical wiring is firmly connected, including PV wiring, Grid wiring and Earth wiring. ·... -
Page 19: Shut Down & Restart The Inverter
Shut Down & Restart the Inverter 6.Shut Down & Restart the Inverter 6.1 Shut Down Procedures ・Turn off the DC switch on the inverter; ・Turn off the PV switch of the system; ・Turn off the AC switch between inverter output and the public grid. Note: The inverter will be operable after minimum 5 minutes. - Page 20 Maintenance&Trouble Shooting Trouble-Shooting List Error Code Error Message Possible Fault Correctie Measure Display Ground Fault Ground Fault Circuit GFCI Fault restart the inverter Circuit Interrupter Interrupter fault fault · check PV input voltage within Bus High 450Vdc(up to 3.0kw model), Bus Voltage High ·...
-
Page 21: Specifications
Specifications 8.Specifications PV Input Data HNS7000TL HNS8000TL Max. DC Power ( W ) 9800 11200 Max. DC Voltage ( V ) MPPT Voltage Range ( V ) 70 -550 70 -550 MPPT Full Power Voltage Range ( V ) 180-550...
Need help?
Do you have a question about the HNS7000TL and is the answer not in the manual?
Questions and answers