Table of Contents
Advertisement
Quick Links
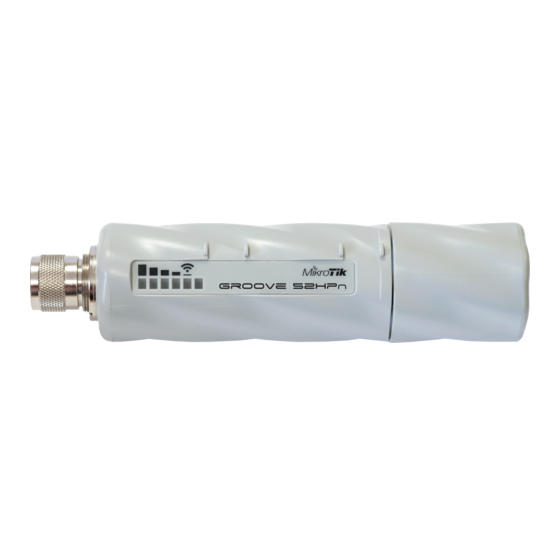
Groove-series
This manual covers Groove models: Groove 52 (Groove 52), GrooveA 52
(RBGrooveA-52HPn), GrooveA 52 ac (RBGrooveGA-52HPacn).
The RouterBOARD Groove comes preinstalled in an outdoor case, with a built-in wireless interface, an
N-Male antenna connector, and one 10/100 Ethernet connector which supports MDI-X auto-detection.
The device is packaged with a 24 V power adapter, a PoE injector, and two mounting loops. Several
models are available (dual-band, single band, AP and CPE variants).
This device needs to be upgraded to RouterOS v6.46 or the latest version to ensure compliance with local authority regulations!
It is the end users responsibility to follow local country regulations, including operation within legal frequency channels, output power, cabling
requirements, and Dynamic Frequency Selection (DFS) requirements. All MikroTik radio devices must be professionally installed
Connecting
Connect the antenna to the N-Male connector.
Twist to open the Groove case, connect an Ethernet cable to the Ethernet port.
The Groove accepts 8-30 V Passive PoE from a PoE injector. The included injector should be
connected with the "Data" end into a switch or other router, the "Data + Power" port should be
connected to the Groove, by using an Ethernet cable of the desired length (not included).
Use the provided rubber insulator to put on the Ethernet cable, and push it into the case opening,
so that the opening is tightly closed.
To configure the device, for the access point models (A) you should connect to the wireless network that begins with "MikroTik". For the CPE
models, the configuration is done from the Ethernet port.
Log in to the device from your web browser by opening 192.168.88.1 in the address bar. Set the WiFi network password, the device password,
any other settings and choose the country where the device is used, to comply with local regulations.
Powering
The device accepts powering from an Ethernet port (Passive PoE). Under maximum load, the power consumption of this device is 4 W.
Mounting
The device is to be mounted vertically so that the Ethernet cable points downwards.
If you wish to tighten the Groove to a pole, you can do it with the provided mounting loops. The Groove
comes bundled with two mounting loops – guide the loops around the Groove though the provided edge
markings, and around the pole where it will be mounted. You should avoid connecting a loose Ethernet
cable to the Ethernet port, secure the cable to a wall or the pole, so that the cable weight is not pulling
the port. It is recommended to secure the Ethernet cable less than 2m from the Groove device. This is to
ensure that the cable doesn't damage the port by its weight or doesn't fall out.
Exposure to Radio Frequency Radiation:
uncontrolled environment. This MikroTik device should be installed and operated no closer than 20 centimeters from your body, occupational user or the
general public.
Configuration
This MikroTik equipment complies with the FCC, IC and European Union radiation exposure limits set forth for an
Advertisement
Table of Contents

Related Manuals for MikroTik RouterBOARD Groove Series


Summary of Contents for MikroTik RouterBOARD Groove Series
- Page 1 Use the provided rubber insulator to put on the Ethernet cable, and push it into the case opening, so that the opening is tightly closed. To configure the device, for the access point models (A) you should connect to the wireless network that begins with “MikroTik”. For the CPE models, the configuration is done from the Ethernet port.
- Page 2 País De Origen: Letonia; Lituania; China (Republica Popular); Estados Unidos De America; Mexico. Por favor contacte a su distribuidor local para preguntas regionales específicas. La lista de importadores se puede encontrar en nuestra página de inicio – https://mikrotik.com/buy/latinamerica/mexico Federal Communication Commission Interference Statement This equipment has been tested and found to comply with the limits for a Class B digital device, pursuant to Part 15 of the FCC Rules.
- Page 3 This device complies with Part 15 of the FCC Rules. Operation is subject to the following two conditions: (1) This device may not cause harmful interference, and (2) this device must accept any interference received, including interference that may cause undesired operation. Note: This unit was tested with shielded cables on the peripheral devices.
- Page 4 BG С настоящото Mikrotīkls SIA декларира, че този тип радиосъоръжение RouterBOARD е в съответствие с Директива 2014/53/ЕС. Цялостният текст на ЕС декларацията за съответствие може да се намери на следния интернет адрес: https://mikrotik.com/products CS Tímto Mikrotīkls SIA prohlašuje, že typ rádiového zařízení RouterBOARD je v souladu se směrnicí 2014/53/EU. Úplné znění EU prohlášení o shodě...
- Page 5 MikroTik soddisfa i limiti di potenza massima TX tramite le normative ETSI. Per informazioni più dettagliate consultare la Dichiarazione di conformità sopra / Este dispositivo MikroTik cumple con los límites máximos de potencia TX a través de las normas ETSI. Para obtener información más detallada, consulte la Declaración de conformidad anterior / Это...
Need help?
Do you have a question about the RouterBOARD Groove Series and is the answer not in the manual?
Questions and answers