
Related Manuals for Riello RDB 3.2 BT 58/70


Summary of Contents for Riello RDB 3.2 BT 58/70
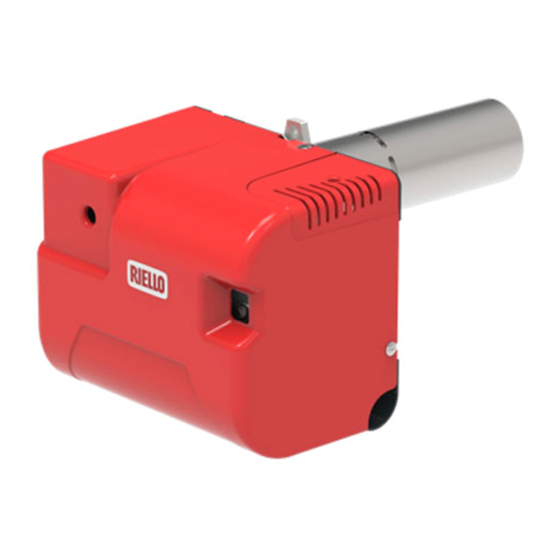
- Page 1 Installation, use and maintenance instructions Kerosene burner One stage operation CODE MODEL 20157841 RDB 3.2 BT 58/70 20158125 (1) - 10/2018...
- Page 2 Original instructions...
-
Page 3: Table Of Contents
Contents Declaration..................3 Information and general warnings. - Page 4 Contents Air damper adjustment ............... . .21 Electrodes setting .
-
Page 5: Declaration
RIELLO S.p.A. Address: Via Pilade Riello, 7 37045 Legnago (VR) Product: Kerosene burner Model: RDB 3.2 BT 58/70 These products are in compliance with the following Technical Standard: EN 12100 EN 267 and according to the European Directives: 2006/42/CE Machine Directive... -
Page 6: Information And General Warnings
Information and general warnings Information and general warnings Information about the instruction manual 2.1.1 Introduction WARNING: MOVING PARTS The instruction manual supplied with the burner: This symbol indicates that you must keep limbs is an integral and essential part of the product and must not away from moving mechanical parts;... -
Page 7: Delivery Of The System And The Instruction Manual
Information and general warnings 2.1.4 Delivery of the system and the instruction The system supplier must carefully inform the user about: – the use of the system; manual – any further tests that may be required before activating the When the system is delivered, it is important that: system;... -
Page 8: Guidance For The Use Of Biofuel Blends Up To 30
Information and general warnings Guidance for the use of biofuel blends up to 30% Introduction the hydroscopic nature of biofuel, it will effectively clean the tank, absorb water present which in turn will result in equip- With increasing focus on renewable and sustainable energy re- ment failure that is not covered by the manufacturer's war- quirements, biofuel usage is set to increase. -
Page 9: Safety And Prevention
Safety and prevention Safety and prevention Introduction The burners have been designed and built in compliance with the type and pressure of the fuel, the voltage and frequency of the current regulations and directives, applying the known technical electrical power supply, the minimum and maximum deliveries for rules of safety and envisaging all the potential danger situations. -
Page 10: Personnel Training
Safety and prevention Personnel training The user is the person, body or company that has acquired the In addition: machine and intends to use it for the specific purpose. He is re- must take all the measures necessary to pre- sponsible for the machine and for the training of the people work- vent unauthorised people gaining access to ing around it. -
Page 11: Technical Description Of The Burner
Technical description of the burner Technical description of the burner Models available Designation Voltage Code RDB 3.2 BT 58/70 1/230V/50Hz 20157841 Tab. A Technical data Model RDB 3.2 BT 58/70 Delivery kg/h 4.9 - 5.9 Output range 58 - 70... -
Page 12: Burner Equipment
Screw and nut to fix the burner to the flange ..... No. 1 lines suitable for bio fuel use. Screws and nuts to fix the burner to the boiler....No. 4 Please contact Riello for further information. Instruction................No. 1 Spare parts list ..............No. 1... -
Page 13: Installation
Installation Installation Notes on safety for the installation After carefully cleaning all around the area where the burner will The installation of the burner must be carried out be installed, and arranging the correct lighting of the environ- by qualified personnel, as indicated in this manual ment, proceed with the installation operations. -
Page 14: Installer/Servicer Notes For The Use Of Gas Oil With Bio Blends Up To 30% Where Gas Oil Use Is Permitted By The Appliance Manufacturer
The burner hydraulic components and flexible oil lines must burner technical manual). be suitable for bio fuel use (check with Riello if in doubt). If a Bio blend is in use the installer must seek information Riello have carefully chosen the specification of the bio com-... -
Page 15: Boiler Fixing
Installation Boiler fixing Prepare a suitable lifting system. D5012 Fig. 7 Put on the flange 1)(Fig. 6) the screw and two nuts. Widen, if necessary, the insulating gasket holes (5), (see Fig. 7). Fix the flange 1)(Fig. 8) to the boiler door 4) using screws 2) and (if necessary) the nuts 3) interposing the insulating gas- ket 5). -
Page 16: Burner Assembly
Installation Burner assembly CF Application Length is reduced if there are bends in the intake In case of CF applications, the burner shall not operate without section. protection (A) of the suction inlet. For instance, using a tube with a smooth inside WARNING surface, you must allow for the following losses: –... -
Page 17: Hydraulic Systems
2) must be totally in steel. In case of use with gas oil containing up to 30% Bio blend, it will be essential to use flexible oil lines suitable for bio fuel use. Please contact Riello for further information. WARNING 20083081 Fig. 11 Key (Fig. -
Page 18: One Pipe System
Usually the tank is lower than the burner. You are advised to use additional filters on the fuel supply line. Riello recommends a good quality fuel filter at the CAUTION tank (Fig. 12 - Fig. 13) and a secondary filter (60 ... -
Page 19: Two Pipe System
You are advised to use additional filters on the fuel supply line. Tab. G Riello recommends a good quality fuel filter at the difference of level CAUTION tank (Fig. 14) and a secondary filter (60 for gas max. length of the suction line oil and 15 ... -
Page 20: Electrical System
Electrical system Electrical system Notes on safety for the electrical wiring The electrical wiring must be carried out with the electrical supply disconnected. Electrical wiring must be carried out by qualified personnel and in compliance with the regulations currently in force in the country of destination. -
Page 21: Electrical Wiring
Electrical system Electrical wiring 7.2.1 Control box ~ 50Hz - 230V This operation must be performed with the burner turned off and mains power disconnected. DANGER Main switch To remove the control box (Fig. 16) from the burner follow of the instruction: ... -
Page 22: Start-Up, Calibration And Operation Of The Burner
Model Angle kg/h ± 4% Set-point Set-point RDB 3.2 BT 58/70 DANFOSS 1.75 45° S Tab. H Nozzles installation The burner complies with the emission requirements of the The use of nozzles other than those specified by EN 267 standard. -
Page 23: Maintenance Position
Start-up, calibration and operation of the burner Maintenance position Access to the combustion head, electrodes and nozzle Loosing the fixing nut to the flange (1) and remove the burner out of the boiler. Hook the burner to the flange (1), by removing the blast tube (2) after loosing the fixing screws (3). -
Page 24: Combustion Head Setting
Start-up, calibration and operation of the burner Combustion head setting To adjust the combustion head, proceed as follows: Slotted ring loosen the two screws in the ring slots. Screw Turn the blast tube to regulate it, until the end of the slotted ring centres up with the notch shown in the Tab. -
Page 25: Maintenance
Bio blend, it will be essential to use flexible oil flow rate and provoke polluting combustion. lines suitable for bio fuel use. Please contact Riello for further information. Flame sensor Clean the flame sensor. Fuel tank... -
Page 26: Safety Components
Maintenance Combustion In case the combustion values found at the beginning of the inter- vention do not respect the standards in force or, in any case, do not correspond to a proper combustion, contact the Technical As- sistant and have him carry out the necessary adjustments. Allow the burner to work for 10 min. -
Page 27: Faults / Solutions
Faults / Solutions Faults / Solutions Here below you can find some causes and the possible solutions When lock out lamp lights the burner will attempt to light only after for some problems that could cause a failure to start or incorrect pushing the reset button. - Page 28 RIELLO S.p.A. I-37045 Legnago (VR) Tel.: +39.0442.630111 http:// www.riello.it http:// www.riello.com Subject to modifications...
Need help?
Do you have a question about the RDB 3.2 BT 58/70 and is the answer not in the manual?
Questions and answers