Advertisement
Quick Links
™
OneSpace is a Trademark of Comfort Products, Inc.
ASSEMBLY INSTRUCTIONS
MODEL # 50-41201
SUPPLIER CODE: PMEX
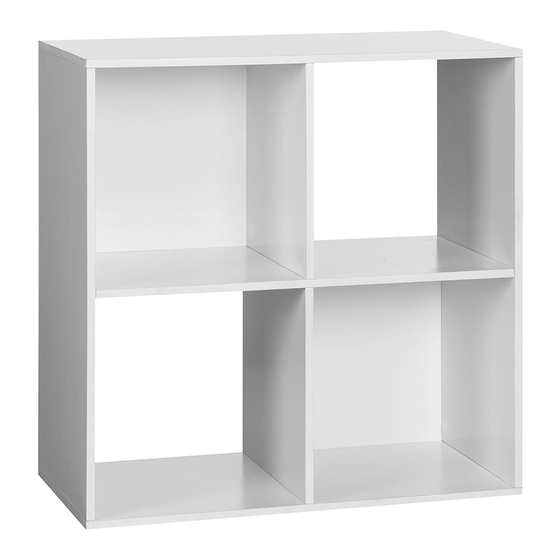
4 Cube Organizer, White
CUSTOMER SERVICE
For fastest service on claims, requests for replacement parts, or
questions, please visit our website at
www.comfortproducts.net/support
e-mail: customerservice@comfortproducts.net
Keep your sales receipt as documentation of your ownership.
1 OF 10
Advertisement

Related Manuals for Onespace 50-41201


Summary of Contents for Onespace 50-41201
- Page 1 ™ OneSpace is a Trademark of Comfort Products, Inc. ASSEMBLY INSTRUCTIONS MODEL # 50-41201 SUPPLIER CODE: PMEX 4 Cube Organizer, White CUSTOMER SERVICE For fastest service on claims, requests for replacement parts, or questions, please visit our website at www.comfortproducts.net/support e-mail: customerservice@comfortproducts.net...
- Page 2 Top maximum weight capacity =40lbs Shelf maximum weight capacity =10lbs 2 OF 10...
-
Page 3: Cleaning And Care
PART DESCRIPTION PART DESCRIPTION STOCK NO STOCK NO Side Panel Left 51-41201A Shelf Panel 51-41201E Center Panel 51-41201F Side Panel Right 51-41201B Top Panel 51-41201C 51-41201G Center Panel Bottom Back Panel 51-41201H Bottom Panel 51-41201D HARDWARE KIT STOCK # 51-41201KIT DESCRIPTION PART Mini x Bolt 24mm... - Page 4 Start assembling by xing the Dowels (C) to Side Panel Left (1), Side Panel Right (2), Shelf Panel (5) Center Panel Top (6) and Center Panel Bottom (7). Part # C x 10 Using a phillips head screwdriver, x the Mini x Bolts (A) to Side Panel Left (1), Side Panel Right (2), Top Panel (3) and Shelf Panel (5).
- Page 5 Use two CSK Screws (D) to attach the Shelf Panel (5) and Center Panel Top (6). Make sure that the grooves for the Back Panel are aligned. (These grooves are on the sides not shown in the drawing below). Part # D x 2pcs Insert the Mini x Cams (B) into the Center Panel Bottom (7).
- Page 6 Insert the Mini x Cams (B) into the Shelf Panel (5). Attach Side Panel Left (1) to the Shelf Panel (5). While doing this make sure that the grooves for the Back Panel are aligned. Tighten the two Mini x Cams (B) clockwise and cover them with Cam Caps (E).
- Page 7 Step 7: Slide in one Back Panel (8) with the nished side facing inside the cube. Step 8: Use six CSK Screws (D) to attach the Bottom Panel (4) to Side Panel Left (1), Side Panel Right (2) and Center Panel Bottom (7). Make sure that the groove in the Bottom Panel (4) is aligned with the panel which you have just inserted.
- Page 8 Step 9: Slide in the other Back Panel (8) with the nished side facing inside the cube. Step 10: Insert the Mini x Cams (B) into the Side Panel Left (1), Side Panel Right (2) and Center Panel Top (6) and attach the Top Panel (3).
- Page 9 9 OF 10...
- Page 10 10 pounds for the shelves and 40 pounds for the top panel. For claims or questions concerning this warranty, please visit: www.comfortproducts.net or email us at: customerservice@comfortproducts.net MODEL: # 50-41201 Comfort Products, Inc. P.O. Box 999 Memphis, TN 38101 www.comfortproducts.net customerservice@comfortproducts.net ™ OneSpace is a Trademark of Comfort Products, Inc. 10 OF 10...
Need help?
Do you have a question about the 50-41201 and is the answer not in the manual?
Questions and answers