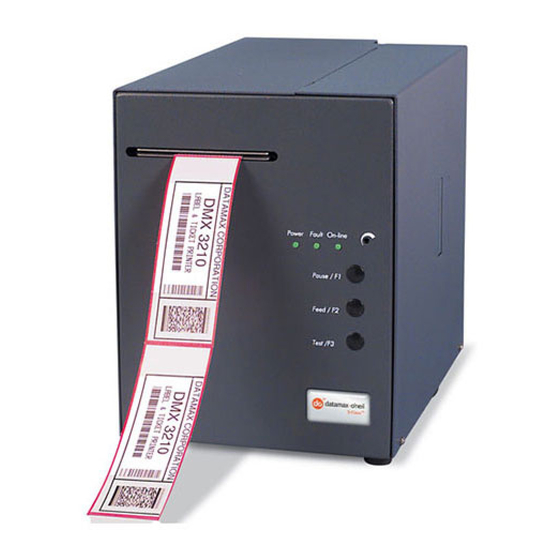
Datamax ST-3210 Operator's Manual
S class series
Hide thumbs
Also See for ST-3210:
- Operator's manual (84 pages) ,
- Quick reference manual (40 pages) ,
- Programmer's manual (26 pages)
Table of Contents
Advertisement
With USB
Operator's Manual
Corporate Headquarters
4501 Parkway Commerce Blvd.
Orlando, Fl 32808
Phone: 407-578-8007
Fax: 407-578-8377
Asia-Pacific
Datamax International
Herbert House
19 Loyang Way
#01-01 CILC Building
12 Elizabeth Way, Pinnacles
Singapore 508724
Harlow, Essex CM19 5FE UK
Phone: +65 542-2611
Phone: +44 1279 772200
Fax: +65 542-3611
Fax: +44 1279 424448
Advertisement
Table of Contents

Related Manuals for Datamax ST-3210


Summary of Contents for Datamax ST-3210
- Page 1 Operator’s Manual Corporate Headquarters 4501 Parkway Commerce Blvd. Orlando, Fl 32808 Phone: 407-578-8007 Fax: 407-578-8377 Asia-Pacific Datamax International Herbert House 19 Loyang Way #01-01 CILC Building 12 Elizabeth Way, Pinnacles Singapore 508724 Harlow, Essex CM19 5FE UK Phone: +65 542-2611...
- Page 3 Information in this document is subject to change without notice and does not represent a commitment on the part of Datamax Barcode Products Corporation. No part of this manual may be reproduced or transmitted in any form or by any means, for any purpose other than the purchaser's personal use, without the expressed written permission of Datamax Corporation.
-
Page 5: Agency Compliance And Approvals
Agency Compliance and Approvals: UL60950-1: 2003 1st Edition CSA C22.2 No. 60950-1-03 1st Edition; April 2003 Listed IEC 60950-1 (2001) 1st Edition Gost-R As an Energy Star Partner, the manufacturer has determined that this product meets the Energy Star guidelines for energy efficiency. The manufacturer declares under sole responsibility that this product conforms to the following standards or other normative documents: EMC:... -
Page 6: Important Safety Instructions
Important Safety Instructions: This printer has been carefully designed to give many years of safe and reliable performance; however, as with all types of electronic equipment, there are some basic precautions that should taken to avoid personal injury or damage to the printer: Carefully read the installation and operating instructions provided with this printer. -
Page 7: Table Of Contents
Contents Overview ...1 About the Printer ... 1 1.0.1 Standard Features ... 2 1.0.2 Optional Features... 3 Getting Started ...5 Unpacking... 5 2.0.1 Inspection ... 6 2.0.2 Additional Requirements ... 6 Setting-Up the Printer ...7 Power Connection ... 7 Interfacing... 8 3.1.1... - Page 8 Troubleshooting...51 Help Guide... 51 Hex Dump Mode... 55 Specifications...57 Specifications ... 57 Approved Ticket Stocks... 63 Appendix A ...65 ASCII Control Code Chart... 65 Appendix B ...67 Available Fonts and Barcodes ... 67 Appendix C ...77 Cable Listings ... 77 Appendix D ...79 SV Model Mounting Dimensions ...
-
Page 9: Overview
This manual provides all the information necessary for the daily operation of the printer. To begin printing tickets, refer to the instructions included with the software package you have chosen. If you wish to write a custom program, visit our website at www.datamaxcorp.com for a copy of the DPL Programmer’s Manual (part number 88-2051-01) and... -
Page 10: Standard Features
1.0.1 Standard Features This printer comes equipped with many standard features: Communication Interfaces USB interface DB-9 RS-232 serial interface IEEE 1284 Centronics Memory 2 MB FLASH Memory 4 MB DRAM Memory Printing Direct Thermal On-demand and batch modes Automatic ticket loading and positioning... -
Page 11: Optional Features
Controller (NIC) to provide Ethernet Print Side Media Sensor (ST Models only) This option allows the printer to sense TOF marks that are present on the same side of the media in which printing will occur. Roll Hanger (ST Models only) This mounting option allows the printer to use rolled ticket stock with a maximum 7-inch outer diameter (177.8 mm) on 2-inch (50.8 mm) - Page 12 S-Class...
-
Page 13: Getting Started
The printer is carefully packaged to avoid any damage during transit. In order to operate the printer, you will need to remove the packaging materials placed there for shipment. Complete the following steps prior to connecting power or attempting to load ticket stock. -
Page 14: Inspection
2.0.1 Inspection After inspecting the printer, check the remaining contents of the box. In addition to this manual, the following items should be included: Ticket Printer Power cord Keys (ST Models only) Accessories CD-ROM Special or additionally purchased items. Important Notice: 2.0.2... -
Page 15: Setting-Up The Printer
Ensure that the Power Switch on the Printer is in the ‘Off’ position. Connect the AC Power Cord to the receptacle on the back of the Printer, and then plug the AC Power Cord into a properly grounded outlet. (The power supply automatically detects and then adjusts to the applied line voltage;... -
Page 16: Interfacing
Interfacing The printer can be connected to the host via the parallel, USB, or serial, The printer will automatically connect to the first port that delivers valid data. Once established, the printer’s power must be cycled ‘Off’ and ‘On’ to change an interface connection. -
Page 17: Automatic Parser Mode Detection
From the factory, the printer will automatically interpret the data received from the host to set the Parser Mode. Note: When set to ‘Auto,’ the printer assumes its parser mode according to the first character received. If the first character is a < (ASCII control character 3C, as transmitted by most ticketing software packages), the printer will assume the desired DTPL parser mode. -
Page 18: Loading Ticket Stock
These differences are detailed below. 3.2.1 ST Models Note: If your printer is equipped with the Roll Hanger option but you want to use an internal fan-fold ticket source instead, the Roll Hanger must be removed. Remove the Roll Hanger by turning it counter-clockwise to unscrew it from the centerplate of the printer. - Page 19 “Standard Media Sensor” using Fan-Fold Stock – With the ticket TOF Marks facing ‘down’ (away from you), place the ticket stock in the bottom of the printer. (If using an external supply, route the ticket stock into the printer through the Rear or Bottom Slots.)
- Page 20 “Print Side Media Sensor” using Fan-Fold Stock – With the ticket TOF Marks facing ‘up’ (toward you), place the stock in the bottom of the printer. (If using an external supply, route the ticket stock into the printer through the Rear or Bottom Slots.)
- Page 21 Standard Media Sensor” using Roll Stock – “ Mount the roll of ticket stock on the Roll Hanger so that it unwinds in the direction shown by the arrow in the drawing below. (The TOF Marks must be wound inward on the roll; see Section 6 for ticket stock specifications).
- Page 22 “Print Side Media Sensor” using Roll Stock – Mount the roll of ticket stock on the Roll Hanger so that it unwinds in the direction shown by the arrow in the drawing below. (The TOF Marks must be wound outward on the roll; see Section 6 for ticket stock specifications).
- Page 23 (Too Tight) Slide the ticket stock farther into the Media Guides until it is grabbed by the loading mechanism, and then allow the printer to complete the positioning process. Close the Access Cover. Note: If automatic loading doesn’t occur, try the following: 1) Ensure that the Printhead Latch is locked.
-
Page 24: Sv Models
Step 5 of Section 3.2.1. Slide the ticket stock through the Media Guides. The motor will start; continue feeding the tickets. The printer will grab the leading edge of the stock and complete the positioning process. If this process fails, see the note on the next page. - Page 25 2) Press the PAUSE button (the On-Line Indicator will go ‘Off’) and then repeatedly press the F2 button while gently pushing the stock forward until the printer grabs the ticket. 3) Press the PAUSE button (to return to the on-line mode).
-
Page 26: Using The Front Panel
3.3 Using the Front Panel The Front Panel is comprised of a ticket exit, darkness control, three indicator lights, and three dual-purpose buttons. ST Models SV Models S-Class... - Page 27 FAULT: During normal operation, this indicator will flash briefly as the printer receives data from the host system; however, if a fault is detected this indicator stays on. A fault can have several different causes; see Section 5 for details.
- Page 28 Dual-Purpose Buttons Depending upon the printer’s mode, the buttons function as follows: On-Line Mode Button Functions (On-Line, as denoted by the On-Line Indicator being ‘On’) PAUSE: Press this to temporarily stop printing (pause mode) or to enter the off-line mode.
- Page 29 Ticket; see Section 3.4.1. F1 + F2 + F3: Press and hold these during power-up to reset the printer to the default settings; see Section 3.5.2. S-Class (a) Press momentarily to advance ticket stock, or to manually load ticket stock.
-
Page 30: Resident Formats
(Resettable Values can be useful in tracking job data; see the DPL Programmer’s Manual for details. Input Values indicates the selected parser mode and the printer’s internal sensor values. VER: S3210 - 01.00C BOOT ES-2562-01A... -
Page 31: Test Pattern Ticket
With stock loaded, turn the printer ‘On’. Press the PAUSE button to put the printer in the off-line mode. Simultaneously press the F1 and F2 Buttons. Note: The Test Pattern Ticket is generated at the current Darkness and Speed settings. -
Page 32: Internal Test Ticket
The Internal Test Ticket is another resident format that is another useful indicator of print quality. This ticket features various font sizes and barcodes (the sample below was printed using the ST-3210). To print an Internal Test Ticket: With stock loaded, turn the printer ‘On’. -
Page 33: Resetting The Printer
There are two different reset levels possible for the printer: 3.6.1 Warm Reset To reset the printer and return to the on-line mode: Press the PAUSE button to go off-line and then press the F1 + F3 Buttons simultaneously. 3.6.2... -
Page 34: Keypad Lockout
3.6 Keypad Lockout The Keypad Lockout Function stops the operator's ability to enter the offline functions in the printer’s menu. To enable the lockout feature: Press and hold the PAUSE/F1 and FEED/F2 buttons while turning ‘On’ the printer. To disable the lockout feature: Press and hold the FEED/F2 and TEST/F3 buttons while turning ‘On’... -
Page 35: Adjustments And Maintenance
See Section 4.3. In this case, the Media Sensor can be adjusted to any location over the ticket stock. Depending upon the printer model and options, the adjustment of the Media Sensor differs slightly, as detailed in the following subsections. S-Class... -
Page 36: St Model Media Sensor Adjustment
The ST Model can be equipped with either a Standard or a Print Side Media Sensor. Follow the appropriate procedure for the Media Sensor in your printer: Adjusting the Standard Media Sensor – Turn ‘Off’ the Power Switch. Open the Access Cover. - Page 37 Ticket Stock Lower the Printhead Assembly and lock the Printhead Latch. Turn ‘On’ the printer and load ticket stock; see Section 3.2. Lower and lock the Access Cover. To verify the alignment, press the FEED button several times – the stopping point should be the same for each ticket that is output.
- Page 38 Adjusting the Print Side Media Sensor – Turn ‘Off’ the Power Switch. Open the Access Cover. Loosen the Thumbscrew and adjust the Media Guides to fit the width of the ticket stock: The guides should be positioned so that there is no side-to-side ticket movement (too loose), but not so close as to cause friction or bowing of the ticket (too tight).
-
Page 39: Sv Model Media Sensor Adjustment
Section 4.0. Tighten the Nut securely. Turn ‘On’ the printer and load ticket stock; see Section 3.2. To verify the alignment, press the FEED button several times – the stopping point should be the same for each ticket that is output. Note that if the Fault Indicator illuminates, the sensor needs to be repositioned (see Section 5 for a complete listing of possible causes). - Page 40 Ticket Stock Raise the Printhead Assembly and lock the Printhead Latch. Turn ‘On’ the printer and load ticket stock; see Section 3.2. To verify the alignment, press the FEED button several times – the stopping point (TOF) should be the same for each ticket output.
-
Page 41: Stock Id Selections
4.1 Stock ID Selections The printer maintains a selection of 10 user modifiable stock setups. Each setup defaults to a specific print width, start print position and cut/tear position, where: The Print Width is the print distance across the ticket. - Page 42 The table below lists the default settings, according to the printer model, for each Stock ID number. Stock ID 3210 Models 3.15" (80.0 mm) 3.15" (80.0 mm) 3.15" (80.0 mm) 3.15" (80.0 mm) 1.89" (48.0 mm) 1.89" (48.0 mm) 1.89" (48.0 mm) 1.89"...
-
Page 43: Start Of Print & Cut/Tear Adjustment
Start of Print (SOP) and Cut/Tear (C/T) Adjustments can be used to visually set the required positions. To begin: If on-line, press the PAUSE button to place the printer off-line. Press and hold (approximately 6 seconds) the F3 button until the On- Line Indicator is lit then release. -
Page 44: Operational Database Modification
The operational configuration of the printer, including the Parser Mode and other parameters, can be changed via the front panel, as follows: If on-line, press the PAUSE button to place the printer off-line. Press and hold the F2 button until the On-Line Indicator is lit (approximately six seconds) then release the button. - Page 45 Section 4.2) TOF Sense Selects the method for sensing the ticket Top Of Form Present DLY Delay - to stop the printer from backing up the tickets when printing multiple tickets. No Reprint When a fault condition is detected, printing stops and the FAULT light turns on.
- Page 46 Section 4.2) TOF Sense Selects the method for sensing the ticket Top Of Form Present DLY Delay - to stop the printer from backing up the tickets when printing multiple tickets. No Reprint When a fault condition is detected, printing stops and the FAULT light turns on.
-
Page 47: Database Modification Example
This section details the modification of an Operational Database parameter. The following example increases the printing speed parameter from 6 to 8 IPS on the ST-3210; however, using the same basic procedure, any of the parameters can be changed regardless of the printer model. -
Page 48: Maintenance
4.4 Maintenance Routine maintenance will ensure the optimum performance of the printer. The following table outlines the recommended cleaning intervals, while the items listed below will help do the job safely and effectively: • Isopropyl alcohol • Cotton swabs • A clean, lint-free cloth For your continued safety and to avoid damaging the unit, always turn ‘Off’... -
Page 49: Printhead Cleaning
Clean the Printhead as follows: Turn ‘Off’ and unplug the printer. (ST Models: Raise the access cover; see Section 3.2.) Slide the Printhead Latch to the ‘Unlocked’ position and then raise (or, in the case of SV Models, lower) the Printhead Assembly. - Page 50 Lower (or raise) the Printhead Assembly and slide the Printhead Latch forward to the ‘Locked’ position. Plug in and turn ‘On’ the printer. Load ticket stock; see Section 3.2. (ST Models: Close the access cover.) This completes the procedure. Surface...
-
Page 51: Platen Roller Cleaning
When this build-up is not removed, it can cause abrasive damage to the printhead. Clean the Platen Roller as follows: Turn ‘Off’ and unplug the printer. (ST Models: Raise the access cover; see Section 3.2.) Slide the printhead latch to the ‘unlocked’ position and then raise (or, in the case of SV Models, lower) the printhead assembly;... -
Page 52: Media Sensor Cleaning
Allow the Platen Roller to dry. Lower (or raise) the printhead assembly and slide the printhead latch into the ‘locked’ position. Plug in and turn ‘On’ the printer. Load ticket stock; see Section 3.2. ST Models: Close the access cover. This completes the procedure. 4.4.3... - Page 53 Media Sensor Printhead Assembly Lower the printhead assembly and slide the printhead latch into the ‘locked’ position. Plug in and turn ‘On’ the printer. Load ticket stock; see Section 3.2. ST Models: Close the access cover. This completes the procedure. S-Class...
-
Page 54: Ticket Detect Sensor Cleaning
Using compressed air, direct an air stream under the area indicated by dotted line in the drawing below to clean the sensor. Media Guide Plug in and turn ‘On’ the printer. Load ticket stock; see Section 3.2. ST Models: Close the access cover. This completes the procedure. Ticket Detect Sensor... -
Page 55: Interior Cleaning
Using a soft brush or compressed air, remove all debris from inside the ticket compartment. Lower the printhead assembly and slide the printhead latch into the ‘locked’ position. Plug in and turn ‘On’ the printer. Load ticket stock (see Section 3.2) and close the access cover. This completes the procedure. S-Class... -
Page 56: Exterior Cleaning
The operating programs and fonts for the printer are stored in Flash memory on the Main PCB. When program updates and/or new features are added, they can be downloaded to the printer as follows: Identify the new version for your model of printer from the Datamax Web site at www.datamaxcorp.com drive or a floppy disk. - Page 57 Following an unsuccessful download, the FAULT Light will illuminate then the printer will perform a ‘warm reset’ The original firmware will remain operational. If the printer fails to reset, toggle the power ‘Off’ and ‘On.’ Try re-sending the file to the printer. If the failure continues, check the following possible causes: •...
- Page 58 S-Class...
-
Page 59: Troubleshooting
Datamax Technical Support or a qualified service technician. Note: If the Fault Indicator is lit, the FEED button must be pressed after completing the corrective action to clear the alarm and return the printer to normal operation. - Page 60 DTPL or DPL. The communication parameters between the printer and host may not match; Print a Configuration Label to check the current port settings (see Section 3.4.1) See Section 4.3 to reconfigure the printer to match the host computer’s...
- Page 61 If experiencing this problem… After printing the ticket, the Fault Indicator lights: The printer feeds when no ticket stock is present or : The printer feeds approximately 20 inches (51 cm) of ticket stock then the Fault Indicator lights: Tickets sometimes jam and/or...
- Page 62 Appendix C for cable requirements. • The printer may be in ‘hex dump mode’ (see Section 5.1); cycle the printer power ‘Off’ and ‘On’. • The printer may be in ‘hex dump mode’;...
-
Page 63: Hex Dump Mode
As a final note, many software programs use bit mapping to construct the ticket, making diagnosis difficult. Contact a Datamax Technical Support Representative with any questions. Note: To exit hex dump mode, turn the Power Switch ‘Off’ and ‘On’. - Page 64 S-Class...
-
Page 65: Specifications
6.0 Specifications Barcodes/Fonts (See Appendix B for examples) Barcode Symbologies (mode dependent): Font Expansion and Rotations: Resident Fonts (mode dependent): Optional Fonts: S-Class Specifications DPL Parser Mode: Code 39, Interleaved 2 of 5, Code 128 (subsets A, B, and C), Codabar, LOGMARS, UPC-A, UPC-E, UPC 2 &... - Page 66 Communications Interface Baud Speed Handshaking Parity Stop Bits Data Bits Control (Front) Panel Buttons: Indicators: Potentiometer: Electrical Grounding: AC Input Voltage Environmental Dust: Electromagnetic Radiation: Operating Temperature Humidity USB, RS-232 (DB-9), and IEEE 1284 Compliant Centronics Parallel 600 to 38,400 bits per second (BPS) Xon/Xoff, CTS, DTR Even, Odd, or None 1 or 2...
- Page 67 Mechanical Depth: ST-3210 & -3306 SV-3210 & -3306 Height: ST-3210 & -3306 SV-3210 & -3306 Width: ST-3210 & -3306 SV-3210 & -3306 Weight: ST Models – SV Models – Top Plate (SV Models only): 9.71 inches (24.7 cm) W x 8.60 inches (21.8...
-
Page 68: Print Engine
Print Engine DRAM Memory: FLASH Memory: Maximum Fields and Characters Per Ticket: Media Sensing: Printhead Dot Size (nominal): ST/SV-3210 – ST/SV-3306 – Print Length Range: Print Resolution: ST/SV-3210 – ST/SV-3306 – Print Width, Maximum: ST/SV-3210 – ST/SV-3306 – Print Speed Range: ST/SV-3210 –... - Page 69 Ticket Stock Requirements Type Roll Stock (media sensor dependant): Print Side Media Sensor – Standard Media Sensor – Thickness Range: Standard Model – Cutter-Equipped Model – The ST Model has space restrictions when ticket stock is stored internally, see ‘Mechanical / Ticket Compartment,’ above. The mark must be black carbon-based ink, with a reflectance that is less than 10% at wavelengths of 950 and 640 nm.
- Page 70 Ticket Length Quiet Zone Width Units of measure are given in inches, and all dimensions are referenced in the direction of ticket travel through the printer. The maximum allowable length of the combined ticket and mark measurement cannot exceed 99.99 inches.
-
Page 71: Approved Ticket Stocks
6.1 Approved Ticket Stocks For optimum print quality, maximum printhead life, and warranty compliance Datamax recommends the following ticket stocks. Contact a Datamax Media Representative at (407) 523-5650 with any questions regarding your specific application. Manufacturer Ricoh 150 TLA 190... - Page 72 S-Class...
-
Page 73: Appendix A
Appendix A ASCII Control Code Chart Char Ctrl @ Ctrl A Ctrl B Ctrl C Ctrl D Ctrl E Ctrl F Ctrl G Ctrl H Ctrl I Ctrl J Ctrl K Ctrl L Ctrl M Ctrl N Ctrl O Ctrl P Ctrl Q Ctrl R Ctrl S... - Page 74 ASCII Control Code Chart Char Char Ç á ü í é ó â ú ä ñ à Ñ å ç ° ê ¿ è ® è ï î ì ¡ Ä Å – É Æ Æ ô ö ´ ò Á...
-
Page 75: Appendix B
Appendix B Available Fonts and Barcodes All available character fonts and barcodes are listed below. The selections will differ according to the Parser Mode. Depending upon the mode, use either the DPL Programmer’s Manual or the DTPL Programmer’s Manual for detailed information. DPL Fonts Fonts 0 through 8 use the slash zero (Ø) convention for distinguishing between the zero and the alphabetic O (the slash can be removed with the... - Page 76 The table below lists font sizes, 0 – 8, in dots. Font Number Font 0 Font 1 Font 2 Font 3 Font 4 Font 5 Font 6 Font 7 Font 8 DPL Font Samples Font 0: 96 characters, alphanumeric, upper and lower case. Font 2: 138 characters, alphanumeric, upper and lower case.
- Page 77 Font 4: 62 characters, alphanumeric, uppercase. Font 6: 62 characters, alphanumeric, uppercase. Font 7: OCR-A, size I. S-Class Font 5: 62 characters, alphanumeric, uppercase. Font 8: OCR-B, size III.
- Page 78 Font 9: Internal CG Triumvirate number in the bar code height. Larger point sizes can be obtained by increasing the height and width multipliers. Note: Point sizes 4 and 5 are only available on the ST/SV-3306. DTPL Fonts Font Number FONT 1 FONT 2 FONT 3...
- Page 79 DTPL Font Samples S-Class...
- Page 80 DPL Barcodes Uppercase alpha names will print barcodes with human readable interpretations; lowercase alpha names will print barcodes only. Barcode Type A / a Code 39 B / b UPC-A (regular) C / c UPC-E (zero suppression) D / d Interleaved 2 of 5 (I 2 of 5) E / e Code 128...
- Page 81 Barcode A Code 39 Barcode C UPC-E (zero suppression) Barcode E Code 128 Barcode G EAN-8 Barcode I Codabar S-Class Barcode B UPC-A (regular) Barcode D Interleaved 2 of 5 Barcode F EAN-13 Barcode H Health Industry Bar Code (Code 39 Mod and 43 checksum) Barcode J Interleaved 2 of 5 w/module 10 checksum...
- Page 82 Barcode K Plessey Barcode M 2 Digit UPC addendum Barcode O Code 93 Barcode Q SSCC-18/Serial Shipping Container Code Barcode L ITF SCC-14/ I 2 of 5 Shipping Container Code Barcode N 5 Digit UPC addendum Barcode p Postnet Barcode R UCC/EAN Code 128 KMART NON EDI S-Class...
- Page 83 Barcode S UCC/EAN 128 Random Weight Barcode T Telepen Barcode u UPS MaxiCode Barcode v FIM Barcode z PDF417 Bar Code W1c: DataMatrix Bar Code W1d: QR Code S-Class...
- Page 84 Bar Code W1f: Aztec Bar Code W1z: MicroPDF417 Bar Code W1T: TCIF Linked Barcode 3 of 9 (TLC39) DTPL Barcodes Code 39; Code 128 A, B, and C; Codabar, Interleaved 2 of 5; UPC-A; EAN-8; and EAN-13. S-Class...
-
Page 85: Appendix C
Appendix C Cable Listings ® Parallel Cable: Connect a Centronics type 36-pin cable. Serial Cable: Connect a cable that complies with one of the configurations listed in the table below (the serial interface cable must have specific connections [pin-outs] for proper data exchange). The cable part numbers and suggested applications are included (contact a reseller for ordering information). - Page 86 S-Class...
-
Page 87: Appendix D
Appendix D SV Model Mounting Dimensions Top Plate Dimensions: S-Class... -
Page 88: Side Dimensions
Side Dimensions: S-Class... -
Page 89: Warranty Information
This one year (365 days) warranty is valid only if a Datamax - approved ticket stock is used, as defined in the then current Datamax list of approved ticket stocks, a copy of which is available from Datamax. -
Page 90: Warranty Service Procedures
Include a contact name, action desired, a detailed description of the problem(s), and ticket examples when possible with the defective unit. Datamax shall not be responsible for any loss or damages incurred in shipping. Any warranty work to be performed by Datamax shall be subject to Datamax’s confirmation that such product meets Datamax... -
Page 91: Limitation Of Liability
Limitation of Liability In no event shall Datamax be liable to the purchaser for any indirect, special or consequential damages or lost profits arising out of or relating to Datamax’s products, or the performance or a breach thereof, even if Datamax has been advised of the possibility thereof. - Page 92 S-Class...
- Page 93 Preset database settings returned following a reset of the printer. diagnostics Resident (internal) programs used to locate and diagnose hardware problems in the printer. direct thermal A printing method that uses a heat sensitive (direct thermal) material and only the heat of the printhead to create the image on that material.
- Page 94 (Datamax commands used specifically for label formatting and generation with barcode printers. DTPL (Datamax Ticket Programming Language) Programming commands used specifically for ticket formatting and generation in the admissions/ticketing industry. emulation a set of commands that allow this printer to imitate another.
- Page 95 (TOF) mark A black strip on the underside of the ticket stock used to signal the top of form. roll hanger A device in the printer used to support rolled tickets. rolled tickets Ticket stock that is wound upon cardboard cores.
- Page 96 S-Class...
Need help?
Do you have a question about the ST-3210 and is the answer not in the manual?
Questions and answers