Datamax EX2 User Manual
Datamax ex2: user guide
Hide thumbs
Also See for EX2:
- Programmer's manual (302 pages) ,
- Quick start manual (2 pages) ,
- Programmer's manual (330 pages)
Table of Contents
Advertisement
Advertisement
Table of Contents

Related Manuals for Datamax EX2


Summary of Contents for Datamax EX2
-
Page 3: Printer Overview
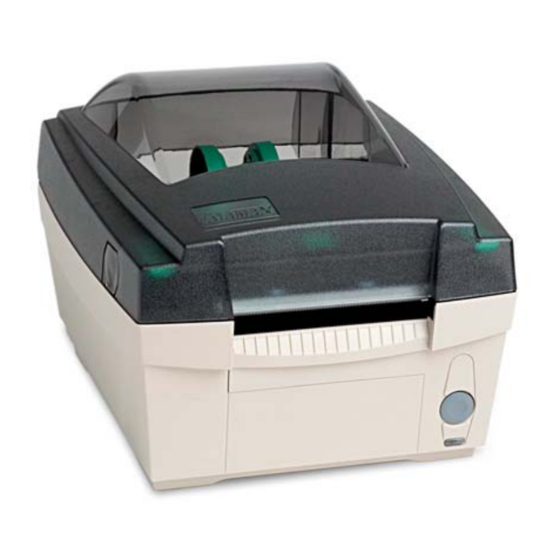
Printer Overview Congratulations on your purchase of the Ex2 printer. The Ex2 hereafter referred to as ‘the printer’, blends quality and durability into an affordable package with state-of-the-art electronics and user-friendly features to redefine the standard in thermal printers. The printer uses a unique one button design to simplify operation, while its USB, RS232 serial, and parallel interfaces allow easy connection to your host system. -
Page 4: Printer Connections
The printer is powered by an external power supply that connects as shown. Connect the power cord to the printer first and then plug the other end into a suitable AC outlet. Use only the power supply shipped with the printer. -
Page 5: Interface Connection
Interface Connection The printer can be connected to the host via a USB, serial or parallel cable. The Printer will automatically connect to the first port (USB, serial or parallel) that transmits valid data. After this connection has been made, the printer’s power must be cycled Off and On to change the interface connection. - Page 6 In addition to the port settings, the serial interface cable wiring must have specific connections (pin-outs) for proper data exchange between the host and printer. The different serial cable pin-outs and part numbers are shown below (contact your reseller for ordering information). An "off the shelf" serial cable can be used with Xon/Xoff handshaking.
-
Page 7: Ethernet Setup
Connect the network cable to the printer and power on the printer. Allow 90 seconds (from power up) for the printer to retrieve an IP address from the server. After this time, print a Configuration Label to verify the printers current network settings. - Page 8 Windows Driver. Using the Printer Configuration Utility (DMXConfig) to set IP values 1. Connect the printer to the host via the parallel or serial port 2. Start the DMXConfig program, see the Printer Configuration Utility section for installation.
- Page 9 “Print Configuration” Button to confirm the printer has received the new values. 8. Exit the DMXConfig program. 9. Power Off the printer and remove the parallel or serial connection. Connect the network cable to the printer and power on the printer.
- Page 10 Gateway: 0.0.0.0 If these values are in range of your network, (if you are unsure contact your system administrator), you can browse directly to the printer's internal web pages by entering this IP address into a web browser. 1. Connect the network cable to the printer and power on the printer.
- Page 11 5. Type the Authentication password (sysadm) into the box on the bottom of the page and click on "Apply" to apply the changes. The new IP address can then be used to browse to the printer's internal web pages for further configuration or used for installing the Windows Driver.
-
Page 12: Loading Media
Adjustment). Once the Media Guides are set for the width of the media being used it is no longer necessary to perform this adjustment. Note: It is important that the Windows Printer Driver 'Stock' setting matches the size of the label you Windows Driver are using. See the 1. - Page 13 3. Feed the media forward into the printer. Once the media is detected the printer will grab the media and position it for printing.
- Page 14 1. Open the Peel and Present Door. Set the Peel and Present switch to the '1' position. 2. Complete the 'standard' media loading as described in the previous section. 3. Feed approximately 12 inches of media out of the printer and remove the labels from the media liner.
- Page 15 5. While pulling firmly on the Media Liner, close the Peel and Present Door. It is important to keep the Media Liner taught around the Peel Bar.
- Page 16 Fan-fold / External Supply Loading With the Media Hanger Guides in their centered position, route the media through the Slot in the Cover, over the Hanger Guides, and into the properly adjusted media guides.
-
Page 17: Media Setup
Media Setup The printer's default setup is for die-cut label media, 4” (101.6mm) wide. Reflective label media (black mark) and Continuous label media (no black mark, holes, gaps etc.) may be used by configuring the printer appropriately using the Windows Printer Driver or Printer Configuration Utility (DMXConfig), both provided on the Accessories CD. - Page 18 Print the label Press the Control Button On subsequent printer power-ups, if the media has not been removed, simply print the label as outlined in steps 3 and 4. Note: To configure the printers "power-up" settings use the included on the Accessories CD-ROM. Using this method will result in less label waste when loading...
-
Page 19: Printer Operation
Error Mode - Clears error, feeds media to next label and resumes operation. Printer Reset The printer can be reset by pressing and holding the Control Button for at least 10 seconds, then release the button, the Status Light will turn off momentarily. Resetting the printer will clear RAM of downloaded images, fonts, label formats, and remove temporary printer configuration changes. -
Page 20: Maintenance Mode
To print the Configuration Label: 1. Be sure the printer is properly loaded with media (at least 4 inches wide), and that the power to the printer is off. 2. Apply power to the printer, once the Status light is on press and hold the Control Button. -
Page 21: Installing The Windows Driver
Windows Driver The Windows driver is located on the Accessories CD-Rom included with your printer. For the latest version please visit our web site at www.datamaxcorp.com. Installing the Windows Driver: Place the Accessories CD-Rom included with your printer into your computers CD-Rom drive. -
Page 22: Important Notes
Important Notes: The Windows driver functions the same as any other Windows printer. A built in help file is available for complete information on all settings, however there are some important settings that should be observed for trouble free printing. -
Page 23: Printer Configuration Utility (Dmxconfig)
DMXConfig (located on the Accessories CD-ROM) is a windows based configuration utility that allows the user to make changes to the existing printer setup via a direct connection to the host computers serial and parallel connection or any port (USB, Ethernet, ect.) assigned to a Datamax printer driver port. -
Page 24: Maintenance And Adjustments
Maintenance and Adjustments Cleaning Intervals The following table outlines the recommended maintenance schedule for the various printer parts. Area Printhead Turn off the printer before cleaning the printhead. Use solvent* on a cotton swab to clean the printhead from end to end. -
Page 25: Printhead Cleaning
Burn Line. Allow the printhead to dry. 4. Lower the Printhead Carrier back to the down and locked position. 5. Close the cover. Plug in the printer. Feed several labels to normalize tracking. -
Page 26: Printhead Pressure Adjustment
(2) print speed software controls. When adjusting, use only the minimum pressure necessary for better imaging. To adjust: 1. Load the printer with media, see 'Loading Media'. 2. Print a test label from the host. 3. Using a small coin or screwdriver, turn... - Page 27 It is important that the Windows print driver 'Stock' setting matches the size of the label you Windows Driver are using. See the 1. Unplug the printer from its power source. 2. Press down on both Printhead Latches to unlock the Printhead Carrier. Raise the Printhead Carrier to its up position.
- Page 28 Too Tight Correct Too Loose 4. Close and latch the Printhead Carrier. The printer is now ready to be loaded with media, (see Loading Media)
- Page 29 Printhead Removal/Replacement Note: Printheads are fragile; use extreme care when handling and never use a sharp object on the surface. If you have questions, contact a qualified technician or Datamax Technical Support before proceeding. Allow the printhead to cool before proceeding.
- Page 30 3. Press down on the Printhead Latches and raise the Printhead Carrier. Disconnect the Printhead Cable and then remove the Printhead. 4. While carefully holding the new Printhead, connect the Printhead Cable. 5. Position the Printhead onto the Locating Pins in the Printhead Assembly and secure in place with the Printhead Mounting Screw (do not over-tighten).
- Page 31 3. Rotate the Platen Roller Latches 90 degrees to their 'Up' position. 4. Grasp both of the Platen Roller Latches and pull the Platen Roller out of the printer. 5. The Platen Roller can now be cleaned or replaced. When replacing be sure the left Platen...
-
Page 32: Downloading Firmware And Fonts
2. Ensure that the printer is connected to the host, (via parallel port or USB only, serial port not recommended due to slow transfer speed) and that the power is ‘On.’... -
Page 33: Troubleshooting
• Verify that the AC power cord connection has been made at both the outlet and the printer. • Verify that the AC outlet is functioning, or try moving the printer to another AC circuit. • The AC cord or External Power Supply may be damaged; replace it. - Page 34 • Out of Stock setting is too low; Run Quick Media Calibration using Datamax Printer Configuration Utility (DMXConfig). • Out of Stock setting is too low; Increase OOS Maxvolt using Datamax Printer Configuration Utility (DMXConfig). • Leading edge of media is rough, catching in Label Edge Sensor, or preventing label from engaging onto platen roller;...
- Page 35 Windows printer driver. • Be sure you are using Direct Thermal Media. Contact a Media Representative. • The printhead or printhead cable may be loose; unplug the printer then reconnect. • Ensure that the printer is selected in the applications 'Print Dialog Window'.
-
Page 36: Additional Information
Internal Ethernet Connectivity (Factory Installed only) An internal Network Interface Controller (NIC) that enables the printer to provide Ethernet connectivity. External Media Supply Stand The external media supply option allows the use of large media supply rolls, up to 8-inches in diameter, on 1" to 3"... -
Page 37: Option Installation
Option Installation The following table lists the available options and the recommended qualification level of the installer. For detailed information concerning a specific option, contact your dealer or Datamax Technical Support. Experience Level for Options Installation Option Peel and Present Mechanism... -
Page 38: Printer Specifications
Printer Specifications Mechanical Width Depth Height Weight Operating Temperature Humidity AC Input Voltage Printing Print Method Print Speed Resolution Tear Bar DRAM Memory FLASH Memory Media Media Types Media Width Range Max Print Width Print Length Range Media Thickness Range Media Supply Roll Capacity 8.6”... - Page 39 Communications Interface Baud Speed Handshaking Parity Stop Bits Data Bits Fonts See "Embedded Fonts" Bar Codes See "Embedded Bar Codes" USB, RS-232 (DB-9), and Centronics Parallel 600 to 38,400 bits per second (BPS) Xon/Xoff, CTS, DTR Even, Odd, or None 1 or 2 7 or 8...
-
Page 40: Approved Media
To achieve optimum print quality and maximum printhead life, Datamax specifies the use of DATAMAX media. These supplies are specially formulated for use in our printers; use of non-Datamax supplies may affect the print quality, performance, and life of the printer or its components. -
Page 41: Wall Mounting
Be sure to use the appropriate fastener and anchor system compatible with the material of the wall you are mounting the printer to, (eg. drywall, masonry, ect.) and can support at least 20lbs (9kg). Fastener Head Diameter: 0.330" - 0.250" (8.38mm - 6.35mm) Head Distance from Wall: 0.110"... -
Page 42: Media Selection
For specific application information, consult your media specialist or a Datamax Media Representative. Or download our "A Brief Introduction to Media" whitepaper at... -
Page 43: Embedded Fonts
Embedded Fonts All character fonts available with the printer are described in this section. Each font has a name associated with it for use in programming. Human-readable fonts have numeric names. Fonts 0 through 8 use the slash zero (Ø) conventions for distinguishing between the zero and the alphabetic O. - Page 44 Font 0 96-character alphanumeric, upper and lower case. Font 2 138-character alphanumeric, upper and lower case. Font 4 62-character alphanumeric, uppercase. Font 6 62-character alphanumeric, uppercase. Font 1 145-character upper and lower case alphanumeric w/ descenders and ascenders. Font 3 62-character alphanumeric, uppercase.
- Page 45 Font 7 OCR-A, size I. Font 8 OCR-B, size III. Font 9 Internal Triumvirate font. Point sizes are selected by the number in the barcode height. Larger point sizes can be obtained by increasing the height and width multipliers, 48pt and 72pt fonts are generated by doubling the 24pt and 36pt fonts respectively (see the Programmer's Manual for more information)
-
Page 46: Embedded Bar Codes
Embedded Bar Codes Bar Code fonts have alpha names (left column in the table below). Uppercase alpha names will print barcodes with human-readable interpretations. Lowercase alpha names will print barcodes only. The table is followed by visual samples. Barcode Type A / a Code 39 B / b... - Page 47 Barcode A Code 39 Barcode B UPC-A (regular) Barcode C UPC-E (zero Barcode D Interleaved 2 of 5 suppression) Barcode E Code 128 Barcode F EAN-13 Barcode G EAN-8 Barcode H Health Industry Bar Code (Code 39 Mod and 43 checksum) Barcode I Codabar Barcode J Interleaved 2 of 5...
- Page 48 Barcode K Plessey Barcode L ITF SCC-14/ I 2 of 5 Shipping Container Code Barcode M 2 Digit UPC addendum Barcode N 5 Digit UPC addendum Barcode O Code 93 Barcode p Postnet Barcode Q SSCC-18/Serial Barcode R UCC/EAN Code 128 Shipping Container Code KMART NON EDI...
- Page 49 Barcode S UCC/EAN 128 Random Weight Barcode T Telepen Barcode u UPS MaxiCode Barcode v FIM Barcode z PDF417 Bar Code W1c: DataMatrix Bar Code W1d: QR Code...
- Page 50 Bar Code W1f: Aztec Bar Code W1g: USD-8 (Code 11) Bar Code W1k: RSS Bar Code W1t: TCIF Linked Barcode 3 of 9 (Reduced Space Symbology) (TLC39) Bar Code W1z: MicroPDF417...
- Page 51 Also referred to as “resolution”. DPL (Datamax Programming Language) programming commands used specifically for control of and label production in Datamax printers. A complete listing of commands can be found in the Programmer’s Manual.
- Page 52 A paper or synthetic printing material, typically with a pressure sensitive adhesive backing. label length The distance from the top of the label to the bottom of the label as it exits the printer. label repeat The distance from the top of one label to the top of the next label.
- Page 53 Repeatable top to bottom alignment of printed labels. reverse speed The backward rate of media motion into the printer during tear-off, peel and present and cutting operations for positioning the label at the start of print position. roll media A form of media that is wound upon a cardboard core.
-
Page 54: Ascii Chart
ASCII Chart... -
Page 56: Important Safety Instructions
> Do not use your printer near water, or spill liquid into it. > Be certain that your power source matches the rating listed on your printer. If you are unsure, check with your dealer or with your local power company. -
Page 57: Copyright Information
Information in this document is subject to change without notice and does not represent a commitment on the part of Datamax Barcode Products Corporation. No part of this manual may be reproduced or transmitted in any form or by any means, for any purpose other than the purchaser's personal use, without the expressed written permission of Datamax Corporation. -
Page 58: Agency Compliance And Approvals
Agency Compliance and Approvals UL60950 Information Technology Equipment C22.2 No. 950-M93 EN60950 For 230 Volt Operation (Europe): Use a cord set, marked "HAR," consisting of a min H05VV- F cord which has a minimum 0.75 square mm diameter conductors, provided with an IEC 320 receptacle and a male plug for the country of installation rated 6A, 250V Für 230 Volt (Europa): Benützen Sie ein Kabel, das mit "HAR"... -
Page 59: Thermal Print Head
This warranty is limited to a period of one year, (365 days), or 1,000,000 linear inches of use, whichever comes first, for the Ex2™ thermal printhead. This one year (365 days) warranty is valid only if a Datamax - approved thermal label media is used, as defined in the then current Datamax list of approved thermal/thermal transfer media, a copy of which is available from Datamax. -
Page 60: General Warranty Provisions
In no event shall Datamax be liable to the purchaser for any damages resulting from or related to any failure or delay of Datamax in the delivery or installation of the computer hardware, supplies or software or in the performance of any services. -
Page 61: Contact Datamax
Contact Datamax Datamax Technical Support We can help! If you are having technical problems with a Datamax product, please do not hesitate to contact us. Our Technical Support Specialists are available to provide you technical solutions before, during, and after the sale and delivery of a Datamax product. -
Page 62: Recommended Spares List
CCA, MAINBOARD 8MB FLASH w/LAN (1/PK) DPO20-2192-01 PRINTHEAD (1/PK) DPO15-3155-01 KIT, PLATEN ROLLER (5/PK) DPO17-2436-01 SCREW, M3 X 8 THRD CUT OVAL (50/PK) DPO50-2050-01 POWER SUPPLY, 24VDC, 3 AMPS (1/PK) For ordering information contact Datamax Customer Support at 407-578-8007 or email at customercare@datamaxcorp.com...
Need help?
Do you have a question about the EX2 and is the answer not in the manual?
Questions and answers