
Subscribe to Our Youtube Channel
Related Manuals for Dynapac CA 252


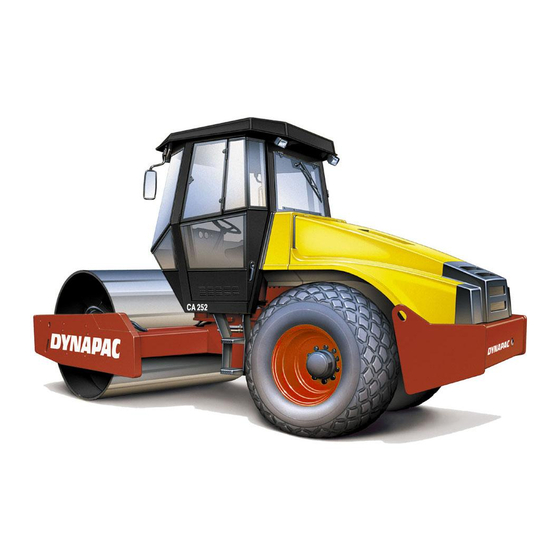
Summary of Contents for Dynapac CA 252
- Page 1 DYNAPAC CA 252/302/402 MAINTENANCE M252EN6 Box 504, SE-371 23 Karlskrona, Sweden Telephone +46 455 30 60 00 Telefax +46 455 30 60 30 www.dynapac.com...
- Page 2 ILF015WO1...
- Page 3 CA 402D PIN (S/N) *69410402* Dynapac’s medium-range vibratory soil compactors are the CA 252/302 and CA 402. They are available in D (smooth drum) and PD (padfoot) versions, of which the CA 302D and CA 402D are designed for the compaction of rock fill. The PD versions have their major range of application on cohesive material and disintegrated rock.
-
Page 4: Table Of Contents
State of diesel engine, for which the manufacturer’s California to cause cancer, birth defects, instructions are detailed in the engine manual. and other reproductive harm. This is found under a separate flap in the roller’s product binder. CA 252/302/402 M252EN6... -
Page 5: Lubricants And Symbols
50/50 with water Anti-freeze protection down to about -41°C (-106°F). Other fuel and lubricants are required for operation in extremely high or extremely low ambient temperature. See the “Special instructions” chapter, or consult Dynapac. Engine, oil level Air pressure... -
Page 6: Technical Specifications
Height, with cab, mm (in) 2952 (116) 2965 (117) 2952 (116) Fluid volumes, litres (gal or qts) CA 252/302/402 Rear axle: • Differential ........12 (12.7 qts) • Planetary gears ..........2,0 (2.1 qts)/side (std. axle) • Planetary gears ..........1,85 (1.9 qts)/side (accessories axle) Drum gearbox .......... - Page 7 0,8 (0.031) 0,8 (0.031) 0,8 (0.031) Frequency (High amplitude)Hz (vpm) 33/33 (1980) 33/33 (1980) 33/33 (1980) Centrifugal force (High amplitude)kN (lb) 300 (67,500) 300 (67,500) 300 (67,500) Centrifugal force (Low amplitude)kN (lb) 146 (32,850) 146 (32,850) 146 (32,850) CA 252/302/402 M252EN6...
- Page 8 The system described in this manual is of the ACC type (Automatic Climate Control), ie, a system that maintains the set temperature in the cab, on condition that windows and doors are kept closed. Refrigerant designation: HFC-R134:A Weight of refrigerant when newly filled CA252/302/ 402=1600 gram CA 252/302/402 M252EN6...
- Page 9 Guaranteed Acoustic Acoustic acoustic pressure level, pressure level, power level operator’s ear operator’s ear dB(A) LwA (platform) (cab) dB(A) dB(A) LpA CA 252/302/402 Noise level can vary when driving on different courses and with different seat positions. CA 252/302/402 M252EN6...
-
Page 10: Maintenance Schedule
37. Forward/Reverse lever 11. Fuse-box 24. Rear axle suspension, 2 sides 38. Air conditioner 12. Drum cartridge, filling, 2 fillers 25. Oil filter, diesel engine 39. Fresh air filter 13. Drum gearbox 26. Drainage, fuel tank = Optional CA 252/302/402 M252EN6... -
Page 11: Maintenance Measures
Check the wheel-nuts are tightened New machine only Check tire pressure Inspect the air conditioning Optional Lubricate the strike-off blade bearings. Optional After the first 50 hours of operation change only the drum oil and all the oil filters. CA 252/302/402 M252EN6... - Page 12 Measure See page Comments fig. 1 9, 10 Change fluid in hydraulic reservoir 12, 15 Change oil in the drum cartridge Change oil in drum gearbox Lubricate Forward/Reverse control Inspecting the steering joint Overhaul air conditioning Optional CA 252/302/402 M252EN6...
- Page 13 2. Screws CA 252PD/302PD Loosen the screws (1), then adjust the beam (2) to 25 mm between the teeth (3) and the drum. Tighten the screws (1). Fig. 4 Scrapers 1. Screws 2. Scraper beam 3. Scraper teeth CA 252/302/402 M252EN6...
-
Page 14: Every 10 Hours Of Operation (Daily)
EVERY 10 HOURS OF OPERATION (Daily) CA 252-402 Soft scrapers (Optional) Loosen the screws (2) and adjust to light contact against the drum. Tighten the screws. Fig. 5 Scrapers 1. Scraper blade 2. Screws Circulation of air – Check Ensure that the engine has free circulation of cooling air through the vents in the hood. - Page 15 (1) is between the max. – min. marks. Top off with hydraulic fluid according to the lu- bricant specification if the level is too low. Fig. 10 Hydraulic fluid reservoir 1. Sight glass 2. Filler pipe CA 252/302/402 M252EN6...
- Page 16 After testing the brakes, set the forward/reverse lever (2) in neutral. Pull up the reserve/parking brake knob. Fig. 11 Control panel 1. Reserve/parking brake knob The roller is now ready for operation. 2. Forward/reverse lever CA 252/302/402 M252EN6...
- Page 17 When replacing the backup filter (4), pull out the old fil- ter from its holder, insert a new one and refit the air cleaner in the reverse order to the instructions given in the figure above. Fig. 14 Air filter 4. Backup filter CA 252/302/402 M252EN6...
- Page 18 Allow a little grease to remain on the nipples after lubrication, it will prevent dirt from entering. Fig. 17 Steering cylinder, right side 4. Lubricating nipple, rear right steering cylinder mount (x1) 5. Lubricating nipple, rear left steering cylinder mount (x1) CA 252/302/402 M252EN6...
- Page 19 (1), which is located at the rear of the cab roof. Also clean the cooling unit inside the cab. See under the heading 2000 hours, air conditioning – overhaul. Fig. 20 Cab 1. Condenser element CA 252/302/402 M252EN6...
-
Page 20: Every 50 Hours Of Operation (Weekly)
Wipe the nipples clean from grease and dirt, three on each side of the machine. Grease each nipple (1) with four strokes of the grease gun. Ensure that grease penetrates the bearings. Fig. 21 Strike-off blade 1. Lubricant nipples CA 252/302/402 M252EN6... -
Page 21: Every 250 Hours Of Operation (Monthly)
Check the oil level in the same way in the rear axle’s other planetary gear. Fig. 23 Oil level check – planetary gear, Std. 1. Oil level/Filler plug Fig. 24 Oil level check – planetary gear, optional 1. Oil level/Filler plug CA 252/302/402 M252EN6... - Page 22 1. Indicator pin Drum cartridge – Checking the oil level Wipe the filling plug and level plug clean from dirt. Unscrew the filling plug (1) Fig. 27 Roller, right-hand side 1. Filler plug 2. Drain plug 3. Level plug CA 252/302/402 M252EN6...
- Page 23 – do not place the nozzle too close to the radiator. Fig. 30 Hydraulic fluid cooler 1. Intercooler 2. Water cooler Use protective goggles when working with 3. Hydraulic fluid cooler compressed air or a high-pressure washer. CA 252/302/402 M252EN6...
- Page 24 10–15 mm (0.4-0.6 in). Use a knife blade or other pointed tool when carrying out this check. Check also that the screw fasteners (2) are tightened. Fig. 32 Roller, vibration side 1. Rubber element 2. Screw fasteners CA 252/302/402 M252EN6...
- Page 25 Inspect refrigerant hoses and connections and make sure that there are no signs of oil film that could indicate leakage of refrigerant. Fig. 35 Air conditioning 1. Refrigerant hoses 2. Condenser element CA 252/302/402 M252EN6...
-
Page 26: Every 500 Hours Of Operation (Every Three Months)
– Lubrication Lubricate engine hood hinges (1) and the slide rails of the operator’s seat with grease, other joints and controls with oil. Lubricate the cab hinges with grease. See lubricant specification. Fig. 38 Engine hood 1. Hinge CA 252/302/402 M252EN6... - Page 27 (4) and move the steering column forward, tighten the screws and check the tension of the chain. Fig. 40 Seat bearing 1. Lubrication nipple 2. Cogwheel 3. Steering chain 4. Adjusting screw 5. Cover 6. Slide rails 7. Slew interlock CA 252/302/402 M252EN6...
-
Page 28: Every 1000 Hours Of Operation (Every Six Months)
Remove the plug (2). Place a container under the tap. Open the tap (1) and let any trapped condensate run out. Shut the drainage tap. Fig. 43 Hydraulic reservoir, underside 1. Drainage tap Refit the plug. 2. Plug CA 252/302/402 M252EN6... - Page 29 Refit the drainage plugs and top up with fresh oil until the correct level is reached. Refit the oil-level/filler plug. Use transmission oil, see the lubrication specification. Fig. 46 Rear axle 1. Oil level/Filler plug 2. Drainage plugs CA 252/302/402 M252EN6...
- Page 30 Position the roller with the plug at 9 o’clock. Fill with oil to lower edge of level hole. Refit the plug and repeat the process on the other side. Use transmission oil. See the lubrication specification. Std. Optional Fig. 48 Planetary gear/filling position 1. Plug CA 252/302/402 M252EN6...
- Page 31 Take down the whole holder and remove the filter insert. Replace with a new filter. It may be necessary to replace the filter more often if the machine is used in a dusty environment. Fig. 49 Cab 1. Fresh air filter 2. Screw (x2) CA 252/302/402 M252EN6...
-
Page 32: Every 2000 Hours Of Operation (Yearly)
“Drum cartridge – checking the oil level”. Repeat the procedure on the opposite side. Fig. 52 Right side of the drum 1. Filler plug Ensure that only MOBIL SHC 629 is used in 2. Drain plug the cartridges.. 3. Level plug CA 252/302/402 M252EN6... - Page 33 1. Screw 2. Plate 3. Cam disk Steering joint – Check Inspect the steering joint to detect any damage or cracks. Check and correct any loose bolts. Check also for any stiffness and play. Fig. 55 Steering joint CA 252/302/402 M252EN6...
- Page 34 Check the drain by squeezing the valves (2) underneath the cab. Fig. 57 Aircondition 1. Cooling element 2. Drain valve (x2) CA 252/302/402 M252EN6...
- Page 35 The cooling system is pressurized. Incorrect handling can result in serious personal injuries. The system contains pressurized refriger- ant. Releasing refrigerants into the air is prohibited. The refrigerant circuit may only be repaired by an authorized company. CA 252/302/402 M252EN6...
-
Page 36: Long-Term Storage
* Place the instrument cover on the steering column. Covers, tarpaulin Cover the entire machine with a tarpaulin, which should hand some way off the ground. If possible, store the roller indoors, preferably in a building with a uniform temperature. CA 252/302/402 M252EN6... -
Page 37: Special Instructions
When an auxiliary starter battery is used, always Starting assistance connect the positive terminal on the auxiliary battery to the positive terminal on the roller’s battery, and negative to negative. CA 252/302/402 M252EN6... -
Page 38: Electrical System, Fuses
7.5A 4. Anti-spin 5. Direction indicator, left, front, rear and side 5. Windscreen wiper, utility cab 6. Direction indicator, right, front, rear and side 6. Interior lighting, utility cab = Optional * When driving lights are fitted CA 252/302/402 M252EN6... - Page 39 2. Main fuses 3. Preheater relay Relays VBS relay Main relay Horn relay Hourmeter relay Fuel level relay Reverse alarm relay Lights relay Direction indicator relay Brakes relay Air cond. relay = Optional Fig. 65 Instrument panel CA 252/302/402 M252EN6...
- Page 40 Fig. 66 Cab roof, front 1. Instrument plate 2. K30 Relay for air conditioner fan 3. K31 Relay for condenser fans + radio 4. Fuse box CA 252/302/402 M252EN6...
Need help?
Do you have a question about the CA 252 and is the answer not in the manual?
Questions and answers