Advertisement
Please read the instructions completely before beginning the installation.
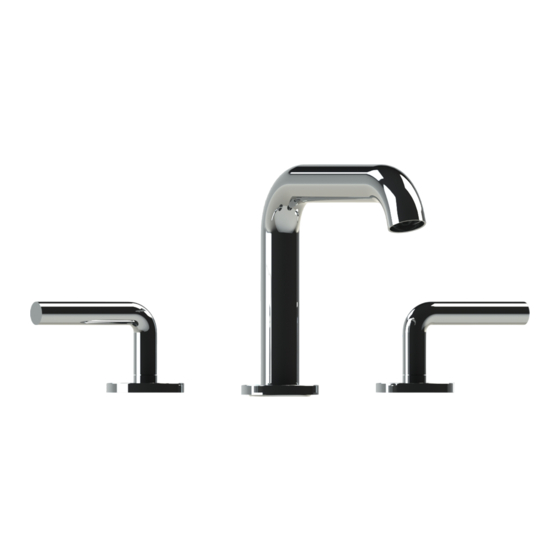
Circ Collection
Model Number: 3920CI
Flush both supply lines before installation, then shut off both supply lines.
Minimum hole size for the spout and handle trim is 1-1/4" and maximum of 1-1/2"
SPOUT INSTALLATION
- Remove the tee connector, spout mounting hardware and tee
1
connector washer from the bottom of the spout assembly. Apply
a ring of silicon caulking around the center hole on the top of the sink.
Do not use plumbers' putty which can damage the finish of the faucet.
- From the top of the deck, insert the spout's threaded shank through
the center hole of the sink. Make sure the spout flange washer is
properly placed underneath of the flange and gently pressed against
the sink top.
- Slip the spout mounting hardware back onto the spout. First the
2
notched rubber washer, then the notched metal washer and lastly
the brass lock nut. Hand tighten the lock nut.
- Tighten the lock nut. Make sure the spout does not move side ways
Adjust it if necessary.
- Place the tee connector washer into the tee connector and thread
the tee connector onto the end of the spout shank. Tighten to seal.
- Align the spout and tighten the shank lock nut firmly.
The measurements shown are for reference only. Products and specifications shown are subject to change without notice.
www.santecfaucet.com | P: 310.542.0063 F: 310.542.5681
Rev 1/2020
Installation Instruction
CIRC COLLECTION
WIDESPREAD LAVATORY SET
Rubber washer
Notched rubber washer
Notched metal washer
Spout stabilizer
Brass lock nut
Tee connector washer
Tee connector
1/7
Advertisement
Table of Contents

Subscribe to Our Youtube Channel
Summary of Contents for Santec CIRC 3920CI
- Page 1 Rev 1/2020 Installation Instruction CIRC COLLECTION WIDESPREAD LAVATORY SET Please read the instructions completely before beginning the installation. Circ Collection Model Number: 3920CI Flush both supply lines before installation, then shut off both supply lines. Minimum hole size for the spout and handle trim is 1-1/4” and maximum of 1-1/2” SPOUT INSTALLATION - Remove the tee connector, spout mounting hardware and tee connector washer from the bottom of the spout assembly.
- Page 2 HANDLE TRIM INSTALLATION DO NOT DISASSEMBLE HANDLE ASSEMBLY - DROP-IN VALVES - Both hot and cold side handle trims are pre-assmbled for faster installation. - For proper handle turning direction, install the handle with the “cold” blue label at the right side of the spout (looking from the front) and Rubber washer the handle with “hot”...
- Page 3 PUSH POP-UP INSTALLATION Remove the drain plug and gasket from push pop-up assembly. remove the washer, lock nut and un-thread bottom drain tube. Insert flange on the drain hole up through bottom of lavatory. add silicon sealant/putty around the flange. Secure by adding rubber washer, gasket, plastic washer and lock nut.
- Page 4 PARTS DRAWING ITEM PART NUMBER DESCRIPTION QTY. PS-2EL00-U-1_RB Circ spout PM-099 Teflon Washer SA234-1 Broach Extension PM-181 # 6-32 Screw PM-184 Belleville Washer PM-407 Rubber Washer P0865 COLD WS VALVE WITH HIDDEN CARTRIDGE 1 P0866 HOT WS VALVE WITH HIDDEN CARTRIDGE PM-332 Fiber Washer PM-607...
- Page 5 SPECIFICATION SHEETS [50] 2" 4 7 8 " 2 " 13 1 3" " 2" 4 " " PUSH POP-UP Ø 2 " " 7" Ø 1 " The measurements shown are for reference only. Products and specifications shown are subject to change without notice. www.santecfaucet.com | P: 310.542.0063 F: 310.542.5681...
- Page 6 Doing so may ruin your faucet finish and/or void the warranty. Thank you for making SANTEC a part of your lifestyle and luxury spa experience. Our products have been created as works of enduring quality and sophisticated design.
- Page 7 SANTEC reserves the product components of the covered product will be repaired, refinished, or replaced at the sole discretion of SANTEC. SANTEC reserves the right to examine any product claimed defective prior to any warranty claim being accepted or processed, at its sole discretion. This warranty gives you specific legal rights and you may have other rights which may vary from state to state.


Need help?
Do you have a question about the CIRC 3920CI and is the answer not in the manual?
Questions and answers