Advertisement
Available languages
Available languages
Quick Links
INSTALLATION INSTRUCTIONS FOR PART INSTGMOS-04
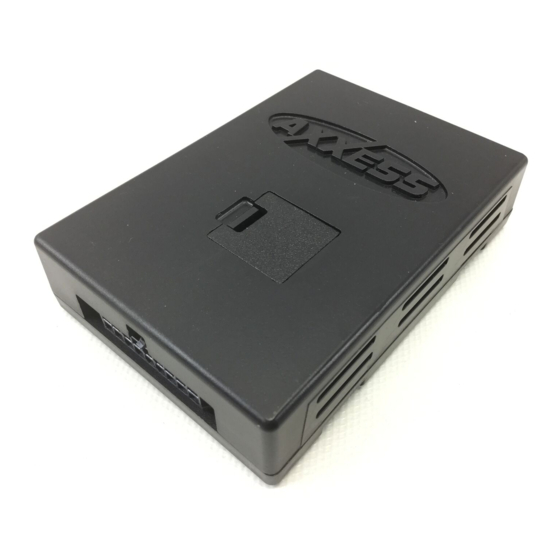
GMOS-04
GM amplified OnStar Class II Data Bus
Interface 2000-up
APPLICATIONS
See inside front cover
KIT FEATURES
• Provides accessory (12-volt 10-amp)
• Retains R.A.P. (Retained Accessory Power)
• Used in amplified systems
• Retains chimes
• Provides NAV outputs (Parking Brake, Reverse, Mute, V.S.S.)
• ASWC harness included (ASWC not included)
• Retains OnStar/OE Bluetooth
• Adjustable volume for chimes and OnStar
• High level speaker input
• USB updatable
• Retains balance and fade
INTERFACE COMPONENTS
GMOS-04 interface • 16-pin harness with stripped leads
18-pin harness to 12- and 24-pin GM harness with stripped leads
TOOLS REQUIRED
• Cutting tool • Crimping tool • Tape • Connectors (butt-connectors, bell caps, etc.)
METRA. THE WORLD'S BEST KITS.™
metraonline.com
1-800-221-0932
© COPYRIGHT 2004-2011 METRA ELECTRONICS CORPORATION
Advertisement

Related Manuals for Axxess GMOS-04


Summary of Contents for Axxess GMOS-04
- Page 1 • USB updatable • Retains balance and fade INTERFACE COMPONENTS GMOS-04 interface • 16-pin harness with stripped leads 18-pin harness to 12- and 24-pin GM harness with stripped leads TOOLS REQUIRED • Cutting tool • Crimping tool • Tape • Connectors (butt-connectors, bell caps, etc.) METRA.
- Page 2 GMOS-04 Applications (Note: This interface will also work in vehicles listed below that are not equipped with OnStar) BUICK Allure 2005-2009 Canyon 2004-up Century 2004-2005 Envoy 2002-2009 LaCrosse 2005-2009 Savana 2003-2007 Rainer 2004-2007 Sierra 2003-2006 Rendezvous 2002-2007 Sierra Classic 2007...
-
Page 3: Connections To Be Made
• Connect the Blue/Pink wire to the VSS or speed sense wire of the aftermarket navigation radio. • Connect the Green/Purple wire to the reverse wire of the aftermarket navigation radio. • Plug the 16-pin harness into the GMOS-04. - Page 4 • Connect pin 86 of the relay to ground. • Connect pin 87 of the relay to fused 12-volt constant wire. Using tape or a wire, tie securely the relay from moving around the dash. • When completed, plug the 18-pin harness into the GMOS-04.
- Page 5 GMOS-04 To Vehicle +12v Battery Fused 5A Cut remote out from GMOS-04. Connect interface side to pin 85 on SPDT relay. SPDT relay 12v remote from GMOS-04 Blue/White GMOS-04 To Radio (Figure A) Installing the GMOS-04 • With all connections completed to the aftermarket radio, plug the 24- and 12-pin harnesses into the vehicles wiring harnesses.
- Page 6 GMOS-04 Testing the GMOS-04 1) Turn the ignition on if not already, and then turn the radio on to verify that the radio works. Check balance and fader controls for proper operation. 2) Push the OnStar button (if equipped) to verify OnStar is working. The radio will shut off or mute, depending if the Brown wire on the 16-pin harness is connected, and OnStar will be heard through the front speakers.
- Page 7 GMOS-04 Additional 12-pin harness (ASWC harness) This 12 pin harness is to be used in conjunction with the ASWC (not included). Please refer to ASWC instructions for programming. BUICK *****Allure 2005-2009 *Canyon 2004-up ****Century 2004-2005 *Envoy 2002-2009 ****LaCrosse 2005-2009 *Sierra...
- Page 8 INSTALLATION INSTRUCTIONS FOR PART INSTGMOS-04 IMPORTANT WARNING This product includes instructions for installation which must be carefully followed. The instructions are worded in such a manner to assume that the installer is capable of completing these type of electronic installations. If you are unclear as to what you are instructed to do or believe that you do not understand the instructions so as to properly and safely complete the installation you should consult a technician who does have this knowledge and understanding.
- Page 9 • Adaptable a USB • Retiene el balance y la intensidad COMPONENTES DEL KIT Interfaz GMOS-04 • Arnés de 16 pines con conectores pelados Arnés de 14 pins a arnés GM de 12 y 24 pins con conectores pelados HERRAMIENTAS REQUERIDAS •...
- Page 10 GMOS-04 Aplicaciones (Nota: Esta interfaz también funcionará en los vehículos enumerados a continuación que no están equipados con OnStar) BUICK Allure 2005-2009 Canyon 2004 y mas Century 2004-2005 Envoy 2002-2009 LaCrosse 2005-2009 Savana 2003-2007 Rainer 2004-2007 Sierra 2003-2006 Rendezvous 2002-2007...
-
Page 11: Conexiones Que Se Deben Hacer
• Conecte el cable Azul/Rosa con el cable VSS o de detección de velocidad del radio de navegación de mercado secundario. • Conecte el cable Verde/Púrpura con el cable de la reversa del radio de mercado secundario. • Conecte el arnés de 16 pins en el GMOS-04. - Page 12 • Conectar el relé el pin 87 a del fusionado 12 voltios de alambre constante. Cinta o un alambre el firmemente el relé para evitar que se mueva alrededor del tablero. • Cuando se haya completado, conecta el arnés de 18 pines en el GMOS-04.
- Page 13 GMOS-04 Vehículo +12v Batería Fusible 5A Cortar de fuera el remoto a la GMOS-04. Conecte el lado de la interfaz a la patilla 85 del relé SPDT. Del relé SPDT 12v remoto desde GMOS-04 Azul/Blanco GMOS-04 Radio (Figura A) Instalación del GMOS-04 •...
- Page 14 GMOS-04 Prueba del GMOS-04 1) Prenda la ignición si no lo ha hecho, y después prenda el radio para probar si funciona. Revise que funcionen bien los controles de balance e intensidad. 2) Presione el botón de OnStar (si lo tiene) para verificar que OnStar esté funcionando. El radio se apagará...
- Page 15 GMOS-04 Arnés de 12 pins adicional (arnés ASWC) Este arnés de 12 pins se debe usar junto con el ASWC (no incluido). Consulte las instrucciones de ASWC para la programación. BUICK *****Allure 2005-2009 *Canyon 2004 y mas ****Century 2004-2005 *Envoy...
- Page 16 INSTRUCCIONES DE INSTALACIÓN PARA LA PIEZA INSTGMOS-04 ADVERTENCIA IMPORTANTE Este producto incluye instrucciones de instalación que deben seguirse cuidadosamente. Dichas instrucciones están redactadas dando por supuesto que el instalador es capaz de completar estos tipos de instalaciones electrónicas. Si tiene dudas respecto de lo que se le indica que haga o cree que no comprende las instrucciones como para completar la instalación en forma adecuada y segura, debe consultar a un técnico que efectivamente tenga estos conocimientos y comprensión.
Need help?
Do you have a question about the GMOS-04 and is the answer not in the manual?
Questions and answers