Table of Contents
Advertisement
Quick Links
Advertisement
Table of Contents

Subscribe to Our Youtube Channel
Related Manuals for Logik L3HDVD19


Summary of Contents for Logik L3HDVD19
- Page 1 DVD player with HD upscaling Instruction Manual L3HDVD19...
-
Page 3: Table Of Contents
Contents Safety Warnings ............................. 5 Unpacking .............................. 7 Product Overview ..........................8 Front View .....................................8 Rear View ....................................8 Remote Control ..................................9 Battery Installation for the Remote Control ......................11 Remote Control Operation Range ..........................11 Connections ............................12 Using Video & Audio Connection..........................12 Using the HDMI Connection ............................12 Using SCART Connection .............................13 Using a USB device .................................13... - Page 4 Stop Playback ...................................19 Volume Adjustment ...............................19 Selecting DISC GOTO / TRACK GOTO / SELECT TRACK ..................19 Previous and Next ................................19 Fast Rewind and Fast Forward ...........................20 Image Rotation ................................20 Zoom ....................................20 Slide-show Effect ................................20 Thumbnail Menu................................20 Customising the General Settings......................20 Customising the Audio Settings ......................22 Customising the Video Settings ......................23 Customising the Preferences ......................24...
-
Page 5: Safety Warnings
Safety Warnings Ventilation Read all the instructions carefully before using the unit and keep them for future reference. • To prevent the risk of electric shock or Retain the manual. If you pass the unit onto a fire hazard due to overheating, ensure third party make sure to include this manual. - Page 6 Supervision Maintenance • Children should be supervised to ensure • Ensure to unplug the unit from the mains that they do not play with the unit and the socket before cleaning. remote control. • Do not use any type of abrasive pad or •...
-
Page 7: Unpacking
Thank you for purchasing your new product. We recommend that you spend some time reading this instruction manual in order that you fully understand all the operational features it offers. You will also find some hints and tips to help you resolve any issues. -
Page 8: Product Overview
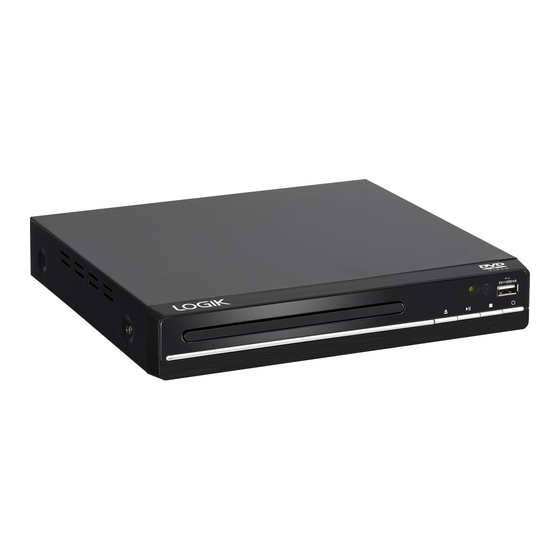
Product Overview Front View 200mA 3 4 5 6 1. Disc Tray 5. Remote Control Sensor Load the disc into the disc drive. Receive infrared signals from the remote control. 2. OPEN/CLOSE button STOP button Open and close the disc tray. Stop playback. -
Page 9: Remote Control
Remote Control 1. POWER Switch the unit between ON and OFF mode. SUBTITLE 2. 0–9, 10+ Select the numeric items in a menu. LANGUAGE 3. SETUP Display the Setup Menu of the DVD player. 4. CURSOR CLEAR PROG Move up, down, left and right in a menu. 5. - Page 10 16. OPEN/CLOSE Open or close the disc tray. 17. SUBTITLE Switch between different subtitle languages. (Available languages depend SUBTITLE on the DVD features.) 18. LANGUAGE LANGUAGE Press to change the OSD language. 19. OSD (On screen Display) Display the disc information. 20.
-
Page 11: Battery Installation For The Remote Control
Battery Installation for the Remote Control 1. Press and lift the back cover up to 2. Insert two AAA size batteries. Make open the battery compartment of the sure to match the (+) and (–) ends of remote control. the battery compartment. 3. -
Page 12: Connections
Connections Using Video & Audio Connection Yellow (Video) Television Red (R) White (L) SCART VIDEO HDMI AUDIO OUT VIDEO OUT Connecting to a TV with RCA cable Use a RCA cable (not supplied) to connect between the DVD player’s AUDIO OUT (L/R) & VIDEO OUT sockets and the TV’s AUDIO (L/R) &... -
Page 13: Using Scart Connection
Using SCART Connection Use a SCART cable (not included) to connect TV (not included) between the DVD player’s SCART socket and the TV’s SCART IN socket. SCART Cable (not included) SCART VIDEO HDMI AUDIO OUT VIDEO OUT Using a USB Device You can play or view files from a USB device. -
Page 14: Connecting To The Mains Socket
Connecting to the Mains Socket 1. After all connections are properly complete, connect the mains cable into the mains socket. Never make or change any connections when the DVD player is connected to the mains socket. 2. Press the STANDBY button on the DVD player or remote control to turn the DVD player on. -
Page 15: Powering On/Off
Standby mode. The LED indicator will light up red. • The LOGIK DVD logo (start-up picture) will appear on the TV’s screen and the unit will start loading the disc automatically (if available). Press the STANDBY button on the unit or the remote control to switch the unit On. -
Page 16: Pause Playback
Pause Playback 1. Press the PLAY/PAUSE button on the unit or remote control to pause playback. 2. Press the PLAY/PAUSE button again on the unit or remote control to resume normal playback. Volume Adjustment 1. Press the VOLUME+/– button on the remote control to adjust the volume. 2. -
Page 17: Repeat Mode
Repeat Mode Press the REPEAT button on the remote control repeatedly to select different repeat modes. Action DVD Description CD Description First Press Repeat CHAPTER Repeat TRACK SHUFFLE Second Press Repeat TITLE Repeat ALL RANDOM Third Press Repeat ALL Repeat off SINGLE –... -
Page 18: Subtitle Language
Subtitle Language Press the SUBTITLE button on the remote control repeatedly to switch between different subtitle languages that are available on the disc. Info You can view disc information (such as current title / chapter / track number, total playing time or remaining time on the disc) without interrupting the disc playback. -
Page 19: Cd/Jpeg Disc Playback
CD/JPEG Disc Playback Playing an Audio or a JPEG Picture CD 1. While in ON mode, press the OPEN/CLOSE button and the disc door will open. 2. Place the CD/JPEG disc with the label side up into the CD compartment, and then press the OPEN/CLOSE button to close the disc door. -
Page 20: Fast Rewind And Fast Forward
Fast Rewind and Fast Forward 1. Press the button on the remote control to fast rewind / fast forward through the disc. Each time the button on the remote control is pressed, the fast rewind / fast forward motion speed changes. There are 5 levels of speed available: ×2, ×4, ×8, ×16 and ×32. - Page 21 TV DISPLAY To select the aspect ratio of the playback picture: 4:3 PANSCAN If you have a conventional TV and want both sides of the wide picture to be trimmed or formatted to fit your TV screen. 4:3 LETTERBOX If you have a normal TV. A wide picture with black bands on the upper and lower portions of the TV screen will be displayed.
-
Page 22: Customising The Audio Settings
Customising the Audio Settings 1. Press the SETUP button to display the setup menu. - - ANALOG AUDIO SETUP PAGE - - button to select ANALOG 2. Press the DOWNMIX LT/RT DOLBY DIGITAL AUDIO SETUP PAGE. STEREO SPDIF/OFF SPDIF/RAW DUAL MONO DYNAMIC SPDIF/PCM L-MONO... -
Page 23: Customising The Video Settings
Customising the Video Settings 1. Press the SETUP button to display the setup menu. - - VIDEO SETUP PAGE - - 2. Press the button to select VIDEO VIDEO OUTPUT Resolution SETUP PAGE. COLOR SETTING HDMI Setup 3. Press the button to select the following options and then press the button to... -
Page 24: Customising The Preferences
Customising the Preferences 1. The preference setting is only active when there is no disc in the DVD player or the - - PREFERENCE PAGE - - DVD player is in STOP mode. The setting TV TYPE AUDIO ENGLISH AUTO will be saved and effective whenever the SUBTITLE FRENCH... - Page 25 PARENTAL This feature allows you to block disc playback with specific ratings. The rating levels are from 1 to 8 and are country dependent. You can prohibit the playing of certain discs that are not suitable for your children, or you can have certain discs played with alternative scenes.
-
Page 26: Customising The Password Settings
Customising the Password Settings 1. Press the SETUP button to display the setup menu. - - PASSWORD SETUP PAGE - - 2. Press the button to select PASSWORD PASSWORD MODE PASSWORD SETUP PAGE. 3. Press the button to select the following options and then press the button to change the setting. -
Page 27: Maintenance
Maintenance Cleaning the Unit Ensure the unit is fully unplugged from the mains socket before cleaning. • To clean the unit, wipe the case with a slightly moist, lint-free cloth. • Do not use any cleaning fluids containing alcohol, ammonia or abrasives. •... -
Page 28: Hints And Tips
Hints and Tips PROBLEM SOLUTION No power • Press the button on the unit or remote control to turn on the unit. • Make sure the mains socket has power. No picture • Make sure the TV is set to the correct input source. •... -
Page 29: Specifications
USB device or • Some file formats might not be compatible to the unit. This memory Card is not a defect. Specifications Model L3HDVD19 Power AC 100V - 240V, 50/60Hz Power Consumption Output RCA, HDMI, SCART Frequency Response 20 Hz - 20 kHz (1dB) Dimensions 225 mm (W) ×... - Page 32 Dolby Laboratories. DSG Retail Ltd. (co. no. 504877) 1 Portal Way, London, W3 6RS, UK EU Representative DSG Retail Ireland Ltd. (259460) 3rd Floor Office Suite, Omni Park SC, Santry, Dublin 9, Republic of Ireland IB-L3HDVD19-190812V2...
Need help?
Do you have a question about the L3HDVD19 and is the answer not in the manual?
Questions and answers