Table of Contents
Advertisement
Quick Links
Advertisement
Table of Contents

Related Manuals for Riello RS 300/EV FGR


Summary of Contents for Riello RS 300/EV FGR
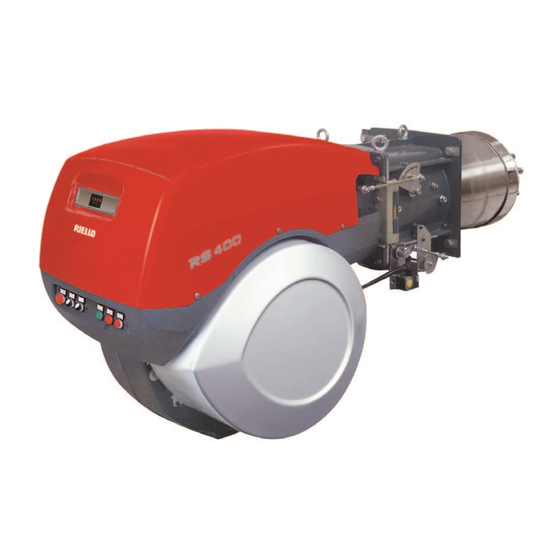
- Page 1 Installation, use and maintenance instructions Forced draught gas burners Progressive two stage or modulating operation CODE MODEL 20038037 RS 300/EV FGR RS 400/EV FGR 20036674 RS 500/EV FGR RS 650/EV FGR 20067788 RS 800/EV FGR 20037075 (4) - 09/2014...
-
Page 3: Table Of Contents
Contents Information and general instructions ..............3 Information about the instruction manual . - Page 4 Contents Combustion air adjustment ..............35 5.5.1 Adjusting gas/air delivery.
-
Page 5: Information And General Instructions
Information and general instructions Information and general instructions Information about the instruction manual 1.1.1 Introduction 1.1.4 Danger: live components The instruction manual supplied with the burner: This symbol indicates operations which, if not car- ➤ is an integral and essential part of the product and must not be ried out correctly, lead to electric shocks with lethal separated from it;... -
Page 6: Guarantee And Responsibility
Information and general instructions Guarantee and responsibility The manufacturer guarantees its new products from the installa- 1.2.1 Owner’s responsibility tion date, in accordance with the regulations in force and/or the Please pay attention to the Safety Warnings contained within sales contract. At the moment of the first start-up, check that the this instruction manual. -
Page 7: Safety And Prevention
Safety and prevention Safety and prevention Introduction The burners have been designed and built in compliance with facturer; current regulations and directives, applying the known technical the type and pressure of the fuel, the voltage and frequency of rules of safety and envisaging all the potential danger situations. the electrical power supply, the minimum and maximum deliv- eries for which the burner has been regulated, the pressurisa- It is necessary, however, to bear in mind that the imprudent and... -
Page 8: Technical Description Of The Burner
Technical description of the burner Technical description of the burner Technical data Model RS 300/EV FGR RS 400/EV FGR RS 500/EV FGR Output 1500 - 4220 (3834*) 2000 - 4995 (4541*) 2715 - 5740 (5217*) max. MBtu/hr 5112 - 14390 (13082*) -
Page 9: Electrical Data
Technical description of the burner Electrical data Model RS 300/EV FGR Control circuit power supply V/Ph/Hz 120/1/60 Main power supply (+/- 10%) V/Ph/Hz 230/3/60 460/3/60 575/3/60 3500 3500 3500 Fan motor 11.5 V1 - V2 120 V - 1 x 8 kV... - Page 10 Technical description of the burner Model RS 650/EV FGR Control circuit power supply V/Ph/Hz 120/1/60 Main power supply (+/- 10%) V/Ph/Hz 230/3/60 460/3/60 575/3/60 3550 3550 3550 Fan motor 71.4 35.7 28.6 V1 - V2 120 V - 1 x 8 kV Ignition transformer I1 - I2 1.6 A - 20 mA...
-
Page 11: Burner Models Designation
Technical description of the burner Burner models designation Model Code Voltage Starting Flame safeguard 230/3/60 RS 300/EV FGR 20038037 460/3/60 Inverter Burner mounted 575/3/60 230/3/60 RS 400/EV FGR 460/3/60 Inverter Burner mounted 575/3/60 230/3/60 RS 500/EV FGR 20036674 460/3/60 Inverter... -
Page 12: Burner Dimensions
R. Bear in mind that inspection of the combustion head requires the burner to be opened by rotating the rear part on the hinge. 20092541 Fig. 2 inch RS 300/EV FGR ANSI 3” ANSI 4” 37” 16“ 2“ 16“... -
Page 13: Burner Description
Technical description of the burner Burner description 20092516 Fig. 3 Lifting eyebolts 18 Air pressure switch 19 Air pressure test point Fan motor 20 Maximum gas pressure switch with pressure test point Air gate valve servomotor 21 QRI infrared sensor Gas pressure test point 22 Hinge for opening burner Combustion head... -
Page 14: Panel Board Description
Technical description of the burner 3.6.1 Panel board description D11429 Fig. 4 Horn Operator panel with LCD display “K5” relay Terminal strip “XAUX” Control box transformer “T1” Bracket for shielded cables Control box for checking flame and air/fuel ratio Warning: used only to avoid a break in the cable’s shielding, Ignition transformer “TA1”... -
Page 15: Firing Rates
Firing rates Maximum output must be selected in the hatched area of the dia- Model MBtu/hr gram (Fig. 5 and Fig. 6). RS 300/EV FGR 1893 Minimum output must not be lower than the minimum limit shown RS 400/EV FGR 3030 in the diagram. -
Page 16: Procedure To Refer Burner Operating Condition In High Altitude Plants
Technical description of the burner RS 800/EV FGR RS 650/EV FGR MBtu/h 2000 4000 6000 8000 10000 12000 14000 16000 18000 20000 22000 24000 26000 28000 30000 D11425 Power output 1200 2400 2800 3200 3600 4000 4800 5600 6000 6400 6800 7200 7600... - Page 17 Technical description of the burner CORRECTED BURNER CAPACITY ACCORDING TO ALTITUDE Altitude m a.s.l. 1220 1525 1830 2135 2440 Rated Capacity ft a.s.l 1000 2000 3000 4000 5000 6000 7000 8000 1000 1000 1023 1061 1101 1142 1186 1232 1282 1337 1500 1481...
-
Page 18: Minimum Furnace Dimensions
Technical description of the burner Minimum furnace dimensions The firing rates were set in relation to certified test boilers. Example for RS 500/EV FGR: Fig. 7 indicates the diameter and length of the test combustion Output 18500 MBtu/hr: diameter 39.4 inch - length 16.5 ft. chamber. -
Page 19: Control Box For The Air/Fuel Ratio (Lmv52
WARNING The LMV52... is a safety device! Do not open, in- terfere with or modify the unit. Riello S.p.A. will not assume responsibility for any damage resulting from unauthorized inter- ference! Risk of explosion! Incorrect configuration can lead to excessive... - Page 20 Technical description of the burner Electrical connection of ionization probe and flame detector • Observe the permissible cable lengths. It is important to achieve practically disturbance- and loss-free • The ionization probe is not protected against electrical shock signal transmission: hazard.
- Page 21 Technical description of the burner Operation sequence of the burner TSA1 Timer 1 Timer 2 TSA1 Fuel 1 (oil) Fuel selection Fuel 2 (gas) Controller - ON (internal + external) Air pressure switch (LP) Fan conductor contact (GSK) (CPI function with LMV52...) Start release - oil Ignition (Z) (alternative start signal)
- Page 22 Technical description of the burner Key to the sequence diagrams: Assignment of times: Depending on the parameter, valve proving takes place: Postpurge lockout position between phase 62 and phase 70 or/and Max. time safety phase between phase 30 and phase 32. Min.
- Page 23 Technical description of the burner Key to the sequence diagrams: Parameter: With / without pressure switch Permissible positioning range Parameter: Short / long preignition time for oil only Short / long oil pump – ON – time In Standby: actuator can travel within the permissible po- Delayed shutdown within TSA1 + TSA2 sitioning range, but is always driven to the home position.
-
Page 24: Actuators
Technical description of the burner 3.11 Actuators Warning notes To avoid injury to persons, damage to property or the environment, the following warning notes should be observed! WARNING Do not open, interfere with or modify the actua- tors! ➤ All activities (mounting, installation and service work, etc.) must be performed by qualified staff. -
Page 25: Installation
Installation Installation Notes on safety for the installation After carefully cleaning all around the area where the burner will be The installation of the burner must be carried out by installed, and arranging the correct lighting of the environment, pro- qualified personnel, as indicated in this manual and ceed with the installation operations. -
Page 26: Boiler Plate
Boiler plate Drill the combustion chamber mounting plate as shown in Fig. 12. The position of the threaded holes can be marked using the gasket supplied with the burner. inch RS 300/EV FGR coarse 32” 64” 4” RS 400/EV FGR coarse 32”... -
Page 27: Electrode And Ignition Pilot Adjustment
Installation Electrode and ignition pilot adjustment Make sure that the electrode and the ignition pilot are positioned 2" as shown in Fig. 15. E LE CTR O DE PILO T 7/32" D9159 Fig. 15 Combustion head setting In addition to varying air flow depending on the output requested, the air gate valve servomotor 4)(Fig. -
Page 28: Adjustment At The Maximum Output
Installation D9402 RS 300/EV FGR RS 400/EV FGR M Bt u/ hr Max burner output 4545 6060 7575 9090 10605 12120 13635 15150 16664 RS 500/EV FGR M Bt u/ hr Max burner output 3030 4545 6060 7575 9090 10605... -
Page 29: Fgr Duct System
Installation FGR duct system – Normally the duct would connect to the stack as shown in control valves and into the fan. Fig. 20, with a 45° cut facing the flue gas flow and with the In cases of heavy condensation, a condensate drip leg may be center of the cut centered in the stack. -
Page 30: Flue Gas Recirculation Line Sizing
To prepare the Tab. G a flue gas maximum temperature of 500°F flue gases from boiler stack base up to the burner intake port. was considered. Diameter of FGR pipe RS 300/EV FGR RS 400/EV FGR RS 500/EV FGR RS 650/EV FGR RS 800/EV FGR 3"... -
Page 31: Gas Supply
Installation 4.10 Gas supply 4.10.1 Gas train The gas train is to be connected on the right of the burner, by flange 1)(Fig. 21). If necessary connect it on the left, proceed as follows: – loosen nuts and screws 3) and 4); –... -
Page 32: Gas Pressure
Installation 4.10.3 Gas pressure 1 ∆p (“WC) 2 ∆p (“WC) MBtu/hr (GCV) The Tab. I shows minimum pressure losses along the gas supply 5112 0.63 line depending on the maximum burner output operation. 5680 0.79 The values shown in the Tab. I refer to natural gas (GCV). 7574 1.38 Column 1... -
Page 33: Electrical Wiring
Installation 4.11 Electrical wiring Notes on safety for the electrical wiring ➤ The electrical wiring must be carried out with the electrical supply disconnected. ➤ Electrical wiring must be carried out by qualified personnel and in compliance with the regulations currently in force in the country of destination. -
Page 34: Other Connection
Installation 4.11.1 Other connection It is very important to shield the motor cable 1) as The connection from the Inverter to LMV52..must be done shown in Fig. 25. as shown in Fig. 26. WARNING The connection from the speed sensor to LMV52..must be done as shown in Fig. -
Page 35: Inverter Connection
Installation 4.12.1 Inverter connection Treatment of cables Countermeasures against cable noise Following, it is reported an example how to con- nect the Inverter. The treatment of cables is the most important countermeasure. For further information, please refer to the relevant The machinery manufacturers are requested WARNING Inverter instruction manual. -
Page 36: Start-Up, Calibration And Operation Of The Burner
Start-up, calibration and operation of the burner Start-up, calibration and operation of the burner Notes on safety for the first start-up The first start-up of the burner must be carried out Check the correct working of the adjustment, com- by qualified personnel, as indicated in this manual mand and safety devices. -
Page 37: Burner Start-Up
Start-up, calibration and operation of the burner Burner start-up Feed electricity to the burner via the disconnecting switch on the boiler panel. Close the thermostats/pressure switches. Close the thermostats/pressure switches and turn the switch of Fig. 33 to position “LOCAL”. Make sure that the lamps or testers connected to the solenoids, or indicator lights on the solenoids themselves, show that no voltage is present. -
Page 38: Final Calibration Of The Pressure Switches
Start-up, calibration and operation of the burner Further interfaces and computer communication functions for re- personnel specifically trained for internal programming of the in- mote control or integration in centrally supervised systems are strument and for the specific application obtained with this burner. available according to the system’s configuration. -
Page 39: Final Checks (With The Burner Working)
Start-up, calibration and operation of the burner Final checks (with the burner working) ➮ ➤ Open the control limit operation The burner must stop ➤ Open the high limit operation ➤ Rotate the maximum gas pressure switch knob to the mini- mum end-of-scale position ➤... -
Page 40: Maintenance
Maintenance Maintenance Notes on safety for the maintenance The periodic maintenance is essential for the good operation, safe- Before carrying out any maintenance, cleaning or checking opera- ty, yield and duration of the burner. tions: It allows you to reduce consumption and polluting emissions and to keep the product in a reliable state over time. -
Page 41: Opening The Burner
Maintenance Opening the burner Disconnect the electrical supply from the burner. DANGER ➤ Remove the tie rod 1)(Fig. 38) of the head movement lever, loosening nut 2); ➤ disconnect the gas servomotor test point 3); ➤ disconnect the gas pressure switch test point 4); ➤... -
Page 42: A Appendix - Spare Parts
Appendix - Spare parts Appendix - Spare parts 20037075... - Page 43 Appendix - Spare parts CODE DESCRIPTION • • • 20013113 GAS HEAD • 20026758 GAS HEAD • 3003966 GAS HEAD • • • • 3013106 ELECTRODE • 20011338 ELECTRODE • • • 20013159 ELECTRODE CONNECTION • • 20013159 ELECTRODE CONNECTION •...
- Page 44 Appendix - Spare parts CODE DESCRIPTION • • • 20013114 MANIFOLD ASSEMBLY • • 20014022 MANIFOLD ASSEMBLY • • • • • 20040697 LEVER ASSEMBLY • • • • • 20040688 • • • • • 20040700 • • 3013313 CYLINDER •...
- Page 45 Appendix - Spare parts CODE DESCRIPTION • • • • • 20014102 ELECTRODE CONNECTION • • • • • 3007170 O-RING • • • • • 3013327 EXTERNAL TIE ROD • • • • • 3013324 INTERNAL TIE ROD • • • 3013330 AIR DIFFUSER •...
-
Page 46: B Appendix - Accessories
Appendix - Accessories Appendix - Accessories Gas train according to UL Standards The installer is responsible for the supply and instal- lation of any required safety device(s) not indicated in this manual. WARNING 20037075... -
Page 47: Appendix - Burner Start Up Report
Appendix - Burner start up report Appendix - Burner start up report Model number: Serial number: Project name: Start-up date: Installing contractor: Phone number: Model number: Serial number: Project name: Start-up date: Installing contractor: Phone number: GAS OPERATION : Low Fire Gas Supply Pressure: High Fire : Low Fire... - Page 48 RIELLO S.p.A. I-37045 Legnago (VR) Tel.: +39.0442.630111 http:// www.riello.it http:// www.riello.com RIELLO BURNERS NORTH AMERICA 1-800-4-RIELLO 35 Pond Park Road 2165 Meadowpine Blvd Hingham, Massachusetts, 1-800-474-3556 Mississauga, Ontario U.S.A. 02043 Canada L5N 6H6 http://www.riello.ca Subject to modifications...
Need help?
Do you have a question about the RS 300/EV FGR and is the answer not in the manual?
Questions and answers