Table of Contents
Advertisement
Advertisement
Table of Contents

Related Manuals for Crestron TST-602


Summary of Contents for Crestron TST-602
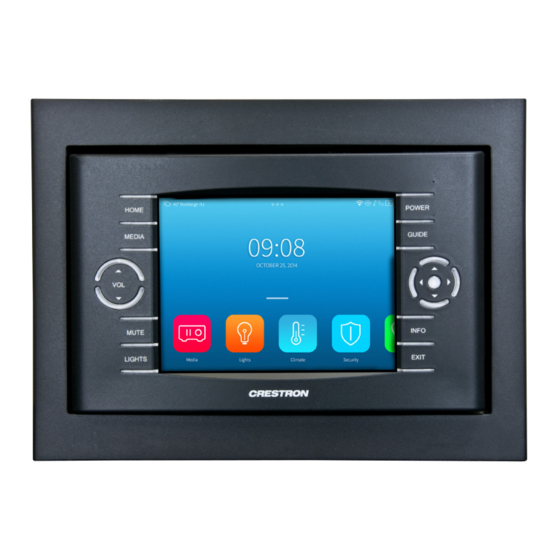
- Page 1 TST-602 5.7" Wireless Touch Screen Supplemental Guide Crestron Electronics, Inc.
- Page 2 Crestron disclaims any proprietary interest in the marks and names of others. Crestron is not responsible for errors in typography or photography.
-
Page 3: Table Of Contents
Contents Access the Setup Screens Configure the TST-602 RF Setup ......................... 2 Audio Setup ......................3 Display Setup ......................4 Standby Timeout ..................... 6 Networking Setup ....................7 LAN Setup ....................8 WiFi Setup ....................10 Diagnostics ......................13 Keypad Test ..................... 14 Touch Test .................... -
Page 5: Access The Setup Screens
The setup screens enable basic configuration prior to regular operation of the Crestron ® TST-602. If no project is loaded, tap the screen to access the main setup screen. If a project is running, the main setup screen can be accessed by pressing HOME, MEDIA, , and ... -
Page 6: Configure The Tst-602
RF roaming, and selecting the series of the control system. Before a TST-602 can be used with a Crestron control system, it must first be acquired by a Crestron Extended Range (RF) Wireless gateway (sold separately). To acquire a TST-602, perform the following procedure: 1. -
Page 7: Audio Setup
RF Setup – Acquire OK For installations with multiple gateways, the TST-602 can be set up for RF roaming. For details, refer to Touch Screen RF Roaming (Doc. 7671) at www.crestron.com/manuals. to return to the TST-602 Setup screen. Audio Setup On the TST-602 Setup screen, tap Audio Setup to display the Audio Setup screen. -
Page 8: Display Setup
TST-602 Setup screen. Display Setup On the TST-602 Setup screen, tap Display Setup to enter the Display Setup screen. Display Setup Screen The Display Setup screen provides controls to adjust the screen’s LCD brightness and key backlight brightness, controls to toggle the hard key backlight on and off, and controls to enable using a hard key to wake the LCD. - Page 9 This screen provides access to Low, Med, and High presets for the screen and the key backlight, in addition to custom adjustment for each of these. to return to the Display Setup screen. again to return to the TST-602 Setup screen. TST-602: 5.7˝ Wireless Touch Screen • 5 Supplemental Guide – DOC. 7688A...
-
Page 10: Standby Timeout
Standby Timeout On the TST-602 Setup screen, tap Standby Timeout to display the Standby Timeout screen. Standby Timeout Screen The Standby Timeout screen provides controls to adjust standby timeout and power down for an undocked TST-602, and standby timeout for a docked TST-602. Standby timeouts can be from 0 to 120 seconds. -
Page 11: Networking Setup
Standby Timeout screen. again to return to the TST-602 Setup screen. Networking Setup On the TST-602 Setup screen, tap Networking Setup to display the Networking Setup - Choose WiFi or LAN screen. Networking Setup - Choose WiFi or LAN Screen... -
Page 12: Lan Setup
The Ethernet Setup screen displays current settings, and provides controls for toggling DHCP on and off. The TST-602 ships with DHCP enabled by default. To enter static IP settings, use the following procedure: 1. On the Ethernet Setup screen, tap Off under DHCP Enabled, and then tap Set Static IP Address Settings to display the Ethernet Setup - Static IPs screen. - Page 13 3. Tap Apply Changes to save the new settings. to return to the Networking Setup - Choose WiFi or LAN screen. again to return to the TST-602 Setup screen. TST-602: 5.7˝ Wireless Touch Screen • 9 Supplemental Guide – DOC. 7688A...
-
Page 14: Wifi Setup
1. If using a static IP address, tap Off under DHCP Enabled, and then tap Set Static IP Address Settings to display the WiFi Setup - Static IPs screen. If using DHCP, skip to step 4 to connect to a Wi-Fi access point. 10 • TST-602: 5.7˝ Wireless Touch Screen Supplemental Guide – DOC. 7688A... - Page 15 4. On the WiFi Setup screen, tap Select a WiFi Access Point to display the Connect to a WiFi Access Point: 1-2-3 screen. Connect to a WiFi Access Point: 1-2-3 Screen TST-602: 5.7˝ Wireless Touch Screen • 11 Supplemental Guide – DOC. 7688A...
- Page 16 7. Tap Step 3 - Make this my Access Point. to return to the Networking Setup - Choose WiFi or LAN screen. again to return to the TST-602 Setup screen. 12 • TST-602: 5.7˝ Wireless Touch Screen Supplemental Guide – DOC. 7688A...
-
Page 17: Diagnostics
Diagnostics On the TST-602 Setup screen, tap Diagnostics to display the Diagnostics screen. Diagnostics Screen The Diagnostics screen displays the CPU temperature and the available memory, and it provides controls to open various test screens. These are explained in the sections that follow. -
Page 18: Keypad Test
The Diagnostics - Keypad Test screen can be used to test the function of the hard keys. When a hard key is pressed, its corresponding indicator on the screen lights. to return to the Diagnostics screen. 14 • TST-602: 5.7˝ Wireless Touch Screen Supplemental Guide – DOC. 7688A... -
Page 19: Touch Test
The built-in microphone (located above the touch screen display) records your voice for five seconds and plays it back to confirm the microphone is functioning. When playback is finished, the display returns to the Diagnostics screen. TST-602: 5.7˝ Wireless Touch Screen • 15 Supplemental Guide – DOC. 7688A... -
Page 20: Lan Test
The Diagnostics - LAN screen displays current settings. This screen also contains a Link indicator to show the status of the Ethernet connection, and controls to test the connection to the default router. to return to the Diagnostics screen. 16 • TST-602: 5.7˝ Wireless Touch Screen Supplemental Guide – DOC. 7688A... -
Page 21: Wifi Test
The Diagnostics - WiFi screen displays current settings. This screen also contains a Link indicator to show the status of the Wi-Fi connection, and controls to test the connection to the default router. to return to the Diagnostics screen. TST-602: 5.7˝ Wireless Touch Screen • 17 Supplemental Guide – DOC. 7688A... -
Page 22: Rf Test
On the Diagnostics screen, tap RF Test to display the Diagnostics - RF LQI Test screen. Diagnostics - RF LQI Test Screen The Diagnostics - RF LQI screen provides diagnostic information about the signals from the gateway. to return to the Diagnostics screen. 18 • TST-602: 5.7˝ Wireless Touch Screen Supplemental Guide – DOC. 7688A... -
Page 23: Test Patterns
On the Diagnostics screen, tap Test Patterns to display the Diagnostics - Test Patterns screen. Diagnostics - Test Patterns Screen The Diagnostics - Test Patterns screen provides buttons for selecting the different available test patterns. to return to the Diagnostics screen. TST-602: 5.7˝ Wireless Touch Screen • 19 Supplemental Guide – DOC. 7688A... -
Page 24: Rava Test
The Diagnostics - Rava screen provides controls for testing the use of the Rava ® Intercom with the TST-602. It can be used to test projects and settings. It can be used to call another Rava-capable touch screen and to test projects and settings. To place a call, dial the extension of the desired touch screen and tap Call. -
Page 25: Rtsp Test
Diagnostics - RTSP screen. The bottom part of the screen provides controls to select among video buffer lengths, or to select a custom length adjustable via a virtual knob. to return to the Diagnostics screen. TST-602: 5.7˝ Wireless Touch Screen • 21 Supplemental Guide – DOC. 7688A... -
Page 26: Battery Diagnostics
The Diagnostics - Battery screen provides information about the battery condition and also has an indicator to show when external power is being applied. to return to the Diagnostics screen. 22 • TST-602: 5.7˝ Wireless Touch Screen Supplemental Guide – DOC. 7688A... -
Page 27: Dock Test
Diagnostics - Dock Screen The Diagnostics - Dock screen has indicators to confirm the presence of external power and a wall dock. There are controls to release the TST-602 from the wall dock and to toggle docking alert messages on and off. -
Page 28: About
TST-602 Setup screen. Save & Edit On the TST-602 Setup screen, tap Save & Exit to save all settings, exit the setup screens, and return to the main project. 24 • TST-602: 5.7˝ Wireless Touch Screen... - Page 29 This page is intentionally left blank. TST-602: 5.7˝ Wireless Touch Screen • 25 Supplemental Guide – DOC. 7688A...
- Page 30 Crestron Electronics, Inc. Supplemental Guide – DOC. 7688A 15 Volvo Drive Rockleigh, NJ 07647 (2041541) Tel: 888.CRESTRON 08.15 Fax: 201.767.7576 Specifications subject to www.crestron.com change without notice.
Need help?
Do you have a question about the TST-602 and is the answer not in the manual?
Questions and answers