
Subscribe to Our Youtube Channel
Related Manuals for Aaeon ACP-1073


Summary of Contents for Aaeon ACP-1073
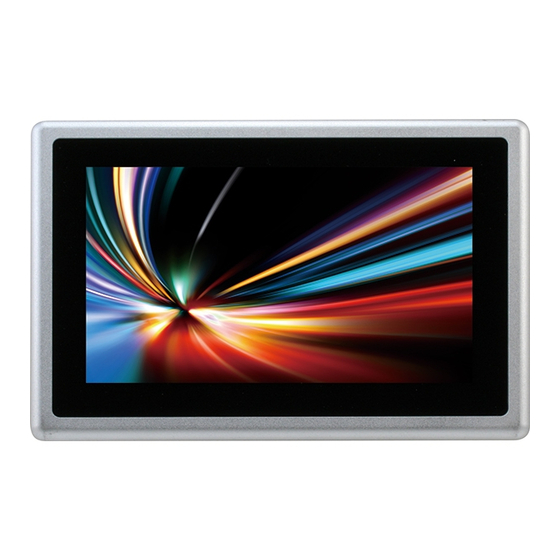
- Page 1 M u l t i - T o u c h P a n e l P C A C P - 1 0 7 3 ACP-1073 7" WSVGA Ultra-slim Fanless Multi-Touch Panel PC ® Intel Atom N2600 Processor RS-232, RS-232/422/485 USB2.0, Mini HDMI ACP-1073 Manual 5th Ed December 8, 2014...
- Page 2 AAEON, assumes no liabilities resulting from errors or omissions in this document, or from the use of the information contained herein. AAEON reserves the right to make changes in the product design without notice to its users.
- Page 3 M u l t i - T o u c h P a n e l P C A C P - 1 0 7 3 Acknowledgments ® ® Intel , Atom are registered trademarks of Intel Corporation. ® ®...
- Page 4 A C P - 1 0 7 3 Packing List Before you begin installing your Panel PC, please make sure that the following items have been shipped: ACP-1073 Fanless Multi-Touch Panel PC RJ-48 Type COM Port Cable x 3 Power Adapter x 1 ...
- Page 5 M u l t i - T o u c h P a n e l P C A C P - 1 0 7 3 Safety & Warranty 1. Read these safety instructions carefully. 2. Keep this user's manual for later reference. 3.
- Page 6 M u l t i - T o u c h P a n e l P C A C P - 1 0 7 3 14. If any of the following situations arises, get the equipment checked by service personnel: a.
- Page 7 M u l t i - T o u c h P a n e l P C A C P - 1 0 7 3 and contain all electronic components in any static-shielded devices. Caution: It may cause the danger of explosion if battery is incorrectly replaced.
- Page 8 M u l t i - T o u c h P a n e l P C A C P - 1 0 7 3 Classification 1. Degree of production against electric shock: not classified 2. Degree of protection against the ingress of water: IPX1 3.
- Page 9 M u l t i - T o u c h P a n e l P C A C P - 1 0 7 3 This device complies with Part 15 FCC Rules. Operation is subject to the following two conditions: (1) this device may not cause harmful interference, and (2) this device must accept any interference received...
- Page 10 M u l t i - T o u c h P a n e l P C A C P - 1 0 7 3 Safety Symbol Description The following safety symbols are further explanations for your reference. Attention, consult ACCOMPANYING DOCUMENTS.
- Page 11 M u l t i - T o u c h P a n e l P C A C P - 1 0 7 3 China RoHS Requirements 产品中有毒有害物质或元素名称及含量 AAEON Panel PC/ Workstation 有毒有害物质或元素 部件名称 铅 汞 镉 六价铬...
-
Page 12: Table Of Contents
M u l t i - T o u c h P a n e l P C A C P - 1 0 7 3 Contents Chapter 1 General Information 1.1 Introduction ..............1-2 1.2 Features ..............1-3 1.3 Specification .............. 1-4 1.4 General Information........... - Page 13 2.19 Inverter / Backlight Connector (CN18) ....2-15 2.20 DDR3 SODIMM Slot (DIMM1) ........ 2-16 2.21 Mini Card Slot (mSATA function only) ..... 2-16 2.22 Mechanical Drawing of the ACP-1073 ....2-19 Chapter 3 AMI BIOS Setup 3.1 System Test and Initialization ........3-2 3.2 AMI BIOS Setup.
- Page 14 M u l t i - T o u c h P a n e l P C A C P - 1 0 7 3 C.3 Scrap Computer Recycling ......... C-5 Appendix D AHCI Setting D.1 Setting AHCI ............D-2 xiii...
- Page 15 M u l t i - T o u c h P a n e l P C A C P - 1 0 7 3 Chapter General Information Chapter 1 General Information...
-
Page 16: Chapter 1 General Information
The ACP-1073 includes all the features of a powerful computer into a slim and attractive mechanism design. The ACP-1073 adopts 250 nits TFT display with 1024 x 600 resolution. This model supports two-point Multi-Touch function (Window 7 : Two finger, Win XP : Single finger, Window embedded version : Single Finger.) and full... -
Page 17: Features
M u l t i - T o u c h P a n e l P C A C P - 1 0 7 3 1.2 Features 7” WSVGA (1024 x 600) TFT LCD Display Aluminum Design ... -
Page 18: Specification
WiFi module by USB interface x 1 ® ® OS Support Windows XP 32-bit, Windows 7 32-bit, Linux Kernal 2.6.3 or higher Note : Suggest to use AAEON Pre-installed SSD storage. Mechanical Construction IP-65/ NEMA4 for front bezel Mounting VESA 75 ... - Page 19 M u l t i - T o u c h P a n e l P C A C P - 1 0 7 3 Carton Dimension 13.58” x 7.87” x 9.65’’ (345mm x 200mm x 245mm) Net Weight 2.42 lb (1.1 kg) ...
- Page 20 M u l t i - T o u c h P a n e l P C A C P - 1 0 7 3 Backlight MTBF (Hours) 50,000 Touchscreen Type Projected Capacitive Multi-Touch (Two points) Resolution 2048x2048 ...
-
Page 21: General Information
M u l t i - T o u c h P a n e l P C A C P - 1 0 7 3 1.4 General Information Optional accessory mount kit USB x 4 Power button HDMI RS-232/422/485 x 2 RS-232 Ethernet Port DC input... - Page 22 M u l t i - T o u c h P a n e l P C A C P - 1 0 7 3 Antenna VESA mount Chapter 1 General Information...
-
Page 23: Chapter 2 Hardware Installation
M u l t i - T o u c h P a n e l P C A C P - 1 0 7 3 Chapter Hardware Installation Chapter 2 Hardware Installation... -
Page 24: Safety Precautions
M u l t i - T o u c h P a n e l P C A C P - 1 0 7 3 2.1 Safety Precautions Always completely disconnect the power cord from your board whenever you are working on it. -
Page 25: Connectors And Jumpers Of The Main Board
M u l t i - T o u c h P a n e l P C A C P - 1 0 7 3 2.2 Connectors and Jumpers of The Main Board Component Side Chapter 2 Hardware Installation... -
Page 26: List Of Jumpers
M u l t i - T o u c h P a n e l P C A C P - 1 0 7 3 2.3 List of Jumpers The board has a number of jumpers that allow you to configure your system to suit your application. -
Page 27: List Of Connectors
M u l t i - T o u c h P a n e l P C A C P - 1 0 7 3 2.4 List of Connectors The board has a number of connectors that allow you to configure your system to suit your application. -
Page 28: Clear Cmos Jumper (Jp2)
M u l t i - T o u c h P a n e l P C A C P - 1 0 7 3 2.5 Clear CMOS Jumper (JP2) 1 2 3 1 2 3 Normal (Default) Clear CMOS Function Normal (Default) Clear CMOS... -
Page 29: At/Atx Power Supply Mode Selection (Jp6)
M u l t i - T o u c h P a n e l P C A C P - 1 0 7 3 2.8 AT/ATX Power Supply Mode Selection (JP6) 1 2 3 1 2 3 AT Mode ATX Mode(Default) Function AT Mode... -
Page 30: Com1,Rj-45 Port (Cn20)
M u l t i - T o u c h P a n e l P C A C P - 1 0 7 3 2.10 COM1,RJ-45 Port (CN20) RJ-45 port Pin Name Signal Type Signal Level DIFF COM1 Signal Signal Chapter 2 Hardware Installation... -
Page 31: Com2,Com3 Rs232/422/485 ,Rj-45 Port
M u l t i - T o u c h P a n e l P C A C P - 1 0 7 3 Note: 1700090156 External COM Port Converter Cable 2.11 COM2,COM3 RS232/422/485 ,RJ-45 Port (CN21,CN22) RJ-45 Port Pin Name Signal Type Signal Level... - Page 32 M u l t i - T o u c h P a n e l P C A C P - 1 0 7 3 DATA- COM2, COM3 Signal Signal (422TXD-/485DATA-) (422TXD+/485DATA+) TXD (422RXD+) DTR(422RXD-) Note: 1700090156 External COM Port Converter Cable 2-10 Chapter 2 Hardware Installation...
-
Page 33: Buzzer (Cn8)
M u l t i - T o u c h P a n e l P C A C P - 1 0 7 3 2.12 Buzzer (CN8) Pin Name Signal Type Signal Level +3.3V +3.3V 2.13 RESET (CN9) Pin Name Signal Type Signal Level... -
Page 34: Usb 2.0 Port 5 (Cn11)
M u l t i - T o u c h P a n e l P C A C P - 1 0 7 3 Pin Name Signal Type Signal Level LAD0 +3.3V LAD1 +3.3V LAD2 +3.3V LAD3 +3.3V +3.3V +3.3V LFRAME#... -
Page 35: Usb 2.0 Port 4 (Cn27)
M u l t i - T o u c h P a n e l P C A C P - 1 0 7 3 2.16 USB 2.0 Port 4 (CN27) Pin Name Signal Type Signal Level USB4_D- DIFF USB4_D+ DIFF WIR_DIS... -
Page 36: Hdmi Type C (Cn17)
M u l t i - T o u c h P a n e l P C A C P - 1 0 7 3 LCD_PWR DIFF +3.3V/+5V LVDS_DA0+ DIFF LVDS_DA0- DIFF LVDS_DA1+ DIFF LVDS_DA1- DIFF BKL_CONTROL LCD_PWR +3.3V/+5V LVDS_DA2+ DIFF LVDS_DA2-... -
Page 37: Inverter / Backlight Connector (Cn18)
M u l t i - T o u c h P a n e l P C A C P - 1 0 7 3 HDMI_TX1+ DIFF HDMI_TX0- DIFF HDMI_CLK+ DIFF HDMI_DDC_CLK DPD_PWR HDMI_TX2+ DIFF HDMI_TX1- DIFF HDMI_TX0+ DIFF HDMI_CLK- DIFF HDMI_DDC_DATA... -
Page 38: Ddr3 Sodimm Slot (Dimm1)
M u l t i - T o u c h P a n e l P C A C P - 1 0 7 3 Pin Name Signal Type Signal Level BKL_PWR +5V / +12V BKL_CONTROL BKL_ENABLE 2.20 DDR3 SODIMM Slot (DIMM1) Standard specification 2.21 Mini Card Slot (mSATA function only) Pin Name... - Page 39 M u l t i - T o u c h P a n e l P C A C P - 1 0 7 3 mSATA_RX- DIFF mSATA_TX- DIFF mSATA_TX+ DIFF +3.3V +3.3V +3.3V +3.3V +3.3V +3.3V +1.5V +1.5V 2-17 Chapter 2 Hardware Installation...
- Page 40 M u l t i - T o u c h P a n e l P C A C P - 1 0 7 3 +3.3V +3.3V +1.5V +1.5V SMB_CLK +3.3V SMB_DATA +3.3V +1.5V +1.5V +3.3V +3.3V 2-18 Chapter 2 Hardware Installation...
-
Page 41: Mechanical Drawing Of The Acp-1073
M u l t i - T o u c h P a n e l P C A C P - 1 0 7 3 2.22 Mechanical Drawing of the ACP-1073 2-19 Chapter 2 Hardware Installation... - Page 42 M u l t i - T o u c h P a n e l P C A C P - 1 0 7 3 Chapter BIOS Setup Chapter 3 AMI BIOS Setup 3-1...
-
Page 43: System Test And Initialization
4. The CMOS memory has lost power and the configuration information has been erased. The ACP-1073 CMOS memory has an integral lithium battery backup for data retention. You have to replace the battery when it Chapter 3 AMI BIOS Setup 3-2... -
Page 44: Ami Bios Setup
M u l t i - T o u c h P a n e l P C A C P - 1 0 7 3 finally runs down. 3.2 AMI BIOS Setup AMI BIOS ROM has a built-in Setup program that allows users to modify the basic system configuration. - Page 45 M u l t i - T o u c h P a n e l P C A C P - 1 0 7 3 Setup Menu Setup submenu: Main Options summary: (default setting) System Date Day MM:DD:YYYY Change the month, year and century. The ‘Day’ is changed automatically. System Time HH : MM : SS Change the clock of the system.
- Page 46 M u l t i - T o u c h P a n e l P C A C P - 1 0 7 3 Setup submenu: Advanced Chapter 3 AMI BIOS Setup 3-5...
- Page 47 M u l t i - T o u c h P a n e l P C A C P - 1 0 7 3 Options summary: (default setting) ACPI Settings System ACPI Parameters CPU Configuration CPU Configuration Parameters IDE Configuration IDE Device Options Settings USB Configuration...
- Page 48 M u l t i - T o u c h P a n e l P C A C P - 1 0 7 3 ACPI Settings Chapter 3 AMI BIOS Setup 3-7...
- Page 49 M u l t i - T o u c h P a n e l P C A C P - 1 0 7 3 Options summary: (default setting) Enabled Enable Hibernation Disabled Enabled or disabled hibernate (OS/S4 Sleep State). Suspend Disabled S1 only(CPU Stop Clock) ACPI Sleep State...
- Page 50 M u l t i - T o u c h P a n e l P C A C P - 1 0 7 3 RTC Wake Settings Chapter 3 AMI BIOS Setup 3-9...
- Page 51 M u l t i - T o u c h P a n e l P C A C P - 1 0 7 3 Options summary: (default setting) Wake system with Fixed Disabled Time Enabled Enable or disable System wake on alarm event. Wake up time is setting by following settings.
- Page 52 M u l t i - T o u c h P a n e l P C A C P - 1 0 7 3 CPU Configuration Chapter 3 AMI BIOS Setup 3-11...
- Page 53 M u l t i - T o u c h P a n e l P C A C P - 1 0 7 3 Options summary: (default setting) Hyper-Threading Disabled Enabled En/Disable CPU Hyper-Threading function Execute Disable Bit Disabled Enabled En/Disable XD bit for supporting OS...
- Page 54 M u l t i - T o u c h P a n e l P C A C P - 1 0 7 3 IDE Configuration Options summary: (default setting) SATA Controller(s) Disabled Enabled En/Disable SATA controller Configure SATA as AHCI Configure SATA controller operating as IDE/AHCI mode.
- Page 55 M u l t i - T o u c h P a n e l P C A C P - 1 0 7 3 USB Configuration Chapter 3 AMI BIOS Setup 3-14...
- Page 56 M u l t i - T o u c h P a n e l P C A C P - 1 0 7 3 Options summary: (default setting) Legacy USB Support Enabled Disabled Auto Enables BIOS Support for Legacy USB Support. When enabled, USB can be functional in legacy environment like DOS.
- Page 57 M u l t i - T o u c h P a n e l P C A C P - 1 0 7 3 F81801 Super IO Configuration Options summary: (default setting) Serial Port 1/2 Configuration Set Parameters of Serial Port 1/2 Chapter 3 AMI BIOS Setup 3-16...
- Page 58 M u l t i - T o u c h P a n e l P C A C P - 1 0 7 3 Serial Port 1 Configuration Chapter 3 AMI BIOS Setup 3-17...
- Page 59 M u l t i - T o u c h P a n e l P C A C P - 1 0 7 3 Options summary: (default setting) Serial Port Disabled Enabled En/Disable specified serial port. Change Settings Auto IO=3F8h;...
- Page 60 M u l t i - T o u c h P a n e l P C A C P - 1 0 7 3 Serial Port 2 Configuration Chapter 3 AMI BIOS Setup 3-19...
- Page 61 M u l t i - T o u c h P a n e l P C A C P - 1 0 7 3 Options summary: (default setting) Serial Port Disabled Enabled En/Disable specified serial port. Change Settings Auto IO=2F8h;...
- Page 62 M u l t i - T o u c h P a n e l P C A C P - 1 0 7 3 F81216 Second Super IO Configuration Options summary: (default setting) Serial Port 3 Configuration Set Parameters of Serial Port 3 Chapter 3 AMI BIOS Setup 3-21...
- Page 63 M u l t i - T o u c h P a n e l P C A C P - 1 0 7 3 Serial Port 3 Configuration Chapter 3 AMI BIOS Setup 3-22...
- Page 64 M u l t i - T o u c h P a n e l P C A C P - 1 0 7 3 Options summary: (default setting) Serial Port Disabled Enabled En/Disable specified serial port. Change Settings Auto IO=2C0h;...
- Page 65 M u l t i - T o u c h P a n e l P C A C P - 1 0 7 3 H/W Monitor Chapter 3 AMI BIOS Setup 3-24...
- Page 66 M u l t i - T o u c h P a n e l P C A C P - 1 0 7 3 Setup submenu: Chipset Options summary: (default setting) Host Bridge Host Bridge Parameters South Bridge South Bridge Parameters Chapter 3 AMI BIOS Setup 3-25...
- Page 67 M u l t i - T o u c h P a n e l P C A C P - 1 0 7 3 Host Bridge Options summary: (default setting) Fixed Graphics Memory 128MB Size 256MB Configure Fixed Graphics Memory Size IGFX –...
- Page 68 M u l t i - T o u c h P a n e l P C A C P - 1 0 7 3 South Bridge Chapter 3 AMI BIOS Setup 3-27...
- Page 69 M u l t i - T o u c h P a n e l P C A C P - 1 0 7 3 Options summary: (default setting) Onboard Devices Onboard devices parameters configurations High Precision Timer Enabled Disabled Enable or Disable the High Precision Event Timer Power Mode...
- Page 70 M u l t i - T o u c h P a n e l P C A C P - 1 0 7 3 Onboard Devices Options summary: (default setting) Azalia Controller Disabled HD Audio Select a OnBoard Azalia Configuration LAN Controller Disabled Enabled...
- Page 71 M u l t i - T o u c h P a n e l P C A C P - 1 0 7 3 Setup submenu: Boot Options summary: (default setting) Quiet Boot Disabled Enabled En/Disable showing boot logo. Launch LAN PXE OpROM Disabled Enabled...
- Page 72 M u l t i - T o u c h P a n e l P C A C P - 1 0 7 3 BBS Priorities Options summary: (default setting) Boot Option #x Disabled Device name Sets the system boot order Chapter 3 AMI BIOS Setup 3-31...
- Page 73 M u l t i - T o u c h P a n e l P C A C P - 1 0 7 3 Setup submenu: Security Chapter 3 AMI BIOS Setup 3-32...
- Page 74 M u l t i - T o u c h P a n e l P C A C P - 1 0 7 3 Options summary: (default setting) Administrator Password/ Not set User Password You can install a Supervisor password, and if you install a supervisor password, you can then install a user password.
- Page 75 M u l t i - T o u c h P a n e l P C A C P - 1 0 7 3 HDD Security Chapter 3 AMI BIOS Setup 3-34...
- Page 76 M u l t i - T o u c h P a n e l P C A C P - 1 0 7 3 Options summary: (default setting) Set User Password/ Not set Set Master Password You can install a Master and User password. Before booting to OS, HDD will be set to frozen state.
- Page 77 M u l t i - T o u c h P a n e l P C A C P - 1 0 7 3 Setup submenu: Exit Chapter 3 AMI BIOS Setup 3-36...
- Page 78 M u l t i - T o u c h P a n e l P C A C P - 1 0 7 3 Options summary: (default setting) Save Changes and Reset Reset the system after saving the changes Discard Changes and Reset Reset system setup without saving any changes Restore Defaults...
-
Page 79: Chapter 4 Driver Installation
M u l t i - T o u c h P a n e l P C A C P - 1 0 7 3 Chapter Driver Installation Chapter 4 Driver Installation... - Page 80 M u l t i - T o u c h P a n e l P C A C P - 1 0 7 3 The ACP-1073 comes with an AutoRun CD-ROM that contains all drivers and utilities that can help you to install the driver automatically.
- Page 81 M u l t i - T o u c h P a n e l P C A C P - 1 0 7 3 4.1 Installation: Insert the ACP-1073 CD-ROM into the CD-ROM drive. And install the drivers from Step 1 to Step 6 in order. Step 1 – Install Chipset Driver 1.
- Page 82 M u l t i - T o u c h P a n e l P C A C P - 1 0 7 3 4. The system will help you install the driver automatically Step 3 –Install LAN Driver 1.
- Page 83 M u l t i - T o u c h P a n e l P C A C P - 1 0 7 3 Step 6 –Install Serial Port Driver (Optional) Chapter 4 Driver Installation...
- Page 84 M u l t i - T o u c h P a n e l P C A C P - 1 0 7 3 Chapter 4 Driver Installation...
- Page 85 M u l t i - T o u c h P a n e l P C A C P - 1 0 7 3 Step 7 – Install Wireless Driver (Optional) 1. Click on the STEP6-Wireless (Optional) folder and select the OS folder your system is 2.
-
Page 86: Appendix A Programming The Watchdog Timer
M u l t i - T o u c h P a n e l P C A C P - 1 0 7 3 Appendix Program ming t Watchdog Timer Appendix A Programming the Watchdog Timer... -
Page 87: Watchdog Timer Registers
M u l t i - T o u c h P a n e l P C A C P - 1 0 7 3 A.1 Watchdog Timer Registers Table 1 : Watch dog relative IO address Default Value Note I/O Base I/O Base address for Watchdog operation. 0xA00 Address This address is assigned by SIO LDN7, register 0x60‐0x61. Table 2 : Watchdog relative register table ... -
Page 88: Watchdog Sample Program
M u l t i - T o u c h P a n e l P C A C P - 1 0 7 3 A.2 WatchDog Sample Program ****************************************************************************** // WDT I/O operation relative definition (Please reference to Table 1) #define WDTAddr 0xA00 // WDT I/O base address Void WDTWriteByte(byte Register, byte Value);... - Page 89 M u l t i - T o u c h P a n e l P C A C P - 1 0 7 3 AaeonWDTEnable(); ******************************************************************************* ******************************************************************************* // Procedure : AaeonWDTEnable AaeonWDTEnable () VOID WDTEnableDisable(1); // Procedure : AaeonWDTConfig AaeonWDTConfig (byte Counter, BOOLEAN Unit) VOID // Disable WDT counting...
- Page 90 M u l t i - T o u c h P a n e l P C A C P - 1 0 7 3 WDTSetBit( TimerReg, PSWidthBit, PSWidthVal // Watchdog WDTRST# Enable WDTSetBit( DevReg, WDTRstBit, WDTRstVal WDTClearTimeoutStatus() VOID WDTSetBit( TimerReg, StatusBit, 1 *******************************************************************************...
-
Page 91: Appendix B I/O Information
M u l t i - T o u c h P a n e l P C A C P - 1 0 7 3 Appendix I/O Information Appendix B I/O Information... -
Page 92: I/O Address Map
M u l t i - T o u c h P a n e l P C A C P - 1 0 7 3 B.1 I/O Address Map Appendix B I/O Information... -
Page 93: Memory Address Map
M u l t i - T o u c h P a n e l P C A C P - 1 0 7 3 B.2 Memory Address Map Appendix B I/O Information... -
Page 94: Irq Mapping Chart
M u l t i - T o u c h P a n e l P C A C P - 1 0 7 3 B.3 IRQ Mapping Chart Appendix B I/O Information... - Page 95 M u l t i - T o u c h P a n e l P C A C P - 1 0 7 3 Appendix B I/O Information...
- Page 96 M u l t i - T o u c h P a n e l P C A C P - 1 0 7 3 Appendix B I/O Information...
-
Page 97: Dma Channel Assignments
M u l t i - T o u c h P a n e l P C A C P - 1 0 7 3 B.4 DMA Channel Assignments Appendix B I/O Information... -
Page 98: Appendix C Miscellanea
M u l t i - T o u c h P a n e l P C A C P - 1 0 7 3 ppendix Miscellanea Appendix C Miscellanea C-... -
Page 99: General Cleaning Tips
M u l t i - T o u c h P a n e l P C A C P - 1 0 7 3 C.1 General Cleaning Tips You may need the following precautions before you begin to clean the computer. -
Page 100: Cleaning Tools
M u l t i - T o u c h P a n e l P C A C P - 1 0 7 3 C.2 Cleaning tools Although many companies have created products to help improve the process of cleaning your computer and peripherals users can also use household items to clean their computers and peripherals. - Page 101 M u l t i - T o u c h P a n e l P C A C P - 1 0 7 3 • Cotton swabs - Cotton swaps moistened with rubbing alcohol or water are excellent tools for wiping hard to reach areas in your keyboard, mouse, and other locations.
- Page 102 For the computers that are no longer useful or work well, please contact with worldwide distributors for recycling. The worldwide distributors show on the following website: http://www.aaeon.com/?TabIndex=Contact&TabID=Distributors Note: Follow the national requirements to dispose unit. Appendix C Miscellanea...
- Page 103 M u l t i - T o u c h P a n e l P C A C P - 1 0 7 3 A ppendix AHCI Setting Appendix D AHCI Setting...
- Page 104 M u l t i - T o u c h P a n e l P C A C P - 1 0 7 3 D.1 Setting AHCI OS installation to setup AHCI Mode. Step 1: Copy the files below from “Driver CD -> STEP4-AHCI\WINXP_32” to Disk Step 2: Connect the USB Floppy to the board (The photo below is for reference only)
- Page 105 M u l t i - T o u c h P a n e l P C A C P - 1 0 7 3 Step 3: Setup OS Step 4: Press “F6” Appendix D AHCI Setting...
- Page 106 M u l t i - T o u c h P a n e l P C A C P - 1 0 7 3 Step 5: Choose “S” Step 6: Choose “Intel(R) NM10 Express Chipset” Appendix D AHCI Setting...
- Page 107 M u l t i - T o u c h P a n e l P C A C P - 1 0 7 3 Step 7: It will show the model number you select and then press “ENTER Step 8: Setup is loading files Appendix D AHCI Setting...
Need help?
Do you have a question about the ACP-1073 and is the answer not in the manual?
Questions and answers