Table of Contents
Advertisement
Quick Links
Advertisement
Table of Contents

Subscribe to Our Youtube Channel
Related Manuals for Global Water G5CT


Summary of Contents for Global Water G5CT
- Page 1 MODEL G5CT COUNTER TOP OPERATION MANUAL P a g e...
-
Page 2: Table Of Contents
Reverse Osmosis Membrane Replacement.…………………………………….……pg.18 Troubleshooting……………………………………….………………………………………..pg.19 Specifications………………………………………….………………………………………..….pg.20 Warranty……………………………………………………….……………………………………..pg.21 List of Figures Figure 1. Assembly Drawing, Model G5CT………………...….…………….………….pg.5 Figure 2. Faucet Operation…………………………….….………..………………………….pg.6 Figure 3. Hot/Cold Power On/Off Switch.……….….……………..……………………pg.6 Figure 4. Water Cooler Connections………………...…………………..………………..pg.9 Figure 5. Drain Connections for “RO” Models……………………………….……...pg.11 Figure 6. Filter Configuration Model “F”……………………………………………….pg.13 Figure 7. -
Page 3: Introduction
We manufacture a wide range of models to fit any home or office application. The G5CT Counter Top has 3 temperature faucets; cold water is chilled around 44ºF, hot water is heated at 180ºF and ambient. -
Page 4: Receiving
Description Model G5CT The G5CT Model provides water at 3 different temperatures, dispensed from three spigots, “hot”, “cold” and ambient. The assembly drawing is shown in Figure 1. Water flows from the filter system into the ambient tank and the cold water tank simultaneously. -
Page 5: Description Model G5Ct Counter Top
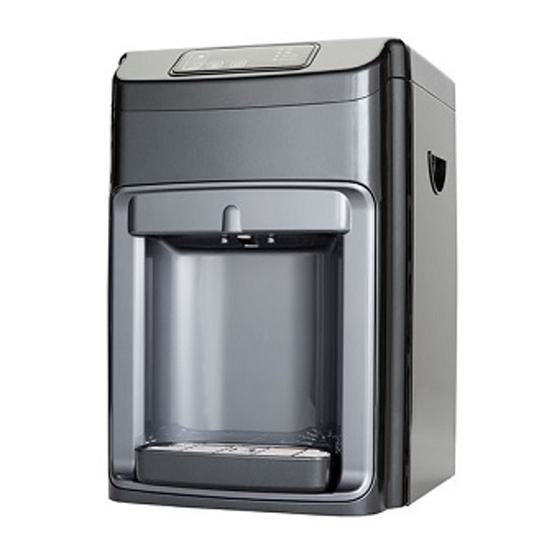
Description Model G5CT Counter Top Figure 1. Assembly Drawing Model G5CT Counter Top P a g e... -
Page 6: Operation
Operation When installation is complete, the unit will fill up with water and shut off when the tanks are full. Plug the unit in to an outlet and press the cold/hot faucets until a steady stream of water comes out. Figure 2. - Page 7 Operation Cont… P a g e...
-
Page 8: Positioning The Cooler
Positioning the Cooler 1) It is not recommended to install this cooler in an area were water may cause severe or costly damage. 2) Do not position the cooler where it can be hit or bumped by Vacuum cleaners or floor waxing machines. This can cause breaks in the waterline, connection fittings and compressor tubing. -
Page 9: Water Cooler Connections
Water Cooler Connections When you receive the water cooler, the water connections on the back have of the cooler have tube plugs in them. These tube sections must be removed before making all your connections. To remove the tube sections see figure 7 “Disconnect”. The 1/4" plastic tubing should be used for making the Feed Water. -
Page 10: Feed Water Connection
Feed Water Connections To connect the feed water, use the supplied self-piercing saddle valve to connect to the cold water supply line under the sink. Attach the 1/4-inch tubing to the compression fitting on the side of the valve. Clamp the saddle valve over copper or plastic feed line (cold water only). -
Page 11: Drain Connection
Drain Connection (Applies to models with Reverse Osmosis “RO” only) The drain line in the back (Fig. 4) must be hooked to the drain line ahead of the normal sink water trap. See Figure 5 below. Place the 2 part drain saddle on the drain pipe before the drain trap. -
Page 12: Ez Connections
EZ Connections The standard tubing connections on the water coolers are EZ connect fittings. Use the tubing and follow the instructions below in fig. 7 to make the connections. If you cut the tubing, make sure it is a square cut, fits squarely in the fitting and seals properly. -
Page 13: Start Up Flush
Start-Up Flush If you order our (ro) model you will receive a large white tank and a separate box that containers the filter pack. Unpack both of these and set them up near the cooler. Our (f) models do not have the tank. Now you have to connect the water line to the filter pack which can be found on water feed connections page. -
Page 14: Tank Flush
‘RO’ version, about 10-15 minutes for the ‘F’ version. Observe the water level when full, and see that water input to the tank stops when it is full. Figure. 7 Back view of the Cooler Water Connections Model G5CT 14 | P a g e... -
Page 15: Cleaning And Maintenance
Cleaning and Maintenance 15 | P a g e... - Page 16 Sanitize Fill main water tank with water. Add 1-2 teaspoons of liquid chlorine bleach. Let stand for 5-10 minutes. Drain the water then let water from filters refill tank and drain a second time. Remember to drain from dispensing spigots also. Note: Upon completion of cleaning, wait at least 10 minutes after the power cord is plugged in before turning on the Hot and Cold Water buttons.
-
Page 17: Filter Replacement
Filter Replacement The filter elements must be replaced at regular intervals to maintain the quality of the water. The G5CTF has 3-stages of mechanical filtration. 1st stage 5- micron sediment filter, 2nd stage activated carbon filter and a 3 stage post carbon filter. The filter elements in all stages must be replaced every 6 months. -
Page 18: Reverse Osmosis Membrane Replacement
Reverse Osmosis Membrane Replacement (every 3 years) RO versions (RO) a) Use the same procedure as above sec a-c. b) Remove the RO stage from the clips. Disconnect the white tubing from the RO housing cap. c) Remove the cap from the housing by unscrewing it. d) Using a pair of pliers, remove the RO element from the housing by grasping the tube end and pulling it out. -
Page 19: Troubleshooting
Trouble Shooting Guide PROBLEM CAUSE SOLUTION No Power No electric current Make sure the cooler flowing. is plugged in and check for improper connections. Cold Water not cold The cooler is placed Provide a minimum of 5” space between wall enough too close to the wall. -
Page 20: Specifications
Specifications Model No. G5CTCT Voltage/Frequency AC110V Dimensions (L)14 x (W)13 x (H)19 Weight (empty) 35 lb. Hot Tank Capacity .5 gal. Ambient Tank Capacity Direct Cold Tank Capacity 1 gal. Power Consumption Hot Water: 500W Cold Water: 100W Electric Power Cord Length 6Ft. -
Page 21: Warranty
Warranty All Global Water products are warranted to be free from defects in materials and workmanship under normal use within the condition of operation listed for a period of 1 year from date of purchase. The compressor has a 3-year warranty. - Page 22 Cleaner, Healthier Water. 2031 SW 31 Ave, Hallandale, Florida 33009 www.GlobalWaterInc.com Tel. (786) 235-2518 Fax (786) 207-2570 Email GlobalWaterFlorida@Gmail.com 22 | P a g e...
Need help?
Do you have a question about the G5CT and is the answer not in the manual?
Questions and answers