Crestron Isys TPS-4L Operations & Installation Manual
3.6-inch wall mount touchpanel
Hide thumbs
Also See for Isys TPS-4L:
- Operations & installation manual (36 pages) ,
- Design manual (84 pages) ,
- Quick manual (60 pages)

Related Manuals for Crestron Isys TPS-4L


Summary of Contents for Crestron Isys TPS-4L
- Page 1 ® Crestron Isys TPS-4L 3.6-Inch Wall Mount Touchpanel Operations & Installation Guide...
- Page 2 This document was prepared and written by the Technical Documentation department at: Crestron Electronics, Inc. 15 Volvo Drive Rockleigh, NJ 07647 1-888-CRESTRON All brand names, product names and trademarks are the property of their respective owners. ©2006 Crestron Electronics, Inc.
-
Page 3: Table Of Contents
® Crestron Isys TPS-4L Contents 3.6-Inch Wall Mount Touchpanel: TPS-4L Introduction ...1 Setup...6 Programming Software...16 Uploading and Upgrading ...20 Problem Solving ...35 Software License Agreement...36 Return and Warranty Policies...38 Operations & Installation Guide – DOC. 6449 3.6-inch Wall Mount Touchpanel Features and Functions...1... -
Page 5: Inch Wall Mount Touchpanel: Tps-4L
Functional Summary * As an option, a custom-engraved bezel can be designed and obtained by using the Crestron Engraver software. Version 2.6.1.0 and Crestron Database 17.6.0 or later are available from the Crestron website (www.crestron.com). -
Page 6: Specifications
Depth: 2.11 in (5.36 cm) Weight: 15 oz (0.43 kg) The latest software versions can be obtained from the Crestron website. Refer to the NOTE following these footnotes. Crestron 2-Series control systems include the AV2 and PRO2. Consult the latest Crestron Product Catalog for a complete list of 2-Series control systems. -
Page 7: Physical Description
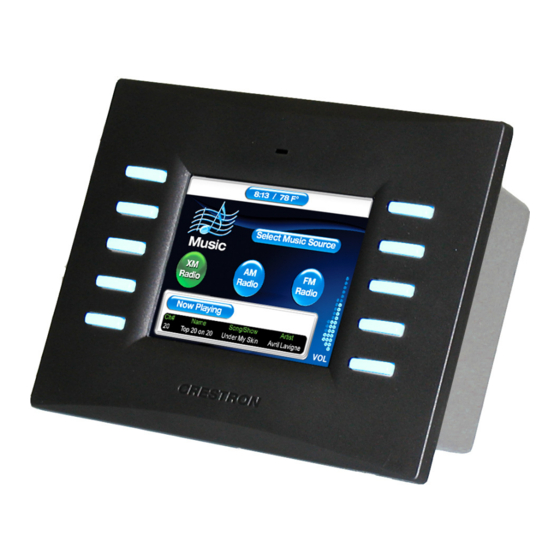
® Crestron Isys TPS-4L Physical Description Refer to the physical views shown below and on subsequent pages. TPS-4L Shown in Black Operations & Installation Guide – DOC. 6449 3.6-inch Wall Mount Touchpanel 3.6-inch Wall Mount Touchpanel: Isys TPS-4L • 3... - Page 8 TPS-4L Physical Dimensions Controls and Ports Buttons The TPS-4L touchpanel has 10 hard buttons; five on each side of the display. The buttons are backlit with white LEDs; brightness is program adjustable. The buttons can be programmed to automate frequently used functions.
-
Page 9: Industry Compliance
NOTE: This port does not support a wireless Ethernet connection. LAN Connector Pinout Industry Compliance As of the date of manufacture, the TPS-4L has been tested and found to comply with specifications for CE marking and standards per EMC and Radiocommunications Compliance Labelling. -
Page 10: Setup
Cresnet power usage of the entire chain. If the unit is a home-run from a Crestron system power supply network port, the Cresnet power usage of that unit is the Cresnet power usage of the entire run. The wire gauge and the Cresnet power usage of the run should be used in the following equation to calculate the cable length value on the equation’s left side. - Page 11 Settings” on page 19 for details of the SIMPL Windows procedure. The Net ID of the TPS-4L has been factory set to 03. The Net IDs of multiple TPS-4Ls in the same system must be unique. Net IDs can be changed from a personal computer (PC) using Crestron SystemBuilder through the device SETUP MENU as described on page 14.
-
Page 12: Mounting Options
The TPS-4L touchpanel installs simply and cleanly into existing or newly constructed walls, with an assortment of pre- and post-construction mounting options. The TPS-4L is supplied with four screws and clips for post-construction installation. All available mounting options are listed in the following table. (The Wall Mount Kit –... -
Page 13: Touchpanel Mounting
Mounting to the Wall The TPS-4L is designed to be mounted in a wall or lectern. Two overlay cutout templates (0V40078) are supplied. One is in the shape of the required opening; the other is similar to a frame, with the inner area of the frame the shape of the required opening. - Page 14 3.6-Inch Wall Mount Touchpanel TPS-4L Cutout Dimensions (4007478, 1 of 2) TPS-4L Cutout Dimensions (4007478, 2 of 2) 10 • 3.6-inch Wall Mount Touchpanel: Isys 1. Locate an area on the wall that is free of miscellaneous wiring and studs.
- Page 15 ® Crestron Isys TPS-4L NOTE: Before inserting the TPS-4L in the mounting hole, ensure that all required cables have been installed in the wall. Attaching the Screws and Mounting Clips Operations & Installation Guide – DOC. 6449 3.6-inch Wall Mount Touchpanel 4.
-
Page 16: Touchpanel Removal
1. Carefully position the bezel over the face of the touchpanel. 2. Ensure that the bezel is oriented properly and press against the TPS-4L until the bezel snaps into place. 1. Lift one edge of the bezel to free it from the touchpanel, and lift it off. Do not apply excessive pressure to the touchscreen. -
Page 17: Hardware Hookup
NOTE: The touch screen responds to both finger and stylus commands. Since the screen is small, Crestron recommends that a stylus (not supplied) be used to ensure the accuracy of commands. Use a stylus that will not damage the surface of the screen. -
Page 18: Calibration Menu
Ethernet. The CIP Enable and Disable buttons determine the touchpanel’s ability to communicate with other Crestron devices using CIP. CIP must be enabled for the touchpanel to communicate with other Crestron Ethernet devices. After the Cresnet ID setting has been verified and the communications protocol has been selected, press Return to save the settings and return to the SETUP MENU. - Page 19 1 to 10; in ten-minute increments from 20-120. STANDBY timeout turns the display and backlight off when the touchpanel is inactive for the specified time. When the touchpanel is reactivated, the last screen to be displayed reappears. The specified time is displayed in minutes. The default STANDBY timeout is 10 minutes.
-
Page 20: Programming Software
Crestron’s True Blue Support, log in at http://support.crestron.com. First-time users will need to establish a user account. You can create a program that allows you to include the TPS-4L in a Crestron control system. The program output of Crestron SystemBuilder is a SIMPL Windows program with much of the functionality encapsulated in macros and templates. -
Page 21: Programming With Crestron Systembuilder
Crestron SystemBuilder is fully integrated with Crestron's suite of software development tools, including SIMPL Windows, VT Pro-e, Crestron Database, User IR Database, and User Modules Directory. Crestron System Builder accesses these tools behind the scenes, enabling you to easily create robust systems. - Page 22 To incorporate a TPS-4L into the system, drag the TPS-4L (Cresnet) from the Touchpanels | Touchpanels (Cresnet) folder of the Device Library and drop it in System Views. The PRO2 system tree displays the TPS-4L in Slot 9, with a default Net ID of 03, as shown in the following illustration.
-
Page 23: Programming With Vt Pro-E
“Device Settings” Window NOTE: This procedure sets the Net ID for the TPS-4L in the program only. It does not automatically set the Net ID for the TPS-4L hardware. SIMPL Windows automatically changes Net ID values of a device added to a program if a duplicate device or a device with the same Net ID already exists in the program. -
Page 24: Example Program
PC. The PC may be disconnected from the control system or panel except during reprogramming. When you start the VT Pro-e project for this product, select TPS-4L as the panel type. - Page 25 1. Ensure that all devices are connected to the control processor and the control processor is connected via serial cable to the PC. 2. Open Crestron Toolbox and click Tools | Manage Address Book to display a list of available devices. Select Serial on COM1 as the connection type.
- Page 26 22 • 3.6-inch Wall Mount Touchpanel: Isys “Address Book” Window – Serial Setup 3. After setting the correct parameters, click OK to return to the Crestron Toolbox main window. 4. Click Tools | Network Device Tree, or click the network device tree icon to display the “Network Device Tree”...
- Page 27 NOTE: Crestron Toolbox displays a customized list of functions depending on the type of device with which it is communicating. TCP/IP Communication This section explains how to configure a TPS-4L to communicate over Ethernet using TCP/IP. These procedures assume that the touchpanel has been powered up and connected properly.
- Page 28 CAT5 straight through cables with 8-pin RJ-45 connectors to connect the LAN port on the touchpanel and the LAN port on the PC to the Ethernet hub. Alternatively, you can use a CAT5 crossover cable to connect the two LAN ports directly, without using a hub.
- Page 29 8. Click Tools | System Info to display the “System Info” window. From the pull-down menu, select the entry created in step 7. 1. Select Functions | IP Table Setup from the Crestron Toolbox menu bar. 3.6-inch Wall Mount Touchpanel: Isys...
- Page 30 26 • 3.6-inch Wall Mount Touchpanel: Isys “IP Table” Window 2. If the touchpanel already has an IP table, it is displayed at the top of the window. 3. Click Add Entry to add a new IP table entry or select an existing IP entry from the list and click Modify Entry.
- Page 31 ® Crestron Isys TPS-4L NOTE: When an IP table is sent to the touchpanel, the previously loaded IP table is overwritten. Operations & Installation Guide – DOC. 6449 3.6-inch Wall Mount Touchpanel “IP Table Entry” Window NOTE: All IP table entries are set as Master and cannot be changed.
-
Page 32: Troubleshooting Communications
3.6-Inch Wall Mount Touchpanel Adding the Touchpanel to the Control System IP Table If the control system is to communicate with the TPS-4L over TCP/IP, the control system's IP table must have an entry for the touchpanel. The entry should list the touchpanel's IP ID and the internal gateway IP address 127.0.0.1. - Page 33 6. To verify that the program has been transferred successfully, select Functions | SIMPL Program. Details about the current program loaded in the control system are displayed in the upper left corner of the “SIMPL Program” window. 3.6-inch Wall Mount Touchpanel: Isys TPS-4L • 29 ®...
-
Page 34: Upgrading Firmware
3.6-Inch Wall Mount Touchpanel Upgrading Firmware To take advantage of all the TPS-4L features, it is important that the unit contains the latest firmware available. Please check the Crestron website for the latest version of firmware. Not every product has a firmware upgrade, but as Crestron improves functions, adds new features, and extends the capabilities of its products, firmware upgrades are posted. - Page 35 5. The “Firmware” window displays the model and current firmware version as shown in the following graphic. 6. Click Browse to display the Open window to locate the desired firmware (.zip) file. 3.6-inch Wall Mount Touchpanel: Isys TPS-4L • 31 ®...
- Page 36 7. Highlight the desired .zip file and click Open to select the file and return to the “Firmware” window. Note that Crestron Toolbox displays the actual firmware file name, not the name of the .zip file. Click Send to transfer the file.
-
Page 37: Uploading Vt Pro-E Projects
2. Use the Address Book icon or the drop-down list at the lower left of the window to select the IP address of the TPS-4L. The system will retrieve the data and the “System Info” window will appear similar to the following figure. - Page 38 3.6-Inch Wall Mount Touchpanel “System Info” Window 34 • 3.6-inch Wall Mount Touchpanel: Isys 3. To upgrade the firmware, select Functions | Firmware from the Crestron Toolbox main menu. • The “Firmware” window displays the model and current firmware version. Click Browse to display the “Open” window to locate the desired firmware (.zip) file.
-
Page 39: Problem Solving
For assistance in your local time zone, refer to the Crestron website (http://www.crestron.com/) for a listing of Crestron worldwide offices. You can also log onto the online help section of the Crestron website to ask questions about Crestron products. First-time users will need to establish a user account to fully benefit from all available features. -
Page 40: Software License Agreement
Agreement, which shall remain valid and enforceable according to its terms. This Agreement may only be modified by a writing signed by an authorized officer of Crestron. Updates may be licensed to You by Crestron with additional or different terms. This is the entire agreement between Crestron and You relating to the Software and it supersedes any prior representations, discussions, undertakings, communications or advertising relating to the Software. - Page 41 “applets” incorporated into the Software), the accompanying media and printed materials, and any copies of the Software are owned by Crestron or its suppliers. The Software is protected by copyright laws and international treaty provisions. Therefore, you must treat the Software like any other copyrighted material, subject to the provisions of this Agreement.
-
Page 42: Return And Warranty Policies
CRESTRON shall not be liable to honor the terms of this warranty if the product has been used in any application other than that for which it was intended, or if it has been subjected to misuse, accidental damage, modification, or improper installation procedures. - Page 43 ® Crestron Isys TPS-4L 3.6-inch Wall Mount Touchpanel This page intentionally left blank. TPS-4L • 39 ® Operations & Installation Guide – DOC. 6449 3.6-inch Wall Mount Touchpanel: Isys...
- Page 44 Crestron Electronics, Inc. Operations & Installation Guide – DOC. 6449 15 Volvo Drive Rockleigh, NJ 07647 (2014335) Tel: 888.CRESTRON 02.06 Fax: 201.767.7576 Specifications subject to www.crestron.com change without notice.