Table of Contents
Advertisement
Quick Links
Turbo Air Speeds up the Pace of Innovation
Food Prep Tables
Sandwich/Salad Units
Installation and Operation Manual
Please read this manual completely before attempting to install or operate this equipment
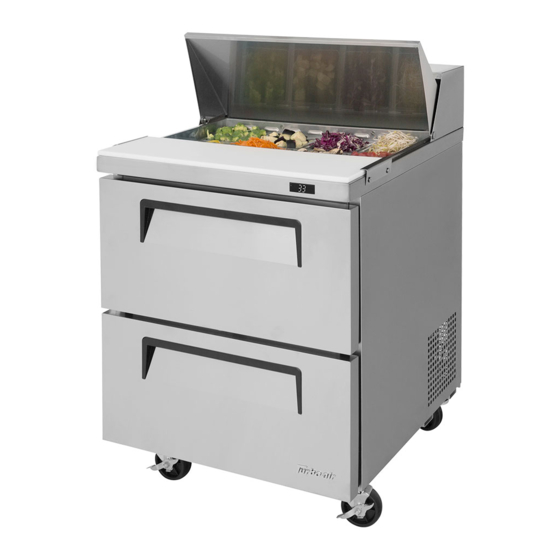
TST-28SD-D2
TST-48SD-D2
TST-48SD-D4
TST-60SD-D2
TST-60SD-D4
www.turboairinc.com
Full Stainless Steel Visible Exterior
Advertisement
Table of Contents

Subscribe to Our Youtube Channel
Related Manuals for Turbo Air TST-28SD-D2


Summary of Contents for Turbo Air TST-28SD-D2
- Page 1 Turbo Air Speeds up the Pace of Innovation Food Prep Tables Sandwich/Salad Units Installation and Operation Manual Please read this manual completely before attempting to install or operate this equipment Full Stainless Steel Visible Exterior TST-28SD-D2 TST-48SD-D2 TST-48SD-D4 TST-60SD-D2 TST-60SD-D4...
-
Page 2: Specifications
CLEANING & CAUTION BASIC OPERATION TROUBLESHOOTING STAINLESS STEEL EQUIPMENT CARE AND CLEANING 10-11 WARRANTY 12-14 SPECIFICATIONS SANDWICH / SALAD UNITS MODEL COMP H.P. V/Hz REFRIGERANT AMPS WEIGHT TST-28SD-D2 115V/60Hz R-134A 6.6A 205lbs TST-48SD-D2 115V/60Hz R-134A 6.5A 249lbs TST-48SD-D4 115V/60Hz R-134A 6.5A 255lbs... -
Page 3: Installation Of Drain Pan
CASTER (WITH BTAKE) (2EA) INSTALLATION OF DRAIN PAN 1) In damp season, when the drain water overflow the drain pan, remove the drain pan and pour the water away. And then set the drain pan back up as below drawing please (Model: TST-28SD-D2). -
Page 4: How To Clean The Pan Supporter
HOW TO CLEAN THE PAN SUPPORTER 1) remove the Guide Pans and Pans. Then pull out the pan supporter. Clean the pan supporter and reinstall in place. MODEL TST-28SD-D2 TST-48SD-D2 TST-48SD-D4 TST-60SD-D2 TST-60SD-D4 DRAWER PAN CAPACITY 1. 28 SERIES Each drawer accommodates 6 (1/6 size) L (6 ”) x W (6... - Page 5 REMOVAL DRAWER Fully extend the drawer out toward you as pictured. after full extension, lift the drawer up and pull towards you. This will disengage the rollers from the roller guide.
-
Page 6: Installation
- Be sure that there is ample air space so that air can flow through the rear of the unit - Turbo Air recommends that the rear of the unit be no less than 5 inches from the wall 2. PLACE ON STRONG GROUND... - Page 7 CLEANING Before cleaning, turn unit off at power switch. 1. CLEANING THE INTERIOR AND EXTERIOR - The interior and exterior of the unit can be cleaned using warm water with soap - Do not use an abrasive cleaner because it will scratch the surface 2.
-
Page 8: Basic Operation
BASIC OPERATION REFRIGERATORS 1. The controller(thermostat) is located at the right inside of the unit. 2. The factory setting for the control is ‘Normal’. 3. Set toward ‘Cool’ for higher temperature and ‘Cold’ for lower temperature. 4. The thermostat controls compressor’s on/off by sensing inside temperature. NORMAL COLD Temperature Controller... -
Page 9: Troubleshooting
TROUBLESHOOTING SYMPTOMS CAUSES SOLUTIONS Refrigerator(Freezer) • The setting temperature is too • Turn the temperature dial to a is freezing(melting) low(high) to maintain food warmer(colder) setting. food freshness. The unit does not • There is a power connection • Check the power cord to make sure refrigerate at all failure problem. -
Page 10: Stainless Steel Equipment Care And Cleaning
STAINLESS STEEL EQUIPMENT CARE AND CLEANING CAUTION : Do not use any steel wool, abrasive or chlorine based products to clean stainless steel surfaces. Stainless Steel Opponents There are three basic things which can break down your stainless steel’s passivity layer and allow corrosion to rear its ugly head. - Page 11 4. Water Treatment To reduce deposits, soften the hard water when possible. Installation of certain filters can remove corrosive and distasteful elements. Salts in a properly maintained water softener can be to your advantage. Contact a treatment specialist if you are not sure of the proper water treatment.
-
Page 12: Three Year Warranty
THREE YEAR WARRANTY Turbo Air warrants to the original purchaser of every new Turbo Air refrigerated unit, the cabinet and all parts thereof, to be free from defects in material or workmanship, under normal use and service, for a period of three (3) year from the date of original installation or 39 months after shipment date from Turbo Air , whichever occurs first. -
Page 13: What Is Not Covered By This Warranty
3. ALTERATION, NEGLECT, ABUSE, MISUSE, ACCIDENT, DAMAGE DURING TRANSIT OR INSTALLATION, FIRE, FLOOD, ACTS OF GOD. TURBO AIR is not responsible for the repair or replacement of any parts that Turbo Air determines have been subjected after the date of manufacture to alteration, neglect, abuse, misuse, accident, damage during transit or installation, fire, flood, or an Act of God. - Page 14 (3) year from the date of original installation or 39 months after shipment date from Turbo Air, whichever occurs first. Any part, covered under this warranty, that are by Turbo Air to have been defective within three (3) year of original installation or thirty-nine (39) months after shipment date from manufacturer, whichever occurs first, is limited to the repair or replacement, including labor charges, of defective parts or assemblies.
Need help?
Do you have a question about the TST-28SD-D2 and is the answer not in the manual?
Questions and answers