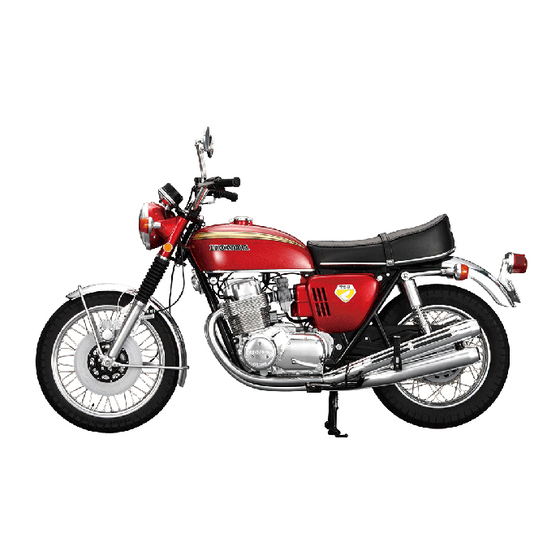
Deagostini MODEL SPACE Honda CB750 FOUR Assembly Manual
Pack 02
Hide thumbs
Also See for MODEL SPACE Honda CB750 FOUR:
- Assembly manual (20 pages) ,
- Assembly manual (16 pages) ,
- Assembly manual (16 pages)
Advertisement
Quick Links
Advertisement

Subscribe to Our Youtube Channel
Related Manuals for Deagostini MODEL SPACE Honda CB750 FOUR


Summary of Contents for Deagostini MODEL SPACE Honda CB750 FOUR
- Page 1 BUILD YOUR OWN Pack 02...
- Page 2 CONTENTS Assembly Guide Stage 5: The headlight case Stage 6: The left fork Stage 7: The right fork Editorial and design by Continuo Creative, 39-41 North Road, London N7 9DP. Published in the UK by De Agostini UK Ltd, Battersea Studios 2, 82 Silverthorne Road, London SW8 3HE.
- Page 3 Honda CB750 FOUR: Assembly Guide Stage 5 The headlight case The indicators are attached to the headlight case and fork cover assembly by wires. To fit the left indicator, first hold the assembly by the Your parts left cover and push the wire into the groove along the indicator mount. Headlight case and fork cover assembly The ends of the indicator mounts fit into...
- Page 4 Honda CB750 FOUR: Assembly Guide Now push the wire into the groove along the right indicator mount. As with the left indicator (shown here), align the end of the right indicator with the hole in the fork cover. Stage complete Push the end of the right indicator mount into the hole in the fork cover.
- Page 5 Honda CB750 FOUR: Assembly Guide Tools Your CB750 model is designed to be assembled using tweezers, Phillips screwdrivers and pliers. Those are the minimum tools that you will need, but if you want to be better prepared and have an easier time assembling your model, we recommend that you equip yourself with the set of tools shown below.
- Page 6 Honda CB750 FOUR: Assembly Guide Instant adhesive Screwdrivers and screws During this series, the most frequently used screwdriver is the size 1 Phillips. Instant adhesive is very useful if you Always try to use the correct size of screwdriver, as using a larger or a smaller need to repair any parts that have one can damage the head of the screw, and possibly make it impossible to been damaged.
- Page 7 Honda CB750 FOUR: Assembly Guide Stage 6 The left fork Cut a neat hole in the bag of grease, and squeeze a small amount of it onto the end of a toothpick. Apply grease around the seal (the black Your parts plastic ring).
- Page 8 Honda CB750 FOUR: Assembly Guide Place the left fork rib over the tube, with Hold the fork case (left) and push the tube the smaller side facing the boot. (right) in and out. This will spread the grease around inside the assembly. Place the left fork boot over the tube and slide it over the seal.
- Page 9 Honda CB750 FOUR: Assembly Guide Insert the end of the left fork into the left fork cover. It is best to hold the fork by the case, rather than by the boot. When viewed from above, the top of the fork should appear as shown, with the D-shaped end in the correspondingly shaped hole in the fork cover.
- Page 10 Honda CB750 FOUR: Assembly Guide Place a type E screw into the hole in the When the screw is fully tightened into the top yoke, which should be directly above hole, line up the left fork bolt head with the the hole in the fork cover.
- Page 11 Honda CB750 FOUR: Assembly Guide Stage 7 The right fork Take the grease from the previous stage and squeeze some onto the end of a toothpick. Your parts Right fork assembly Right fork bolt head Screws (type E) × 2 Right fork rib Right fork boot Tappet caps ×...
- Page 12 Honda CB750 FOUR: Assembly Guide Place the right fork rib over the tube, with Hold the right fork by the fork case and the smaller side facing the boot. push the tube in and out. This will spread the grease around inside the assembly. Place the right fork boot over the tube, Insert the rib into the end of the boot.
- Page 13 Honda CB750 FOUR: Assembly Guide Place a type E screw into the hole in the top yoke. You may prefer to thread the hole with a tap and wrench before you do this. Tighten the screw into the hole, until it is flush against the yoke.
- Page 14 Honda CB750 FOUR: Assembly Guide Fetch the cylinder head cover assembly from Push the tappet cap into the hole, until it is flat Stage 2. against the head cover. Hold one of the tappet caps above the hole at the end of the head cover.
- Page 15 Honda CB750 FOUR: Assembly Guide Countersunk and pan Screws Screws have different-shaped heads, as securing (below right), creating a stronger Several sizes and types of screw are used in this series. They can look very similar, so you well as different type of thread. The photo hold.
- Page 16 Honda CB750 FOUR:...
Need help?
Do you have a question about the MODEL SPACE Honda CB750 FOUR and is the answer not in the manual?
Questions and answers